Prepare Widgets for Record Editing
Before you begin
To add, edit, or delete records in a table widget, you must first establish a page with a table populated from a configured data source. See Add Rows to a Table Using a Table Block.
About this task
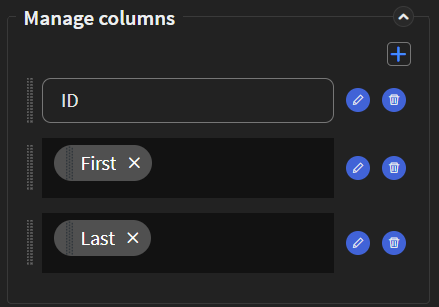
The Table widget supports create, read, update, and delete (CRUD) operations on the data; however, app users cannot directly edit data in the table. Row data must link to compatible widgets where data can be edited and returned to the table. In this example, we have defined a table with three columns: ID, First Name, and Last Name. First Name and Last Name are text columns.
Procedure
- In the Canvas, open the Project tab.
-
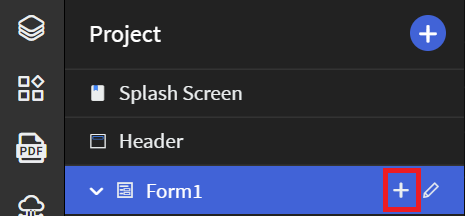
Two pages are required: one for the table and another to edit the table data.
You will already have created a page for the table as part of the setup for this
exercise. To create a page to edit the table's row data, hover over your form's
name to reveal the
Add button. Click the button.
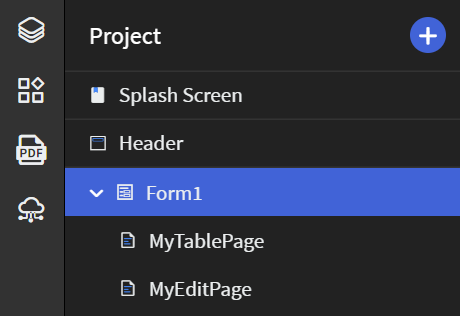
- In the Name field, enter a name for your new table page.
-
Under Choose type, select Page
and click Add. You should have a form with two
sub-pages.
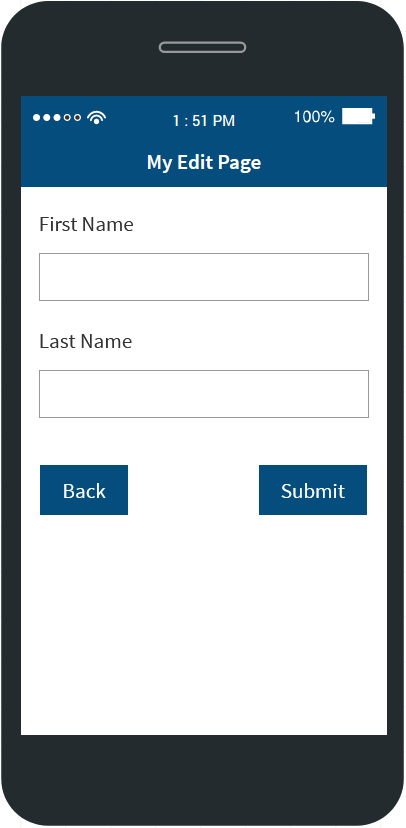
- In the Canvas, open the Widgets tab.
- From the list of forms and pages, select the page you created to edit the table's row data.
- Double-click or drag and drop widgets matching each field's data type onto the app canvas. In this example, two text boxes are used for the First Name and Last Name fields.
-
In the Text Box Properties panel, under the
General section, click the
Name property. Enter a name for each widget.
-
Next, the text boxes need to be linked to the table. On the table page, click
the table widget. In the Table Properties panel, under
the Manage columns section, perform the following for
each column you wish to edit:
-
Click the Select form field to link with this
column dropdown. Click the name of the widget on the
form that will be used to edit the table column value.

-
Click Save. Linked columns are
highlighted.
-
Click the Select form field to link with this
column dropdown. Click the name of the widget on the
form that will be used to edit the table column value.
-
Select Save in the SOTI Snap
banner to apply your changes.
