Add a Table Widget
About this task
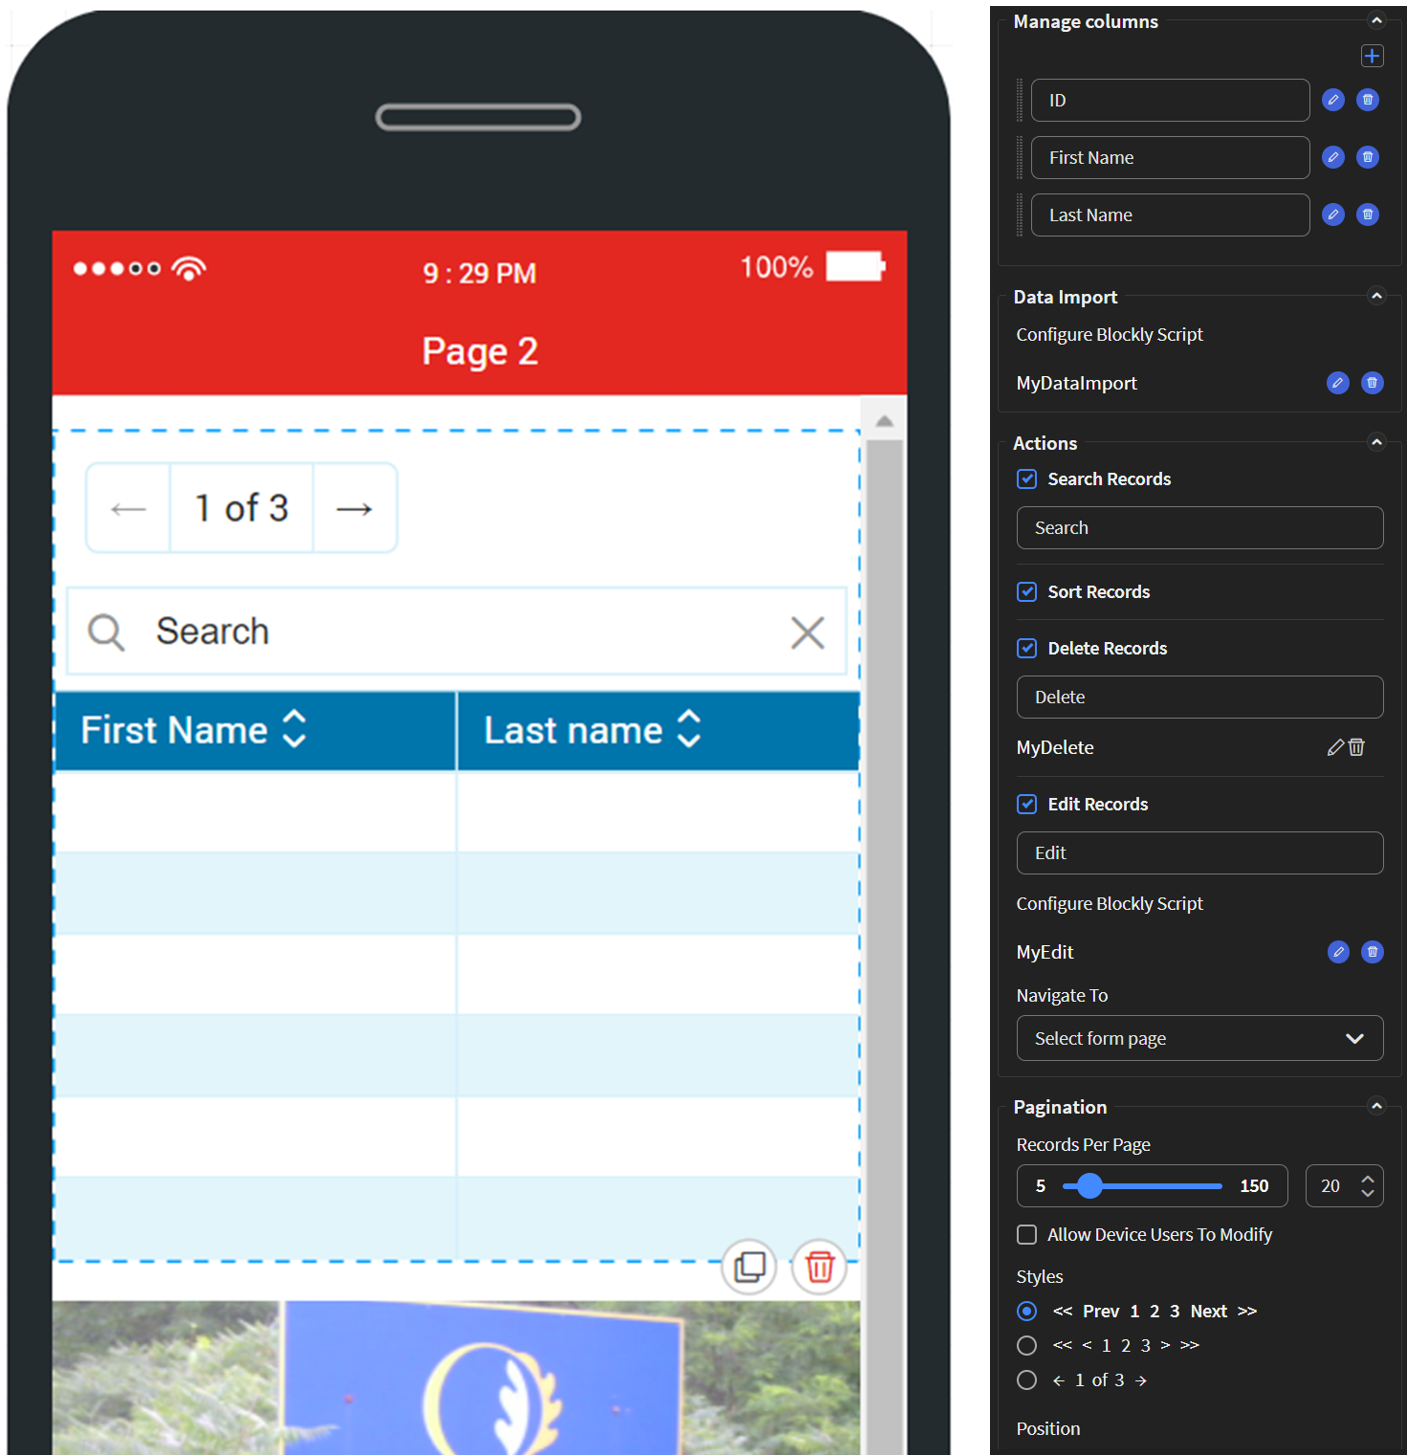
Use the Table widget to load and display data from a private database. This widget uses Blockly scripts for Create, Read, Update, and Delete (CRUD) operations via the REST API. The Table widget supports pagination and search of all the records within a table.
Procedure
- In the Canvas, open the Widgets tab.
- Drag the Table widget onto the app canvas.
- In the Table Properties panel, enter an ID and Name for the widget, or keep the defaults.
-
In the Manage Columns section, perform the following as
required:
-
For the Default Column Behavior, choose from one
of the following:
- Truncate: Excess text in a column displays as
.... - Word Wrap: Excess text in a column displays on a new
line.
- Shrink to Fit: The column width automatically readjusts
itself to display all text. Selecting this option disables the
changing of column width.
- Truncate: Excess text in a column displays as
-
For the Default Column Behavior, choose from one
of the following:
- In the Get Data section, configure a Blockly script to pull data into your table using the REST API by selecting Add. See Table Widget Data Population Examples.
-
In the Export section, you can export the table widget
data to the SOTI Snap report database.
- Permission for Data Storage: When checked, SOTI Snap report saves table widget data.
- Save Only Changed Table Data: When checked, SOTI Snap only saves all newly added/edited data into the SOTI Snap report. When unchecked, SOTI Snap saves all table data.
-
In the Actions section, you can perform the
following:
- Add a search field to the table by selecting the Search Records checkbox. This functionality offer the user to search for terms from the entire data set in the table. You can customize the message in the widget's Search field by overtyping the default search label.
- Select Sort Records to add sort ascending and descending arrow controls to each column header on the device.
- Select Delete Records to give the user the ability to remove row data. Select Add to configure a Blockly script that activates when deleting a record.
- Select Edit Records to add or edit row data. Select Add to configure a Blockly script that activates when editing a record.
- Users can make changes to records from a different form page than the table's home page. Use the Select form page dropdown to select the page for editing. Use the Select widget dropdown to choose the widget on the target page that receives focus when opened.
-
In the Pagination section, use the Records
Per Page slide bar to define the maximum number of records that
appear on one page of the table. You can make this setting configurable in the
app by the user by selecting the Allow Device Users to
Modify checkbox. Use the Styles radio
buttons to present minimalist or verbose pagination controls. The
Position radio buttons enables you to choose the
placement of the pagination controls relative to the table.
- Optional:
In the Rules section, add a visibility rule to the widget.
Use visibility rules to control when a widget is visible to the app user. For example, you can create a condition that a widget should only appear after the app user fills in a field or submits a form.
- Select Visibility Rule to open the Set Visibility Rule dialog box.
- Select whether the visibility rule requires meeting all or any conditions.
- Select an app field or variable and an operator from the Field list. Enter the value required for the widget to be visible.
- Select Add Condition to add another condition.
- Select Save.
- Move to the Format tab to customize the widget's appearance.
-
Select Save in the SOTI Snap
banner to apply your changes.


Results
Tip: Select Preview to see how the widget
appears in your app.