Creating Custom Topics
Custom topics allow you to use data collected by third-party applications for display in Live View. An SDK document and sample source code package is available from SOTI.
Note: In this example we add a custom topic to an existing view. To
create a new view, see the Creating a View section.
To add a custom topic:
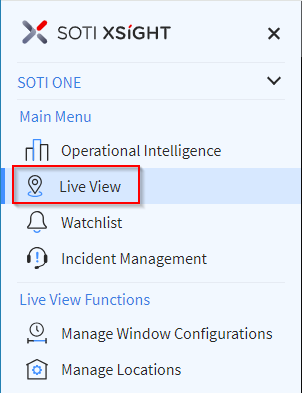
- From the main menu, select Live View.
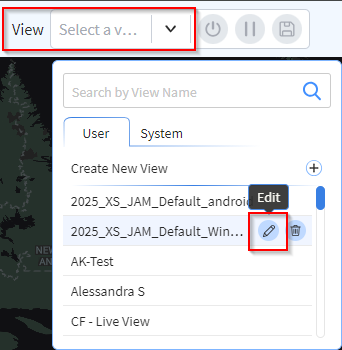
- From the View dropdown at the top of the screen, select
the Edit icon.
The Edit View - User panel displays.
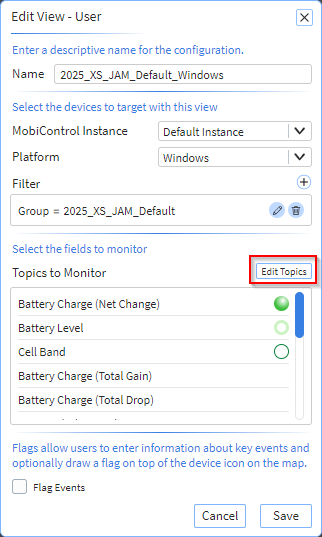
- Select the Edit Topics button. The Edit
Topics panel displays.
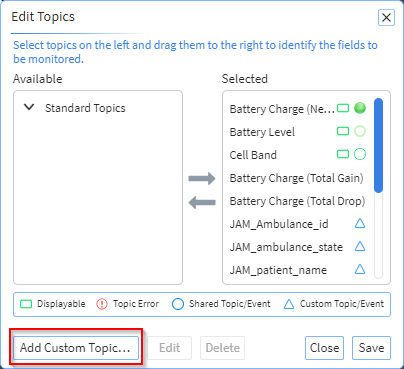
- Select the Add Custom Topic/Event button. The
Add Custom Topic/Event Wizard panel displays.
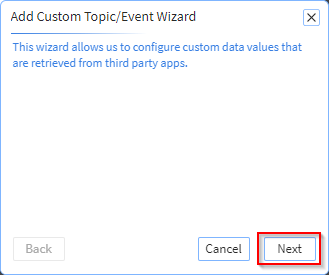
- Select Next. The Add Custom Topic/Event
Wizard panel expands.
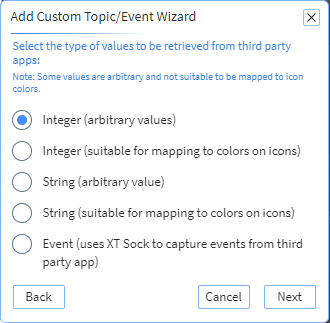
Select the type of value of the data collected from the third-party applications.
Refer to the following table:
Value Description Integer (arbitrary values) Numerical value. Integer (suitable for mapping to colors on icons) Numerical value for display on the map. String (arbitrary value) Sequence of characters. String (suitable for mapping to colors on icons) Sequence of characters for display on the map. Event Uses XT Sock to capture events from third-party applications. - Select Next.
- In the Add Custom Topic/Event Wizard panel, select the
collection frequency, significant change, and units for the custom topic.
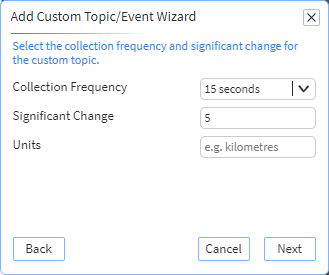 Note: Collection Frequency sets how often the device sends topic data. Significant Change tells the device to send data when this condition occurs, regardless of the collection frequency.
 - Select Next.
- In the Add Custom Topic/Event Wizard panel, select the
method to use to retrieve topic values from third-party applications on the devices.
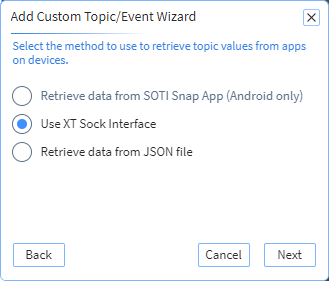
Select the method to use to retrieve topic values from third-party applications on devices.
Refer to the following table:Data Source Option Description Retrieve data from SOTI Snap App (Android only) Specify parameters to retrieve data using the SOTI XT Sock for SOTI Snap. 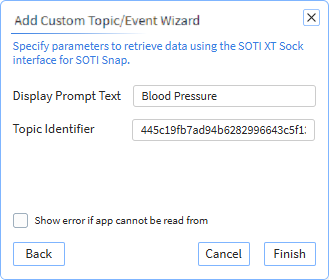
See the SOTI Snap online help: XSight Topics
- Display Prompt Text: Enter the topic name to display in Live View.
- Topic Identifier: Enter a topic exported by SOTI Snap.
Note: This option is only available for Android.Use XT Sock Interface Specify the parameters to retrieve data using the SOTI XT Sock interface, a mechanism developed by SOTI to talk directly to business apps. 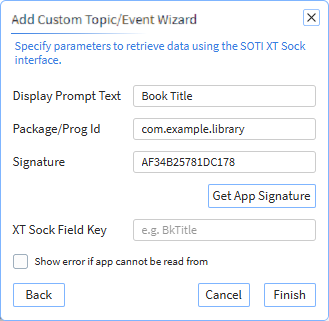
- Display Prompt Text: Enter the topic name to display in Live View.
- Package/Prog Id: The application you want to get data from.
- Signature: The value for signature comes from
your XT Sock signature. If you have the signature,
you can enter it manually in the text box.
Otherwise, select Get app
signature to browse for your XT Sock
*.apkor*.exe. By selecting your XT Sock you can extract the app signature automatically.Note: The Signature field is available in SOTI XSight 2024.0.3 and later. - XT Sock Field Key: Enter the name of the field you want to extract data from.
Retrieve data from JSON file Specify the parameters to retrieve data from a JSON file on the device. 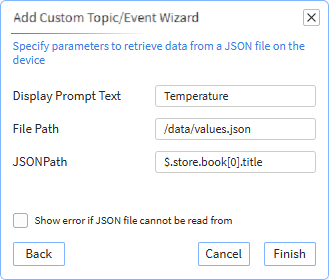
- Display Prompt Text: Enter the topic name to display in Live View.
- File Path: Enter the location of the JSON file on the device.
- JSONPath: Enter the specific subsection of the JSON document you want to extract. Use the format: $.store.book[0].title
Note: There are two styles of notation:- Dot Notation: Uses a dot (.) to separate nodes. For example: $.tool.jsonpath.creator.location[2].
- The dollar sign ($) represents the root member object.
- Use operators like @ (current node) and * (wildcard) in expressions.
- You can apply functions like min(), max(), and length() at the end of a path.
-
Select Finish.
- The new custom topic, appears in the Selected column of the
Edit Topics panel.
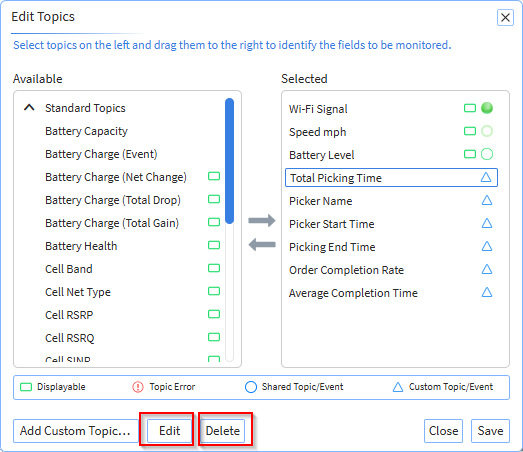
- Select the Edit button to edit a topic. Select the Delete button to delete a topic remove it from the Selected column.
Note: Custom topics are specific to the view they are created in.
Custom topics can only be used in the view where it was created and becomes a topic in
the view (and it appears in the Selected column) immediately upon
creation. You cannot share a custom view with other views and you cannot save a custom
topic. When you delete a custom topic it is removed from the
Selected column, and does not appear in the
Available column. To recreate a deleted custom topic, you must
repeat steps 1 through 12 above.
Note: Custom topics can be identified by the blue triangle to the
right of a topic in the Selected column.

Note: The first three topics in the Selected
column cannot be custom topics. If a custom topic is added as one of the first three
topics, the Topic Error icon will appear to the right of the topic.

Custom topics can be added after the first three topics.