Managing Role Administration (Device Access) for Business Apps
Before you begin
About this task
Managing Roles
About this task
 s
s
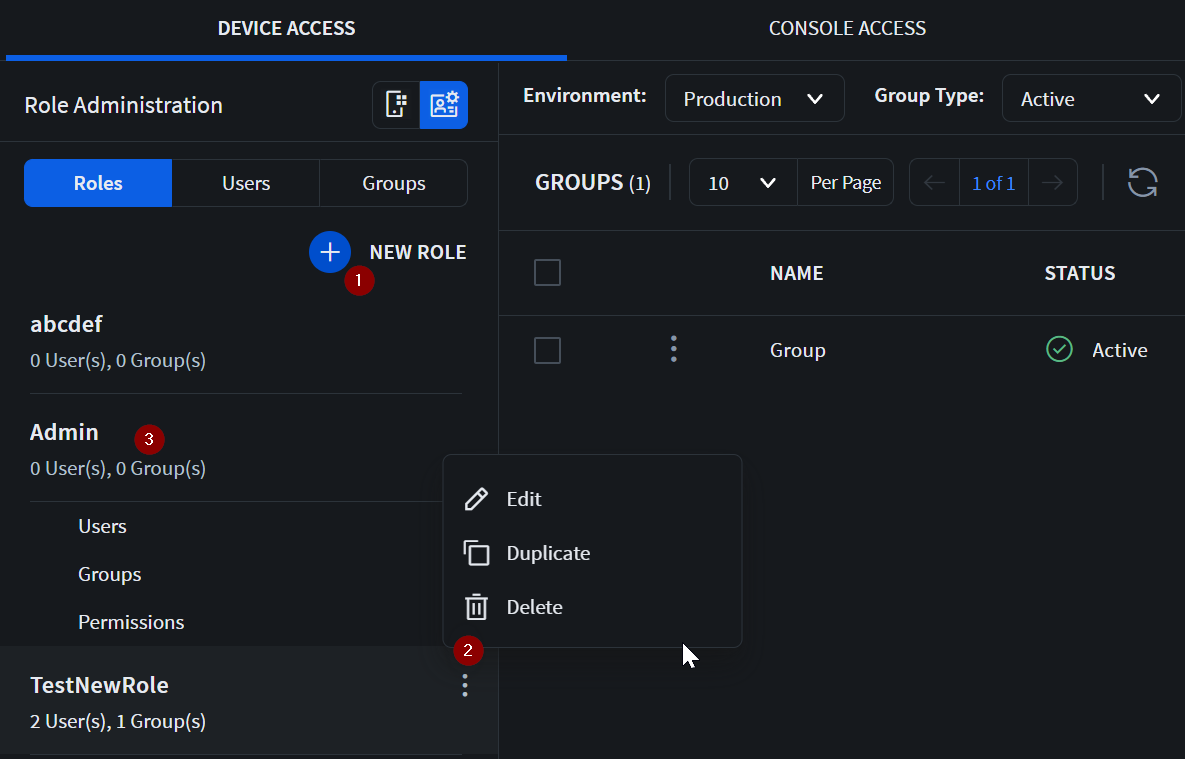
From the Device Access tab's Roles sub-panel, you can:
- Select New Role to create a new role, see Creating a New Role for details.
- For a created role, you can select to:
- Edit the role's name.
- Duplicate the role and its permissions. (The role's member users and groups are not duplicated.)
- Delete the role. You must confirm the deletion.
- For a role, select the role to access it's Users,
Groups or Permissions
sections.Important: When you make any changes to a role, it is immediately reflected in the device's SOTI Snap Device Agent.
- Users: Displays all the device users for this
role. For any user, select to:
- Assign a role. Select Assign Role to configure the all the roles this user is a member of. This includes the current role.
- Remove a user. Select Remove User to remove the current user from this role.
- Groups: Displays all groups of device users
for this role. For any group, select to:
- Assign a role. Select Assign Role to configure all the roles this group is a member of. This includes the current role.
- Remove a group. Select Remove Group to remove the current group from this role.
- Permissions: Displays this role's permissions to all existing app elements. You can customize this role's permission as needed. For more details, see Permissions.
- Users: Displays all the device users for this
role. For any user, select to:
Creating a New Role
About this task
Procedure
- In the Role Details section, enter a name for the role in the Role Name field.
- Select Next.
-
In the Permissions section, assign the role's
respective permissions for all existing app components (app
elements).
-
For form-based app components (Form, Workflow, AI Form Builder):
- View: Role members can view submitted
form records.
- My Records: The role member can only view their own submitted form records.
- Device Records: The role member can view all submitted form records from the device they are using.
- You can also add and then select other filters. See Filtering & Sorting for more details.
- If you enable more than one filter, you can choose the default filter from the Set as Default drop-down menu. The chosen filter is the one that SOTI Snap Device Agent automatically uses for the device user.
- Create: Role members can fill in form details and submit form records.
- Edit: Role members can edit a submitted form record.
- Delete: Role members can delete a submitted form record.
- View: Role members can view submitted
form records.
-
For non-form-based app components (Page, Webpage):
- View: Role members has visibility of the app element.
-
-
For the Assign Users and Groups section:
- For the Environment Type field, choose the
publishing environment that you must publish in order for the
role's member to receive the role's permission.
- Production
- Test
- For the Assign Users field, select to add a new device user to this role.
- For the Assign Groups field, select to add a new device group to this role.
- For the Environment Type field, choose the
publishing environment that you must publish in order for the
role's member to receive the role's permission.
What to do next
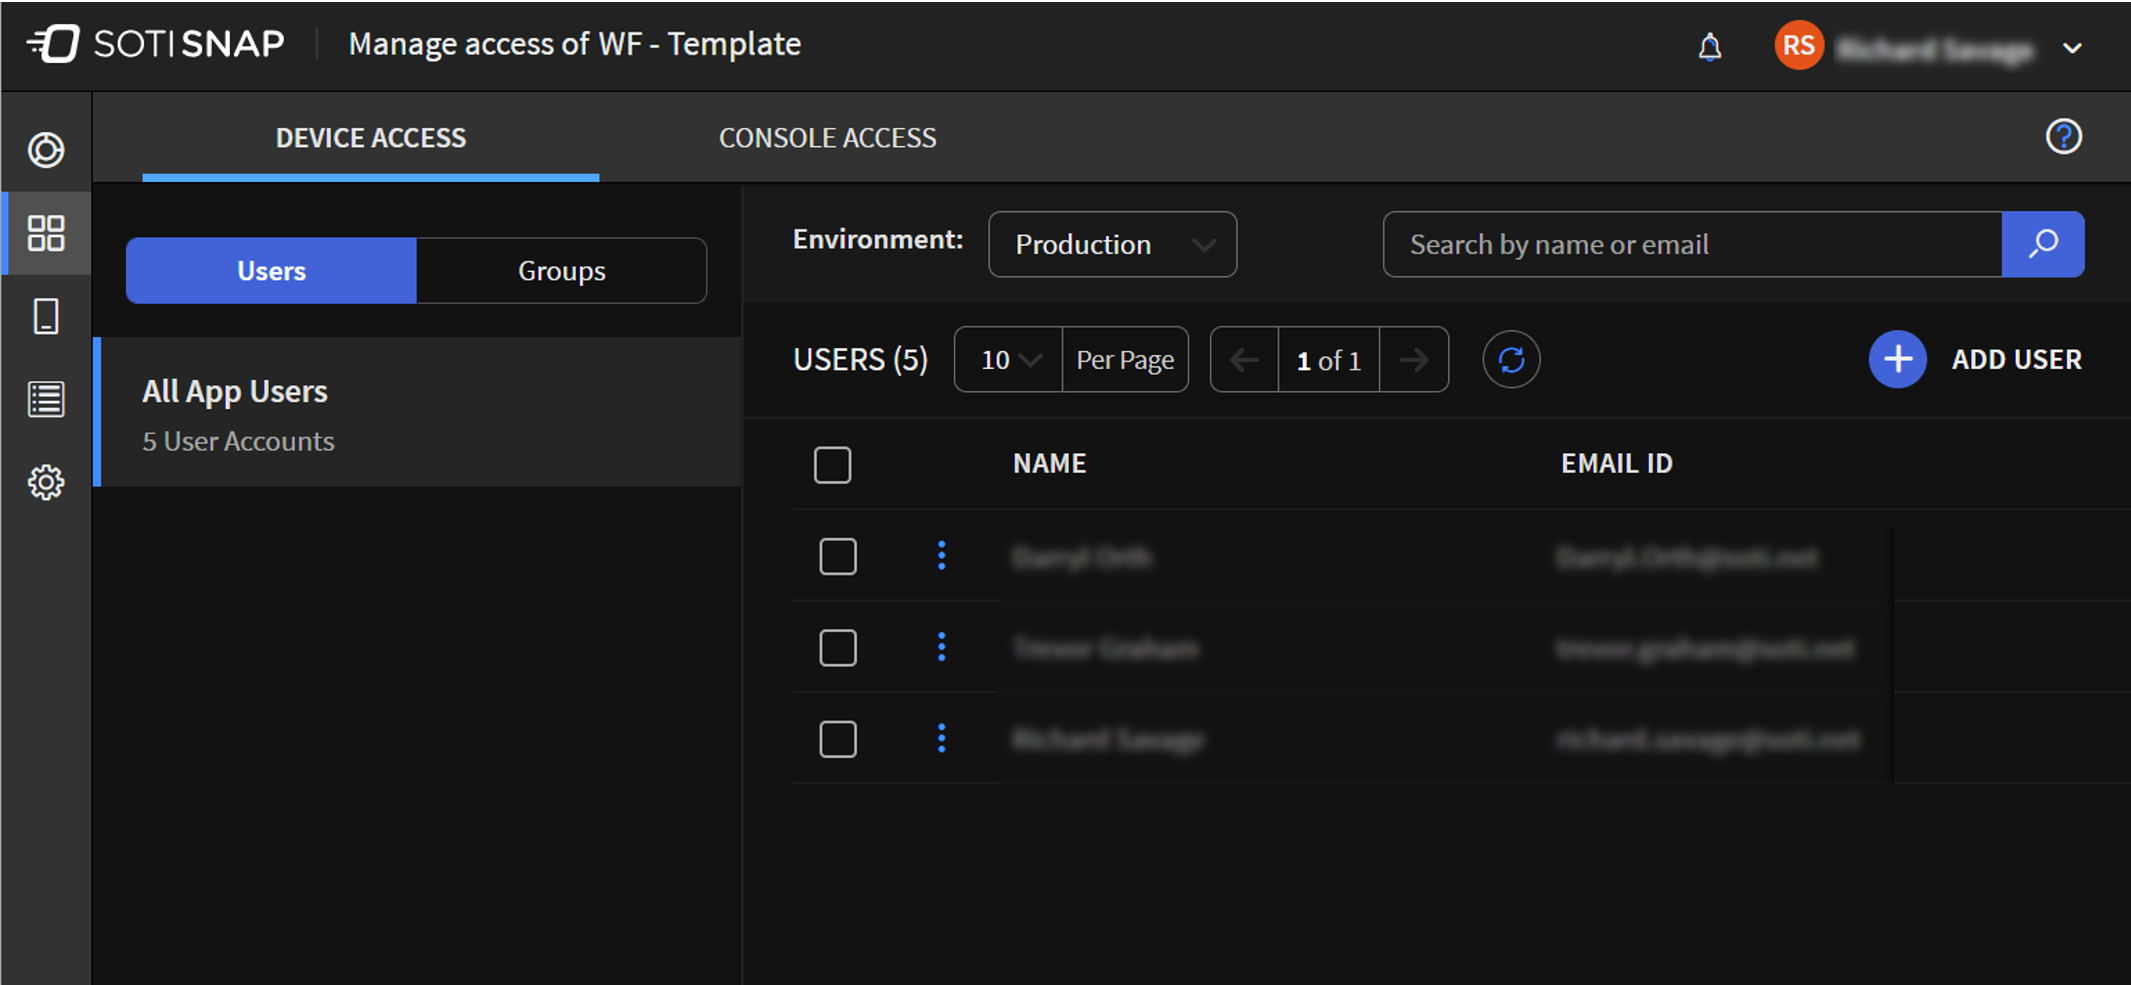
Managing Users
Adding Users to Device Access
About this task
To configure users for access to business apps, perform the following:
Procedure
- Open the Apps view, and beside the published app whose access you want to update, select .
- In the Device Access tab, select Role Administration button, then select the Users sub-panel.
- Select the Assign User button. The Assign Users window opens.
- Go to the search field. Enter and select the name of the user(s) you wish to add.
- For the Role(s) dropdown menu, assign at least one role for the name(s) you added.
- Select Add.
Results
Removing Users from Device Access
About this task
To remove user access to business apps, perform the following:
Procedure
- Open the Apps view, and beside the published app whose access you want to update, select .
- In the Device Access tab, select Role Administration button, then the select Users sub-panel. A list of all app users appears in the panel to the right.
- Beside the name of the user you want to remove, select More. Select Remove User.
- In the Remove Selected User(s)? confirmation window, select Remove.
Results
Managing Groups
Adding Groups to Device Access
About this task
To configure groups for access to business apps, perform the following:
Procedure
- Open the Apps view, and beside the published app whose access you want to update, select .
- In the Device Access tab, select Role Administration button, then select the Groups sub-panel.
- Select the Assign Group button. The Assign Group window opens.
- Go to the search field. Enter and select the name of the group(s) you wish to add.
- For the Role(s) dropdown menu, assign at least one role for the name(s) you added.
- Select Add.
Results
Removing Groups from Device Access
About this task
To remove group access to business apps, perform the following:
Procedure
- Open the Apps view, and beside the published app whose access you want to update, select .
- In the Device Access tab, select Role Administration button, then select Groups sub-panel. A list of all directory groups appears in the panel to the right.
- Beside the name of the group you want to remove, select More. Select Remove Group.
- In the Remove Selected Group(s)? confirmation window, select Remove.