Installing and Activating SOTI Snap Link
Before you begin
- Check the system requirements. See System Requirements
- Create a SOTI Snap Link connection. See Creating a SOTI Snap Link Connection.
- Retrieve the SOTI Snap Link connection's username and password.
About this task
To install and activate SOTI Snap Link on your computer, do the following:
Procedure
-
If you have already downloaded the installer and saved the respective
enrollment ID, skip this step.
- From SOTI Snap's left side navigation pane, select the tab.
- Beside the connection, select and select Edit.
- Beside Enrollment ID, select to save the enrollment ID for later.
- Select Download.
Restriction: You can't mix and match the enrollment IDs from one SOTI Snap account with a SOTI Snap Link installer from another SOTI Snap account. They must be from the same account. - Extract the files in the SOTI Snap Link.zip folder.
-
In the SOTI Snap Link folder, run SnapLink.Installer.bat as an administrator.
If you get a Microsoft Defender SmartScreen warning, select More info, then Run anyway to proceed.
-
Follow the instructions of the SOTI Snap Link installation wizard.
SOTI Snap Link is now installed on your computer.
Activate SOTI Snap Link
-
Open the SOTI Snap Link console. By default, the installer adds a Desktop shortcut for SOTI Snap Link, but if you opted out, you can open it from the installation folder.
The default is C:/Program Files (x86)/SOTI/SOTI Snap Link.
-
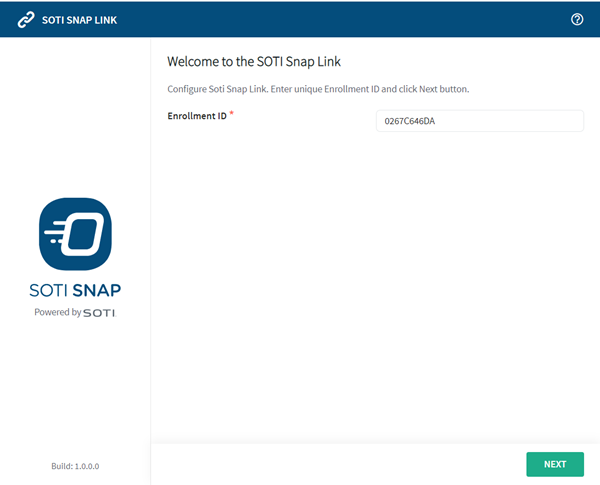
Enter the copied enrollment ID (from earlier) of the SOTI Snap app whose data you want to capture and select
Next.
-
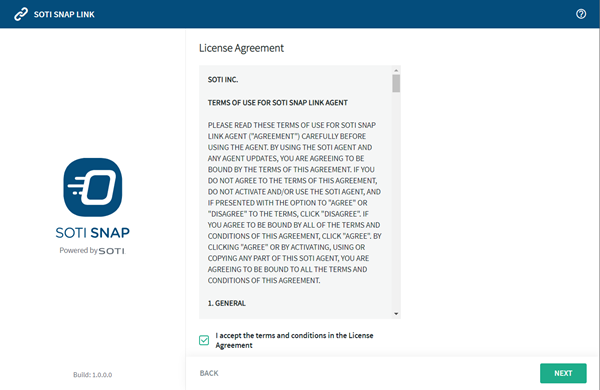
Read the license agreement and then select I accept the terms in the License Agreement and select Next.
-
Enter the Username and Password you
retrieved earlier.

- Select Login.
Results
SOTI Snap Link is now active. Published Apps with a SOTI Snap Link data export connection using this SOTI Snap Link account appear automatically in the Configurations view.
What to do next
Set up a connection. Connections are external locations such as SQL and email servers where you can direct the data exported from your apps. See Connections.