Adding App Components
About this task
The types of screens you use to build your app define its structure. Your app can host many screen styles, and the number of screens you can add is not limited.
Procedure
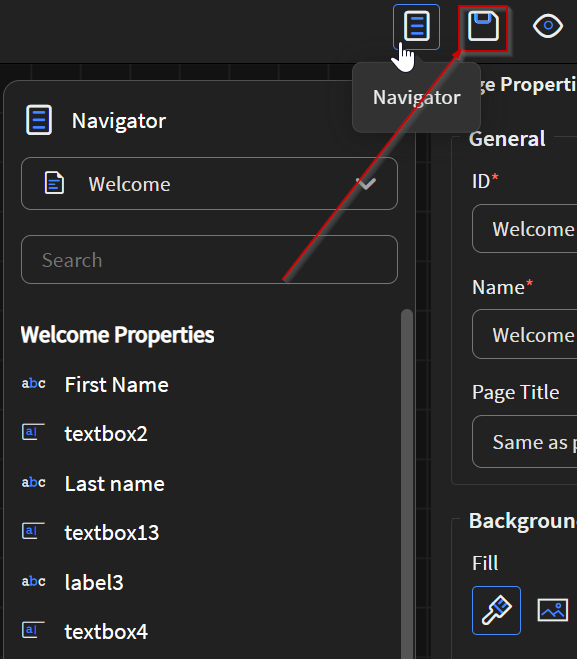
- In the Canvas, select the Project tab.
- Select Add to open the Add App Components screens dialog box.
-
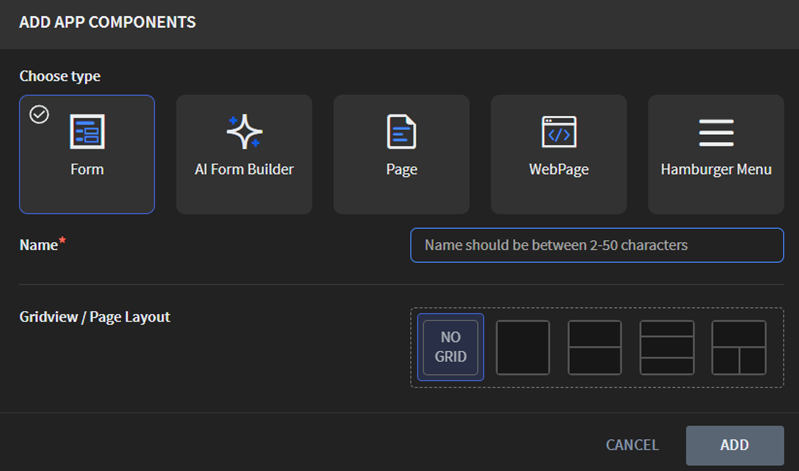
Select the app component type you like to use.
- Form: Use this screen type to collect data from app users through
your app. For example, surveys. You can add many forms to an app, each
corresponding to a different task, such as managing orders, adding items
to inventory, or editing product information. You can add many forms (or
pages) to your app to distinguish between sections.Note: All apps automatically have at least one form or page screen.
- Page: Use this screen type if the app does not require data
submissions from the user. Pages are useful for displaying information
and triggering actions, such as embedding maps or disseminating training
content. You can add more pages (or forms) to your app to distinguish
between sections.Note: All apps automatically have at least one form or page screen.
- WebPage: Use this type to embed external web content directly within your app. App users can browse that website without leaving your SOTI Snap app.
- Hamburger: Use this type to add a navigation element to your app.
The hamburger type simplifies navigation by adding a menu that directs
the user to different locations in the app.Restriction: You can only add one Hamburger Menu per app.
- AI Form Builder: Use this type to automatically create a form
from a prompt message or a file (
*.pdf,*.jpeg,*.jpg,*.png,*.txt, or*.doc). For the prompt message, you can describe the details of the form you envision, and the AI generates as such for you. Otherwise, you can upload a file containing the form you want to generate, and SOTI Snap creates the necessary input fields and options.Restriction: The maximum file size is 10MB.
- Form: Use this screen type to collect data from app users through
your app. For example, surveys. You can add many forms to an app, each
corresponding to a different task, such as managing orders, adding items
to inventory, or editing product information. You can add many forms (or
pages) to your app to distinguish between sections.
- For the Name field, enter a brief name.
-
For the selected app component, do the following respective procedure:
Type Procedure Form How To: Build a Form-Based App in SOTI Snap 
To add a form screen to your app:
- For Gridview / Page Layout, choose one of the available layouts. You can rotate the layout you choose. See Gridview Layout for more details.
- Select Add.
- Select the new form you created in the app screen list and not the new form's sub
page.Notice: When you add a new form, a subpage is automatically created for the new form as well. SOTI Snap by default selects the sub page and not the new form.
- In the Form Properties panel on the right, configure the form.
- Optional: Nest more pages or web pages under the form.
Page To add a page to your app, do the following:
- For Gridview / Page Layout, choose one of the available layouts. You can rotate the layout you choose. SeeGridview Layout for more details.
- Select Add.
- In the Page Properties in the
right panel, perform the following tasks:
- For the ID field: SOTI Snap automatically generates and uses a unique identifier for a new page. You can change this field's value. If you do change it, set it to the same as the Name field.
- For the Name field: This is the name you entered earlier when creating the page. You use this field when referring to this page (such as when incorporating Events and Action) or organizing pages. If you have not done so already, enter a unique customized name.
- For the Page Title drop-down list, select one of the
following labels:
- Same as page name
- Same as form name
- Same as app name
- Custom name
- Design the background of the page. Do one of
the following:
- Color: Select Color Scale to choose a solid color to fill the background.
- Image: Select Upload Image to upload an image to use
it as a background for this page. Then select the
Scale drop-down menu to
choose a setting.
- Fit
- Fill
- Stretch
- Tile
- Center
- Switch to the Format tab to edit the padding and margin of the page.
- Switch to the Events tab to configure the events.
WebPage To add a web page to your app, do the following:
- Select Add.
- In the Webpage Properties in the right panel, choose how a
Header name label option
from the drop-down list. A header name appears at
the top of the app screen while on a specific
screen.
- Same as page name
- Same as app name
- Custom name
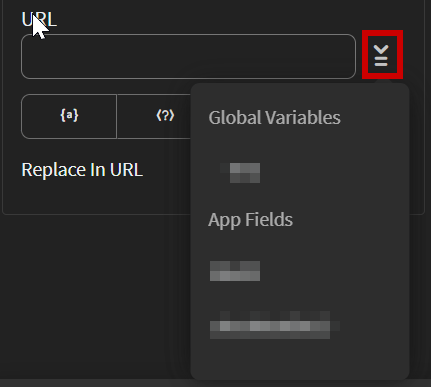
- Do one of the following to specify a URL:Important: The specified URL must began with
HTTPorHTTPS.- Enter the URL of the web page you want to embed in your app.
- Select a Global Variable
that has a value set to a URL or select an
App Field (widget) that has
text set to a URL.
You can specify the direct URL to the page you want to initially display. You can also specify a base URL of the entire site and then use parameters to point to the specific page that you want to display. Parameters are useful when the link is likely to differ slightly between users, such as the addition of an authentication or other security features.
Optional: For the URL, define the keys and assign their corresponding values to the properties below.
- Headers: Use headers when you want to
grant app users access to secured webpages. Only
visitors with the header values can access the web
page.Restriction: Only the website developer can supply the headers defined for a page.
- Query Strings: Use query strings to display the results of a search.
- Cookies: Use cookies to keep users logged into a web page by passing token or session keys and values. SOTI Snap use cookies to enable automatic authentication to a logged in user so they do not need to log in each time they access the website.
- Path Parameters: Use path parameters to generate more dynamic links.
Hamburger Menu Restriction: You can only have one hamburger menu enabled per app.Tip: Consider adding a hamburger menu at the end of your app building process so that you can configure all the menu items at once rather than as you create them.To add a hamburger menu to your app:
- Select Add.
- In the Menu Properties panel on the right, make sure that SOTI Snap has toggled Show Hamburger Menu switch to on.
- Select the Menu Item tab, and then select the Add button to add a new menu item.
- Enter a new name for the menu item and select the image icon to upload a image. SOTI Snap associates the menu item with the image you have uploaded in the hamburger menu on the app. Repeat for as many menu items as you want to appear in the Hamburger menu.
- Optional: Switch to the Header tab and toggle the option
to Enabled.
- Select the image icon under Display photo to upload an image that appears in the Hamburger Menu.
- Enter a name in the Display name field.
- Switch to the Format tab to edit the appearance of the hamburger menu.
- Switch to the Events tab.
- From the Hamburger drop-down list, select a menu or header item.
- Beside Actions, select Add and select and define an action from the Actions drop-down list.
- Repeat for the rest of the menu and header items and select Save.
Al Form Builder Digitizing Processes with the SOTI Snap AI Form Builder 
To add an AI form builder to your app:
- Do one of the following:
- Select Prompt to enter
a prompt message to generate your form:
- Optional: Select Lead Generation Form or Feedback Form to automatically fill a prepared prompt message.
- Below Enter the prompt and see
SOTI Snap
AI in action, enter a prompt message in
the text box describing the form you want to
generate.Tip: The built-in AI has the following features:
- Support for 100+ languages.
- Generate sophisticated contextual images upon request.
- Embed relevant videos upon request.
- For each of the requested widgets, their properties are automatically filled out with appropriate values.
- Select PDF/Image to
upload a file to generate your form:Note: The maximum file size is 10MB.Choose from one of the following:
- Optional: Select Learn more to see more details about this feature.
- Optional: Select Feedback to submit your name, email and a message to SOTI about this feature.
- From your local device's file explorer, drag a
*.pdf,*.jpeg,*.jpg,*.png,*.txt, or*.docfile into the Drag and drop image file here file selector box. A file icon or preview appears. -
- Select to open a file browser.
- From the file browser, navigate to the
*.pdf,*.jpeg,*.jpg,*.png,*.txt, or*.docfile containing your form. - Select the file. A file icon or preview appears.
- Select Prompt to enter
a prompt message to generate your form:
- Select Generate With AI.Note: It may take a few minutes for SOTI Snap to automatically generate the form.
Result: You have generated a new form, which opens in the canvas for editing. You can now edit and customize your new form.
-
The edits are temporary and unsaved. From the top-right, select
Save to confirm the adding of the new app component.
The new app component is now permanently saved.