Adding an Indoor Location
SOTI XSight Indoor Location allows you to track devices based on Wi-Fi positioning within indoor spaces.
Before you begin
You must also have an indoor map ready. The indoor map can be already provided in your data provider configuration, you can upload it from your local machine, or you can create an indoor map using SOTI XSight Design Studio. See Using Design Studio to Create Indoor Map Images.
Procedure
The following steps indicate how to navigate to the Live View
Locations panel and to add a location and perform
configuration steps to add a location.
-
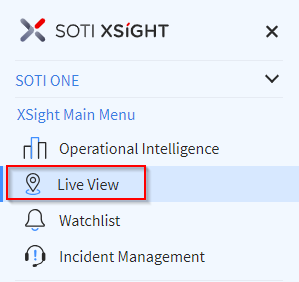
Select Live View from the main menu.
-
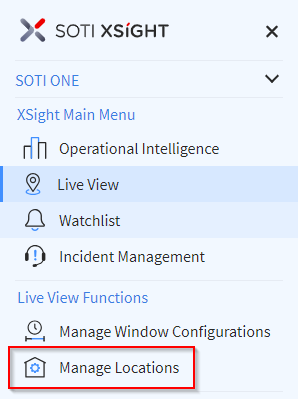
Select Manage Locations from the main menu.
-
In the Manage Indoor Locations panel, select
Locations.
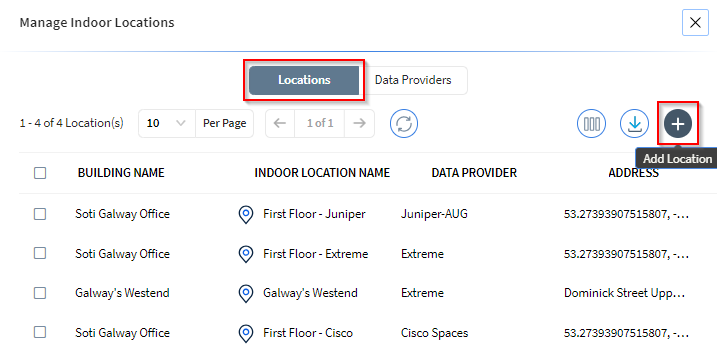
- Select the Add Location icon.
Add a new location or new floor
In the Find A New Indoor Location panel you can add a new location or a new floor.
About this task
Procedure
-
Use the search bar to search for the address in Azure Maps. Select the
address of the desired location from the list of locations that match your
search term.
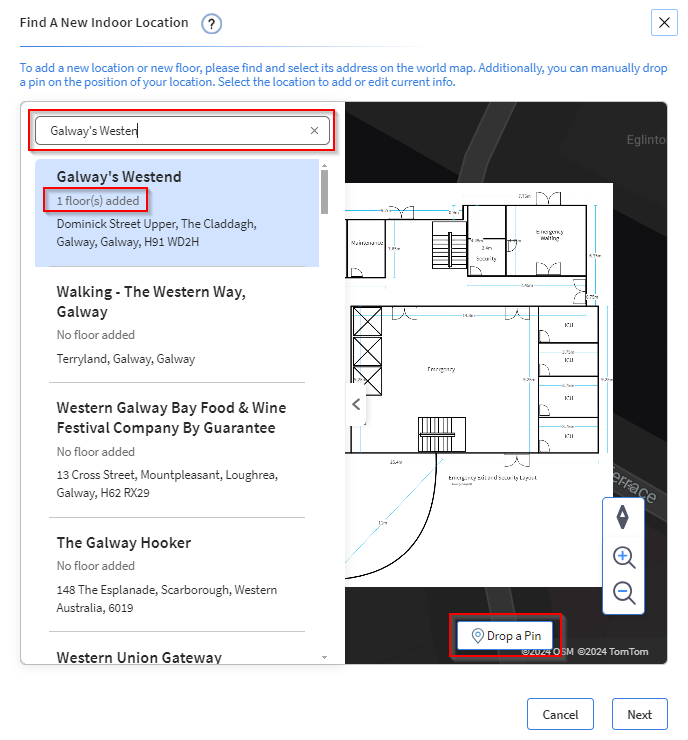 Note: If you are not able to find the location using the search bar, you can select a location using the Drop A Pin feature. Select the Drop a Pin button and move the cursor to the desired location on the map to select it.Note: Previously defined locations have a tag indicating the number of defined floors for the location. Selecting a predefined location allows you to add multiple indoor locations to the same building. Each indoor location is considered as a floor in the building. See Adding Multiple Indoor Locations to the Same Building.
 - Select Next.
-
In the Add Location Details panel, you can configure
and confirm the location details, such as the address, the building name,
latitude, and longitude.
Enter the following information about the selected building and the indoor location that you are configuring:
- Building Name: The building name must be unique and not used for any other building.
- Indoor Location Name: The indoor location name must be unique and not used for any other indoor location name.
- Description: A description of the indoor location.
- Floor Level: The floor level must be an integer (for example, 0, 1, 2). Floors are numerically sorted and must be unique.
- Default Floor toggle: The default floor always shows first when starting a new Live View session or when zooming into the building from a higher level.
Note: A building can only have one default floor. If the building only has one floor, that floor is the default and you cannot toggle it off from being the default floor.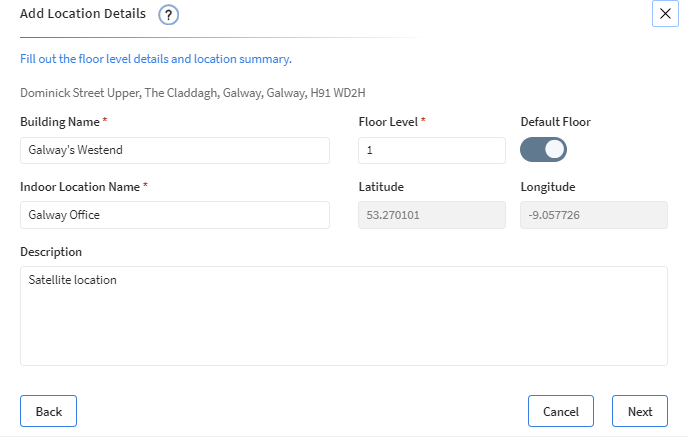
- Select Next.
-
In the Configure Connection And Indoor Map panel, for
the Connection Type:
- Select Data Provider and then select a data provider from the Providers dropdown.
- Select GPS.
If you selected the Data Provider Connection Type, continue with steps 6 through 11.If you selected the GPS Connection Type, continue with steps 12 and 13. -
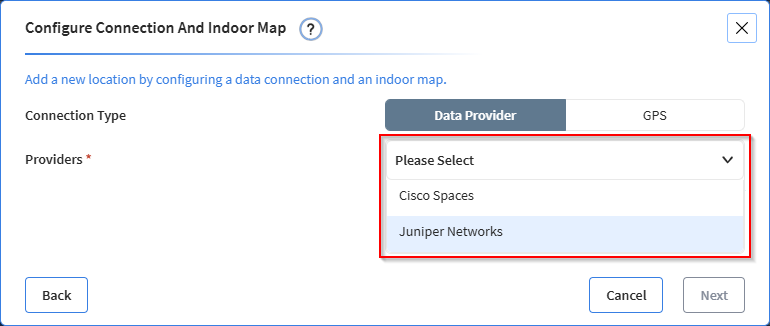
If you selected the Data Provider
Connection Type, select a provider from the
Providers dropdown.
-
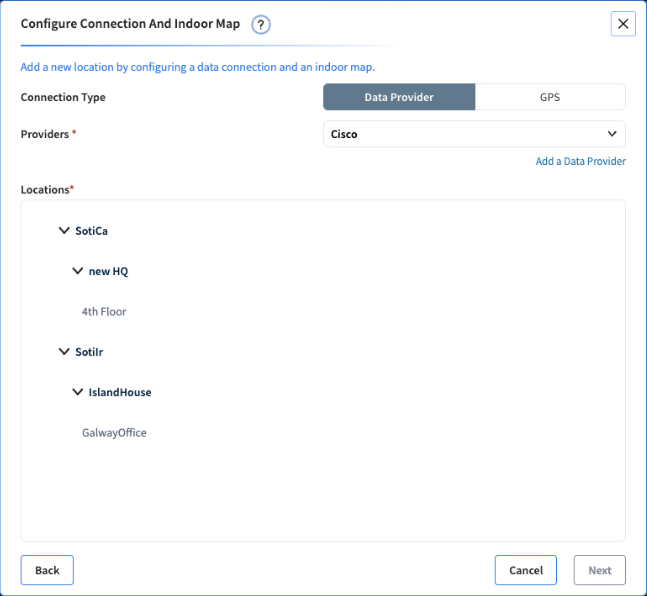
In the Locations section, you must select a location
and floor plan associated with the data provider.
-
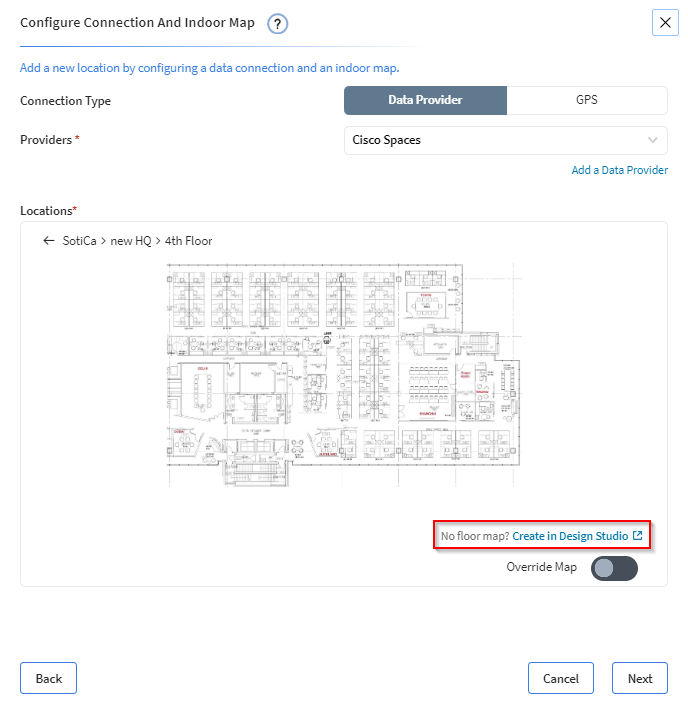
If a floor plan is already associated with the selected location, it is
displayed.
-
To create a new floor plan, select the Create in Design
Studio link to create a new map using SOTIDesign Studio (see Using Design Studio to Create Indoor Map Images).
Note: If the selected location does not have an associated floor plan, you can create one by selecting the No floor map? Create in Design Studio link. This opens SOTI Design Studio in a separate browser tab (see red box in image above), where you can create a floor plan and save it in the SOTI Design Studio Library. You can then access the newly created floor plan by toggling the Override Map option on and selecting the Design Studio Library tab (see red boxes in image below).Note: If the floor plan for this location is in the SOTI Design Studio Library but is not yet associated with this location, you can select it from the SOTI Design Studio Library. To access the SOTI Design Studio Library, toggle the Override Map option on and select the Design Studio Library button (see red boxes in image below).
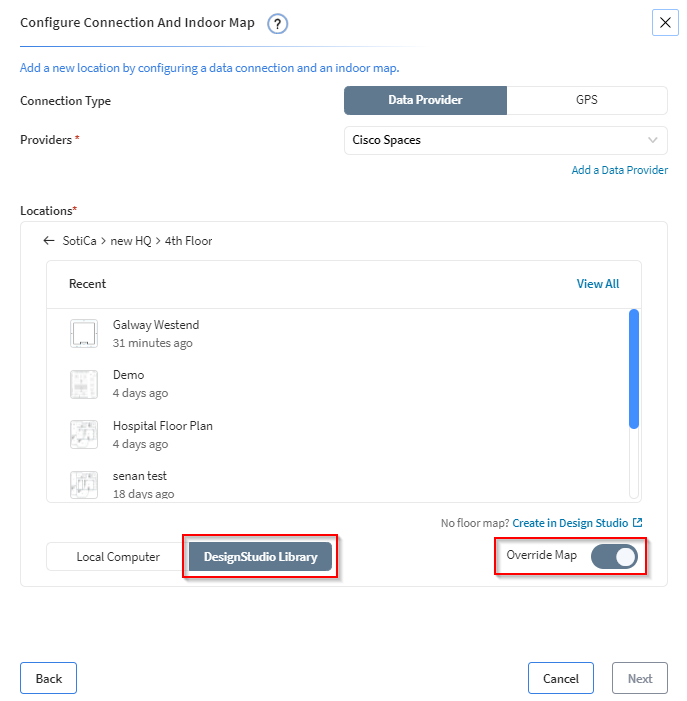
-
To use a floor plan stored on your computer, toggle the Overide
Map option on and select the Local
Computer tab (see red boxes in image below). You can either
browse to the
*.pngor*.jpgfloor plan file, or drag the file.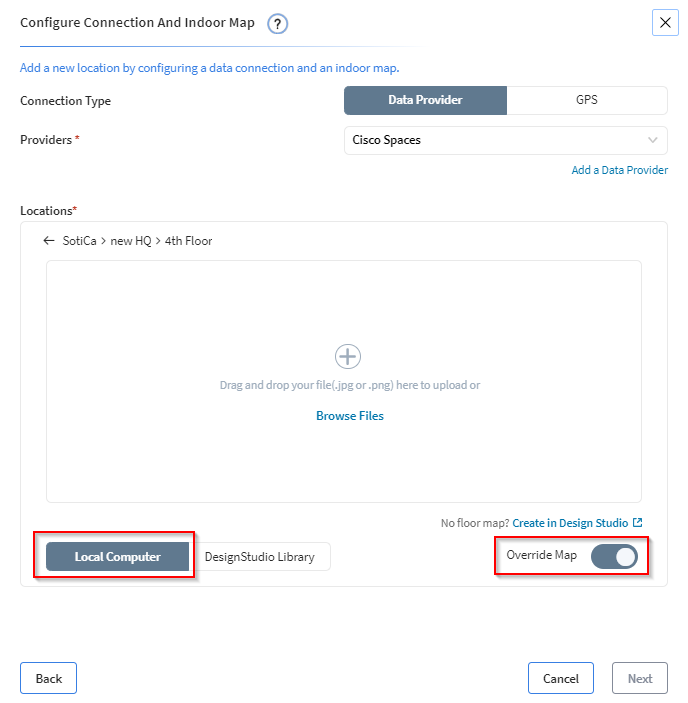
-
Geolocate the indoor map by placing it on the corresponding building in the
map. Ensure the indoor map is accurately placed on the building by rotating,
moving, and scaling the image so that the device data is correctly
represented on the map.
To rotate, move, and scale the image:
- Select the indoor map image.
- Move it by dragging the image into position.
- Scale it by selecting a corner node of the image and dragging the node to a new position.
- Rotate by selecting the rotate icon on the top of the image and dragging it to a new angle.
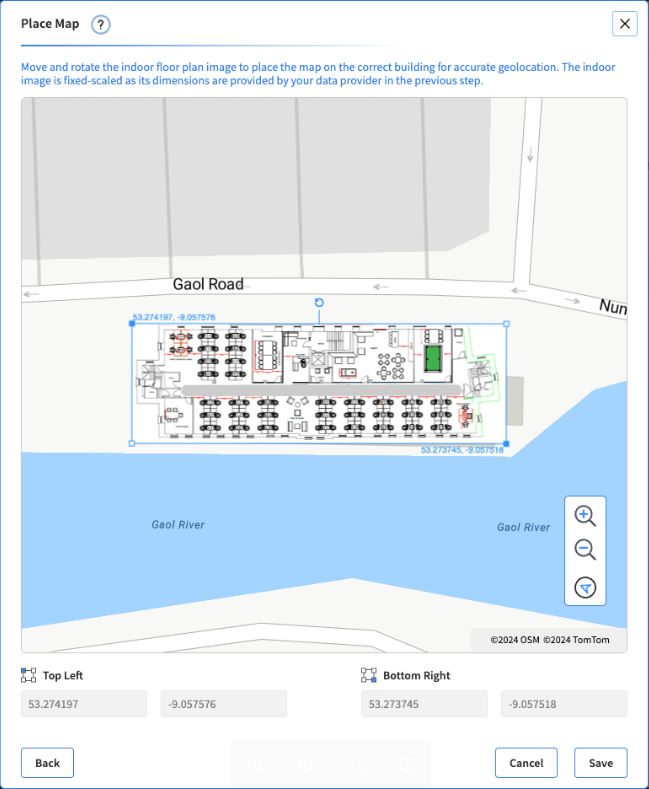 Note: Indoor map images generated from the data providers have fixed dimensions and do not allow you to scale the image (moving and rotating are still available).
 -
If you selected the GPS connection type, you can
associate a floor plan to the location by:
- Uploading it from a floor plan file stored locally on your computer (select the Local Computer tab).
- Selecting a floor plan from the SOTI Design Studio Library (select the Design Studio Library tab).
- Creating a new floor plan in SOTI Design
Studio.Note: To create a new floor map in Design Studio, select the No floor map? Create in Design Studio link (see blue box below) to open Design Studio in a separate browser tab. Create the floor map in Design Studio and save it in the Design Studio Library. You can access floor plans saved in the Design Studio Library by selecting the Design Studio Library tab.
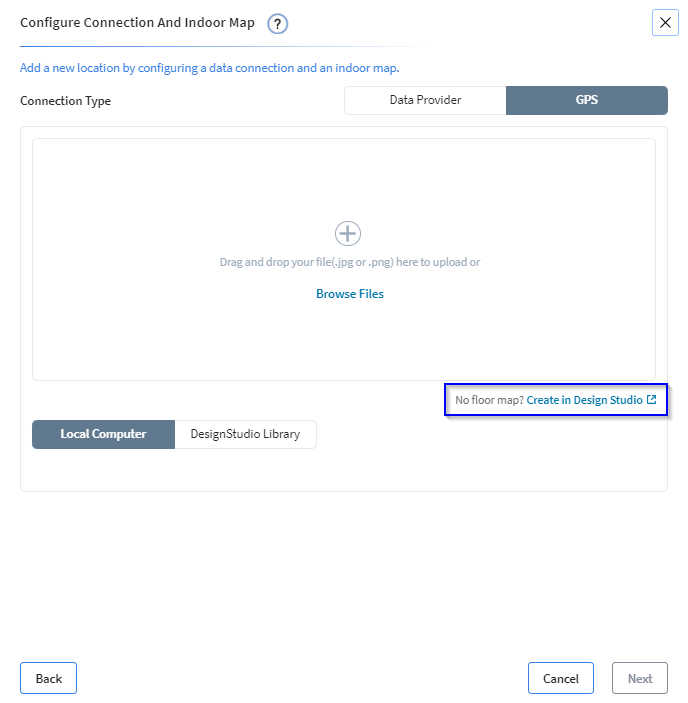
-
Geolocate the indoor map by placing it on the corresponding building in the
map. Ensure the indoor map is accurately placed on the building by rotating,
moving, and scaling the image so that the device data is correctly
represented on the map.
To rotate, move, and scale the image:
- Select the indoor map image.
- Move it by dragging the image into position.
- Scale it by selecting a corner node of the image and dragging the node to a new position.
- Rotate by selecting the rotate icon on the top of the image and dragging it to a new angle.
 Note: Indoor map images generated from the data providers have fixed dimensions and do not allow you to scale the image (moving and rotating are still available).
 - Select Save.