Adding a Data Provider
Before you begin
About this task
Procedure
The following steps describe how to perform the initial configuration steps
to add a data provider.
-
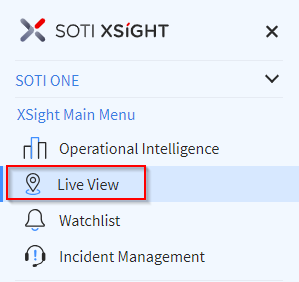
Select Live View from the main menu.
-
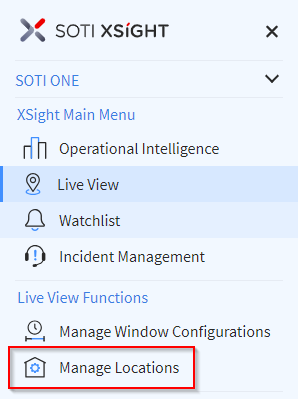
Select Manage Locations from the main menu.
-
In the Manage Indoor Locations panel, select
Data Providers (red box below).
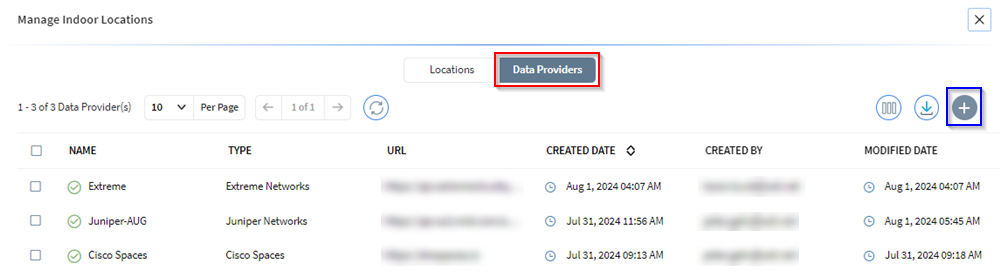
- Select the Add icon (blue box in the diagram above).
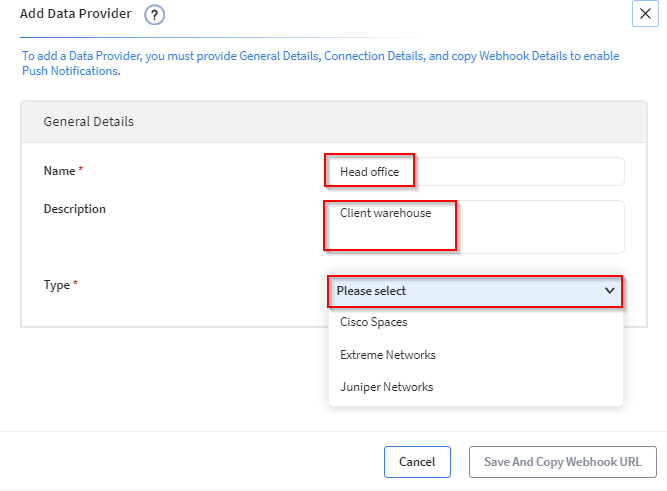
-
Enter a data provider Name and
Description.
Note: The data provider name must be unique.
-
From the Type dropdown menu, select one of the following
Wi-Fi network provider device types and then follow the steps in the
corresponding section below.
- Cisco Spaces
- Extreme Network
- Juniper Networks
Adding a Cisco Spaces Wi-Fi Network Provider
Procedure
The following steps describe how to configure a Cisco Spaces Wi-Fi
network provider.
- Select Cisco Spaces from the Type dropdown menu. This opens the Connection Details panel.
-
Enter the API Key.
Note: To obtain the API Key, go to your Cisco Spaces web console and select and then paste it into the API Key field.
-
In the URL field, enter
https://dnaspaces.io.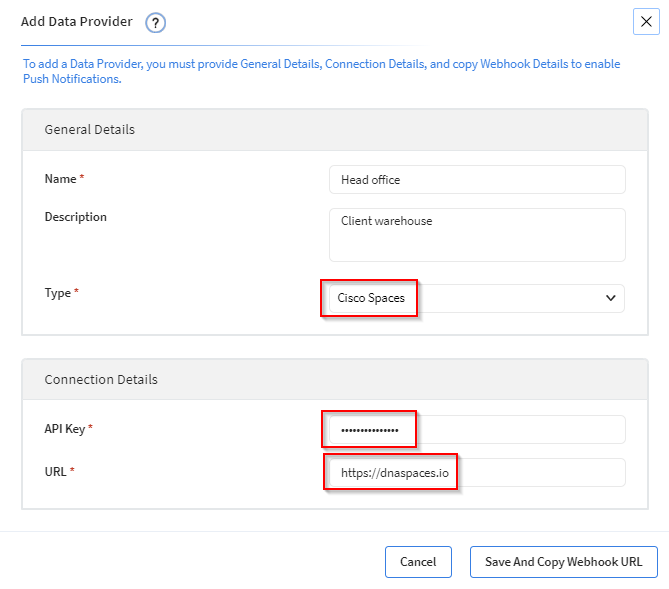
- Select Save And Copy Webhook URL. The Webhook Details panel displays.
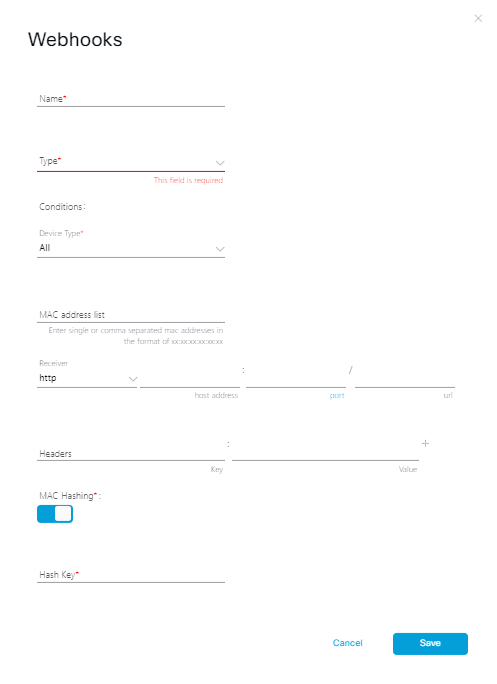
-
Copy the webhook details:
- Navigate to .
-
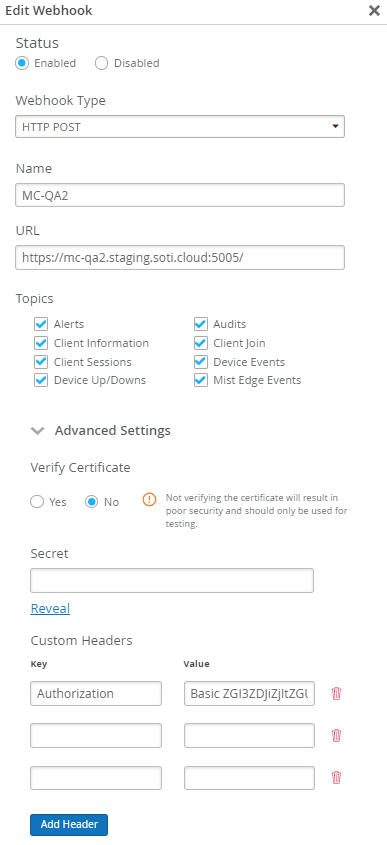
Note: You must create two webhooks, one with Type LocationUpdate, and one with Type In/Out. All values of the two webhooks must be identical, with only their Types being different.
- Device Type, Status: Select ‘All’
- Assigned Site: Select ‘All’ or select your floor(s)
- MAC address list: leave empty
- Receiver: Paste the URL copied from the Webhook Details popup in SOTI XSight (fill in the host address and port separately)
- Header Key and Header Value: Paste the Header Key and Header Value from the Webhook Details popup in SOTI XSight
- MAC Hashing: Toggle Off
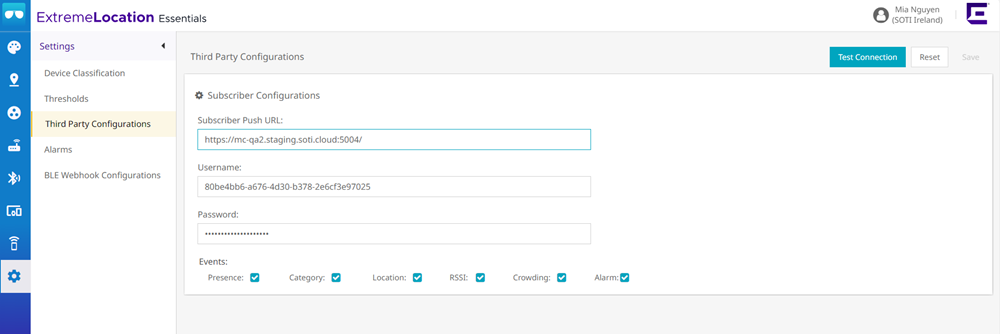
Adding an Extreme Networks Wi-Fi Network Provider
Procedure
The following steps describe how configure an Extreme Networks
Wi-Fi network provider.
- Select Extreme Networks from the Type dropdown menu. This opens the Connection Details panel.
- Enter your login Username for Extreme Cloud IQ.
- Enter your login Password for Extreme Cloud IQ.
-
Enter
https://api.extremecloudiq.com/into the URL field.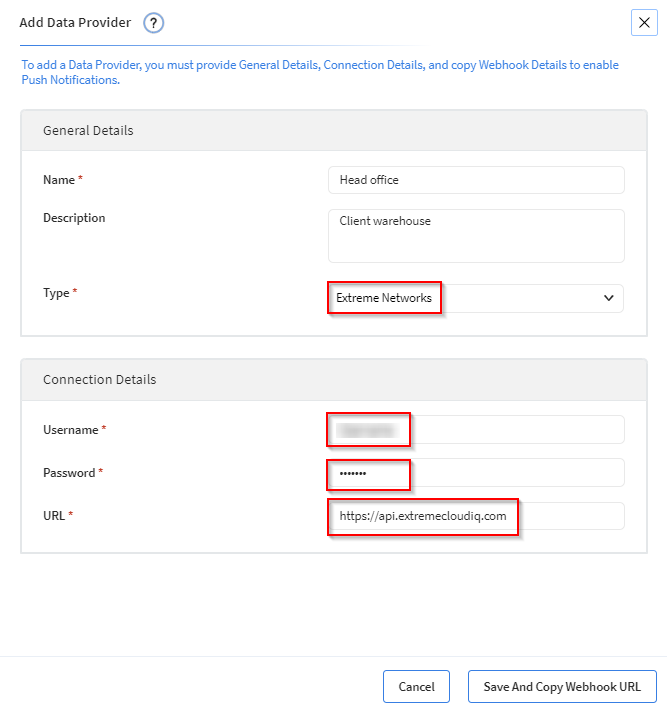
- Select Save And Copy Webhook URL. The Webhook Details panel displays.
-
Copy the webhook details:
- Navigate to
- Enter the information from the Webhook Details panel:
- Subscriber Push URL
- Username
- Password
Adding a Juniper Networks Wi-Fi Network Provider
Procedure
The following steps describe how to configure a Juniper Networks Wi-Fi
network provider.
- Select Juniper Networks from the Type dropdown menu. This opens the Connection Details panel.
-
Enter the API Key.
Note: To obtain the API Key, go to your Mist Dashboard, and from the Organization tab, create a new API token. Copy the API Token and paste it into the API Key field.
-
Enter
https://api.ac2.mist.com/api/v1into the URL field.
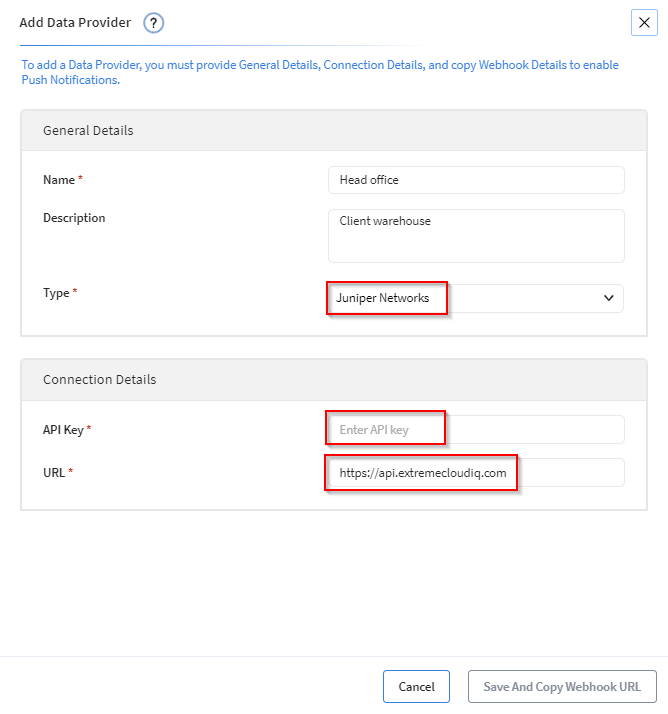
- Select Save And Copy Webhook URL. The Webhook Details panel displays.
-
Enter the Webhook details for Juniper Mist.
- Navigate to
- Fill in the following details:
- Name
- Topics (select all)
- Paste in the information from Webhook Details panel:
- URL
- Header Key
- Header Value