Creating and Managing Groups
About this task
Groups organize devices and apps to control who gets which apps. As part of the app publication process, you assign each app to at least one group. Then, as part of device enrollment, SOTI Snap adds a device to a specific group. Devices enrolled into a group only receive apps assigned to that group rather than all groups in the SOTI Snap console.
You can create as many groups as you need and follow any naming conventions, whether you want to group devices by location, department, job role, or anything else. Groups are in a flat hierarchy, and you cannot nest groups within each other.
Follow these steps below to create and manage groups:
Procedure
-
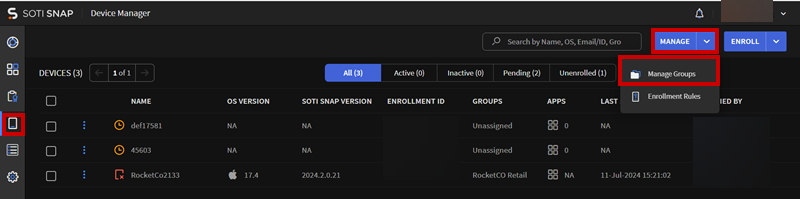
Open the Devices view.
-
Select to display the Manage Groups screen.
-
For the following available features, follow the respective corresponding
procedure:
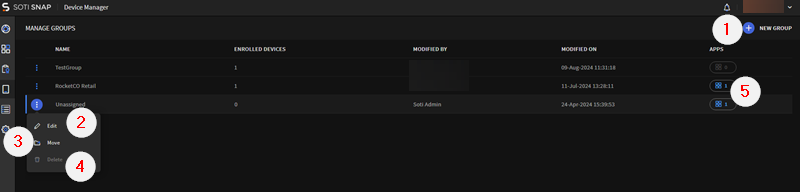
Task Procedure Creating a New Group To create a group: - Select New Group (See ① of diagram) and enter a name for the new group. The name must be between 2—50 characters.
- Configure SOTI Snap Device Agent upgrade
settings:
- Disable the "Optional Upgrade Notification" for SOTI Snap agent: When enabled, the optional upgrade notification does not appear to SOTI Snap Device Agent users. This upgrade action is also disabled on the SOTI Snap Device Agent settings page.
- Disable the upgrade option in "Forced Upgrade Notification" for SOTI Snap agent: When enabled, the forced upgrade notification does not appear to SOTI Snap Device Agent users. This upgrade action is also disabled on the SOTI Snap Device Agent settings page.
- Select Create.
Editing an Existing Group To edit a group, follow these steps: - Beside the group that you want to edit, select More > Edit (See ② of diagram).
- Change the name of the group. Group names must be between 2—50 characters.
- Configure SOTI Snap Device Agent upgrade
settings:
- Disable the "Optional Upgrade Notification" for SOTI Snap agent: When enabled, the optional upgrade notification does not appear to SOTI Snap Device Agent users. This upgrade action is also disabled on the SOTI Snap Device Agent settings page.
- Disable the upgrade option in "Forced Upgrade Notification" for SOTI Snap agent: When enabled, the forced upgrade notification does not appear to SOTI Snap Device Agent users. This upgrade action is also disabled on the SOTI Snap Device Agent settings page.
- Select Save.
Result: The new group name appear in the Manage Group view.
Moving a Group's Devices To move devices into another group:
- Beside the group that you want to manage, select More > Move (See ③ of diagram).
- Choose a new group from the dropdown list.
- Select Move Devices.
Results: SOTI Snap moves devices to the chosen new group. From the Manage Group view, the recipient group receives the donor group's devices.
Deleting an Existing Group Note: You cannot delete a group until you first disassociate any apps and devices associated with this group.To delete a group:- Beside the group that you want to delete, select More > Delete (See ④ of diagram).
- Select Delete Group.
- Viewing a Group's Apps
- Selecting/Unselecting a Group's Startup App
To view a group's assigned apps: - From a listed group's Apps column, select the icon (See ⑤ of diagram) to view the group's associated applications.
- Optional: To the left of an app, select its radio button to assign the chosen app as the device group's startup app. When an device user access SOTI Snap on their device, the assigned startup app launches instead of the app catalog. You can also select Reset to remove the startup app configuration.