Using Signal Policies to Trigger Webhook Actions
Before you begin
- You must sign in to the SOTI MobiControl web console as a user with Manage Webhooks and Manage Signal Policies permissions.
- You must have already created a webhook (see Creating a Webhook).
About this task
Procedure
- Select
-
In the Signal Policies panel, select the New
Signal Policy icon .

-
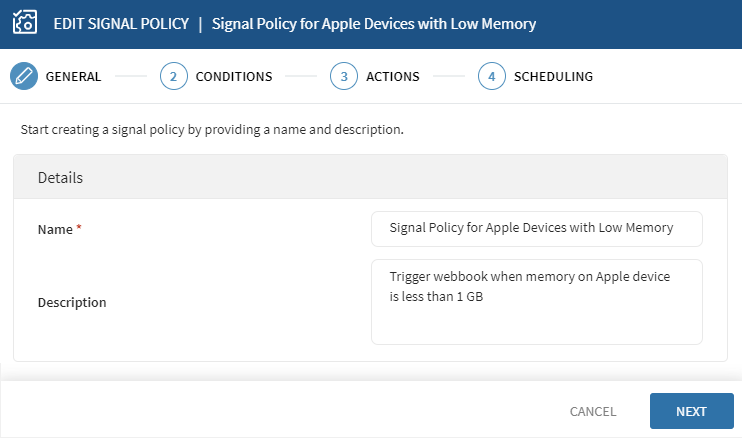
In the General tab of the Create Signal
Policy panel, enter a Name and
Description for the signal policy and select
Next.
-
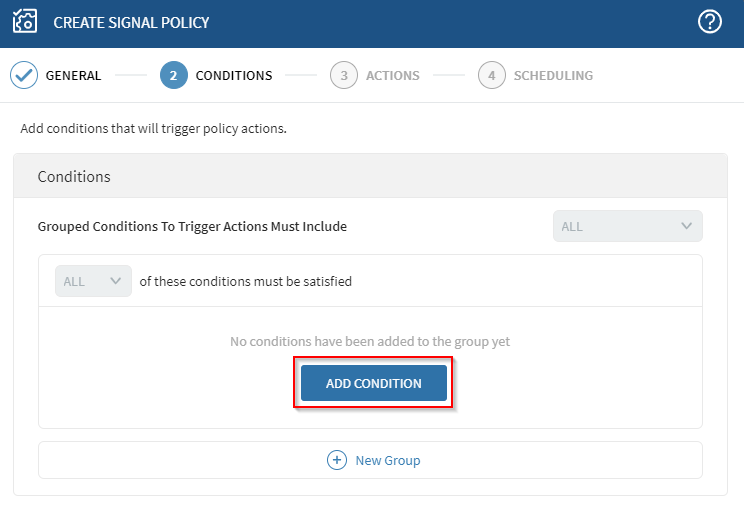
In the Conditions tab of the Create Signal
Policy panel, select Add Condition.
-
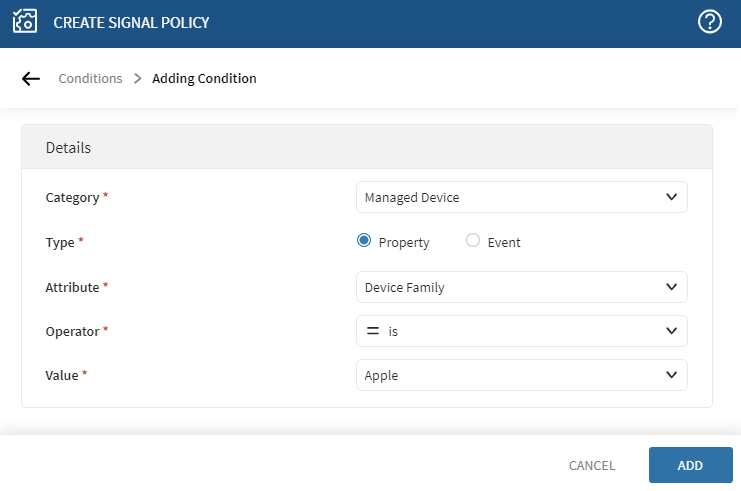
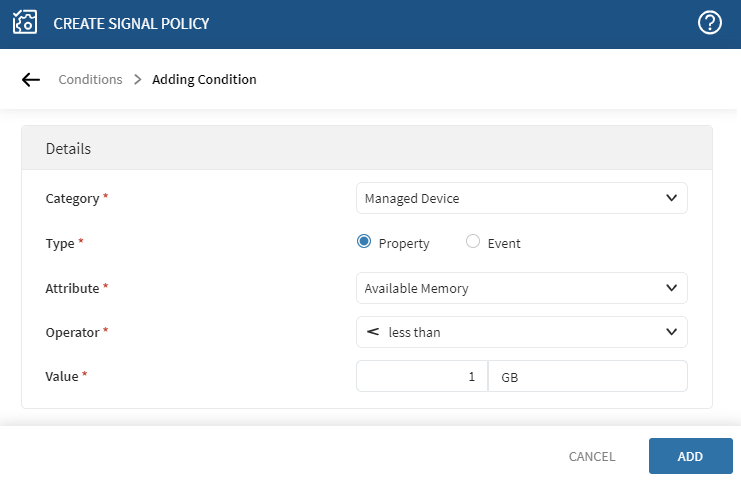
In the Adding Condition panel, enter the conditions that
trigger the signal policy. In this example, the signal policy must detect when
Apple devices have less than 1 GB of memory. This step adds a condition to
filter Apple devices.
-
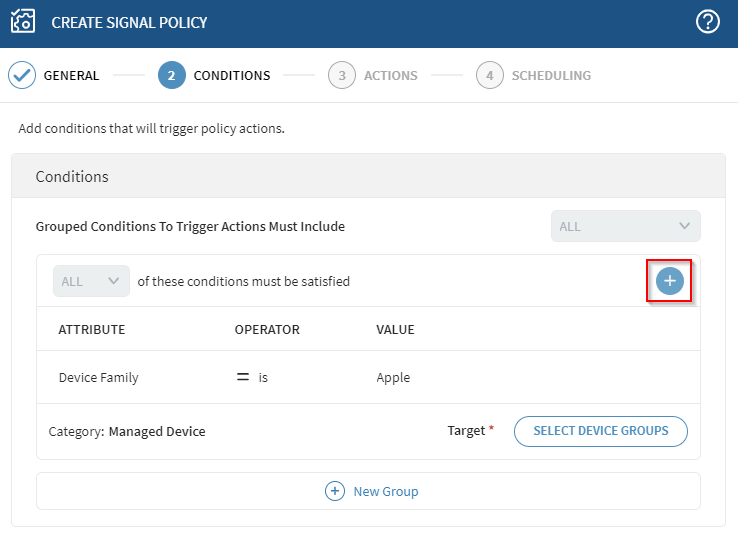
In the Conditions tab of the Create Signal
Policy panel, select the Add
icon to add another condition. This
condition detects devices with less than 1 GB of available memory. This
condition, together with the previous one creates a signal policy that detects
when an Apple family device has less than 1 GB of memory.
-
Select the values as displayed below and select
Add.
 Note: You can add conditions to create more complex signal policies.
-
The Conditions tab of the Create Signal
Policy panel lists the conditions you have added.
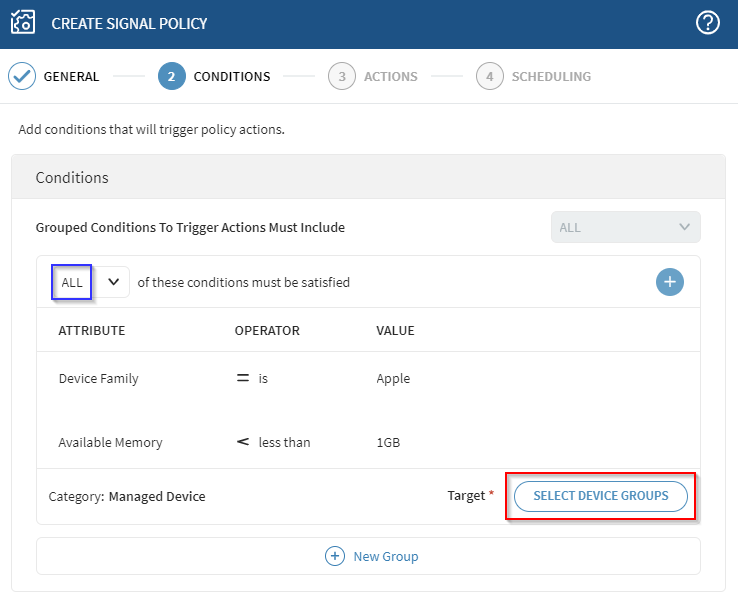 Note: In the blue box, All conditions must apply for the signal policy to trigger. You can change this to Any to make the signal policy trigger when any of the conditions apply.Specify a target group of devices to apply the signal policy to by choosing Select Device Groups.
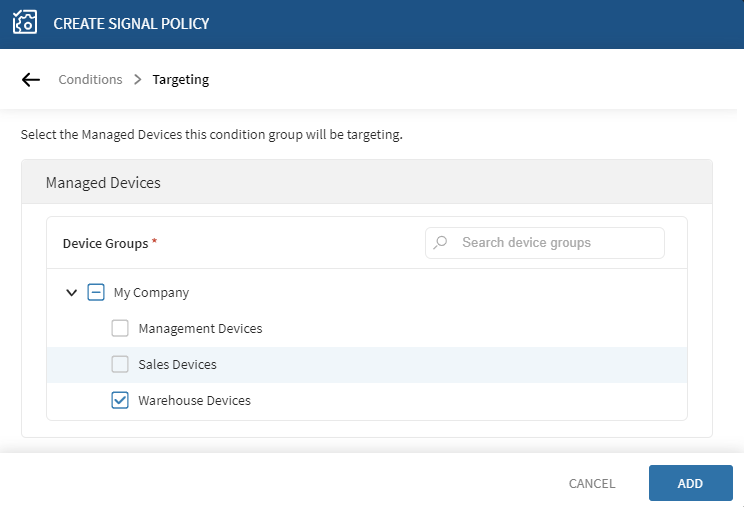
- Select Add to add the device group and then select Next in the Conditions tab of the Create Signal Policy panel.
-
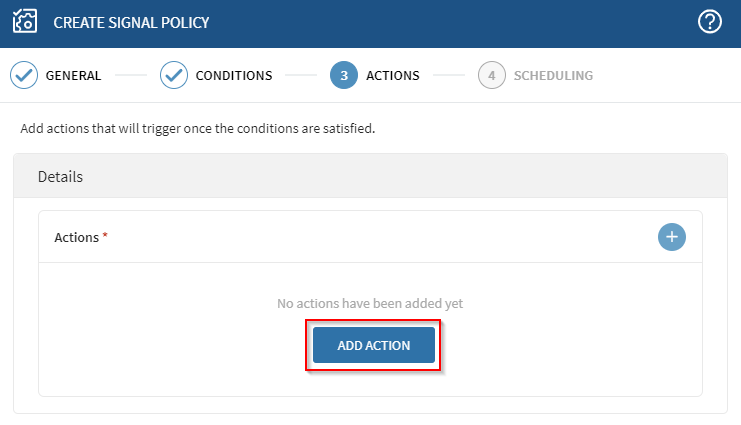
In the actions tab of the Create Signal Policy panel,
select Add Action.
-
In the Adding Action panel, select Trigger
Webhook from the Action drop-down list.
Select the Webhook for this policy to trigger. Enter a
Subject for the signal policy. Select the attributes
from the Source Attributes table to include in the webhook
payload. Use the search bar to find specific device attributes. Select
Add.
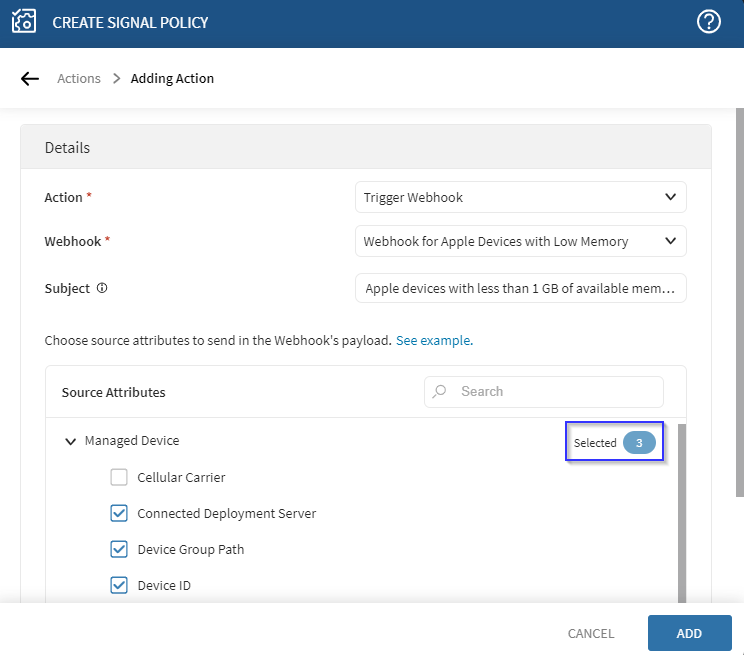 Note: When using the search bar to find device attributes, the Selected value in the blue box may change based on the attributes returned in the search.Note: A signal policy can choose from several different types of actions. Refer to the following table of signal actions from the Adding Signal Policy Actions section:
Option Description Send Script Important: This selection only applies to conditions that include managed devices. Starting version 2024.1.0, SOTI MobiControl has a Device Initiated option to enable device side evaluation and execution of Legacy scripts on supported devices. See Configuring Signal Policy Settings - Device Side Evaluation.Send the following types of scripts to devices when the action triggers:
- Legacy
- JavaScript
- PowerShell 32-bit Compatibility
- PowerShell Native
Choose a script from the Execute Following Script list, then select its delivery method.Note: The Execute Following Script list populates from the Manage Scripts dialog box comprising earlier saved scripts. See Manage Scripts and Sending Scripts to Devices.Send Email Send an email alert to recipients indicating the policy triggered. Add email contacts to the To, CC, and BCC fields.Important: Separate the addresses with a semicolon, and do not space them.Use the Macro button in the Subject and Message fields to add dynamic information, such as Device ID or Policy Name to the email.
Send Message Send a message directly to devices that the policy triggers. You can limit the message's Display Duration on the devices and choose a Type of message, such as Error or Warning.
Relocate Device Automatically move devices that trigger the policy from their current device group to another of your choice.
Trigger Alert Drive an alert to the SOTI MobiControl notification panel.
Use the Macro button in the Alert Title and Message fields to add dynamic information such as Device ID or Policy Name to the alert.
Trigger Webhook Send automated JSON or XML data to a URL when the policy triggers. From Webhook, select a predefined webhook. Specify a Subject for the destination URL and select Source Attributes to include it in the payload. Important: You can define webhooks in . See Using Signal Policies to Trigger Webhook Actions for information on using a Signal policy to trigger a webhook. -
In the Actions tab of the Create Signal
Policy panel, a summary of the added actions displays. Select
Next.
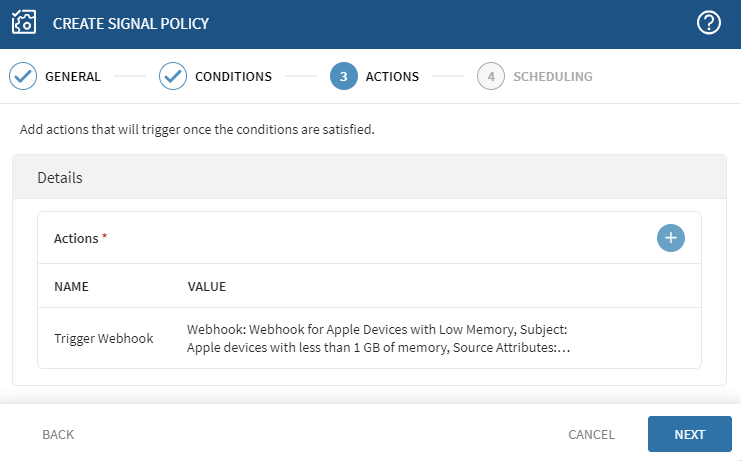 Note: You can make the signal policy trigger more actions by selecting the Add icon.
-
In the Scheduling tab of the Create Signal
Policy panel, specify when the signal policy is in effect. Select
Always to put the signal policy in effect immediately
and indefinitely. Select Custom to specify the days and
time during each week that the signal policy is in effect. In this example, the
signal policy is active every Tuesday and Friday from 8:00 AM to 10:00 PM.
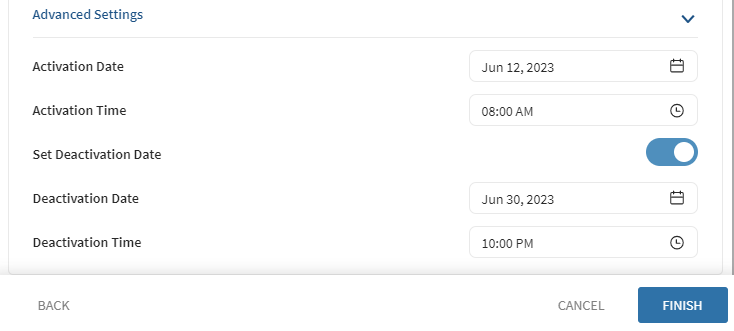
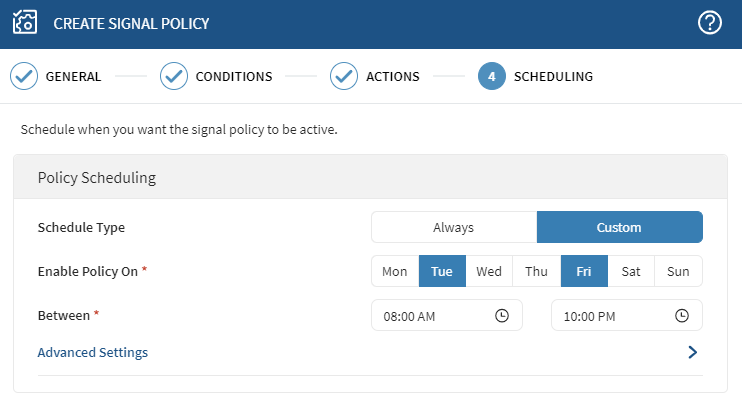 Note: The default activation date and time when selecting Always as the Schedule Type is the date and time of the creation of the signal policy. By default, the deactivation date is not set, so the signal policy is in effect indefinitely.In the Advanced Settings part of the Scheduling tab, you can set activation and deactivation dates and times. If the optional Set Deactivation Date is not set, the signal policy remains in effect indefinitely. You can deactivate the policy by editing the policy and adding a deactivation date and time, or by deleting the signal policy.In the example below, the signal policy is in effect from 8:00 AM on June 12, 2023 to 10:00 PM on June 30, 2023.
-
Select Finish to complete the creation of the signal
policy. The newly created and activated signal policy displays in the
Signal Policies panel.
