Adding a User Role and Granting Permissions
Before you begin
About this task
Procedure
- From the SOTI Connect main menu select Users and Permissions. The Users and Permissions view opens, with the Roles tab selected.
- In the left pane, select the Create New Role.
- In the Create New Role dialog box, enter a unique name for the role.
- Select Save. The new role appears in the left pane.
Results
What to do next
- Add general permissions to the role.
- Add device group permissions to the role.
Adding General Permissions to a Role
About this task
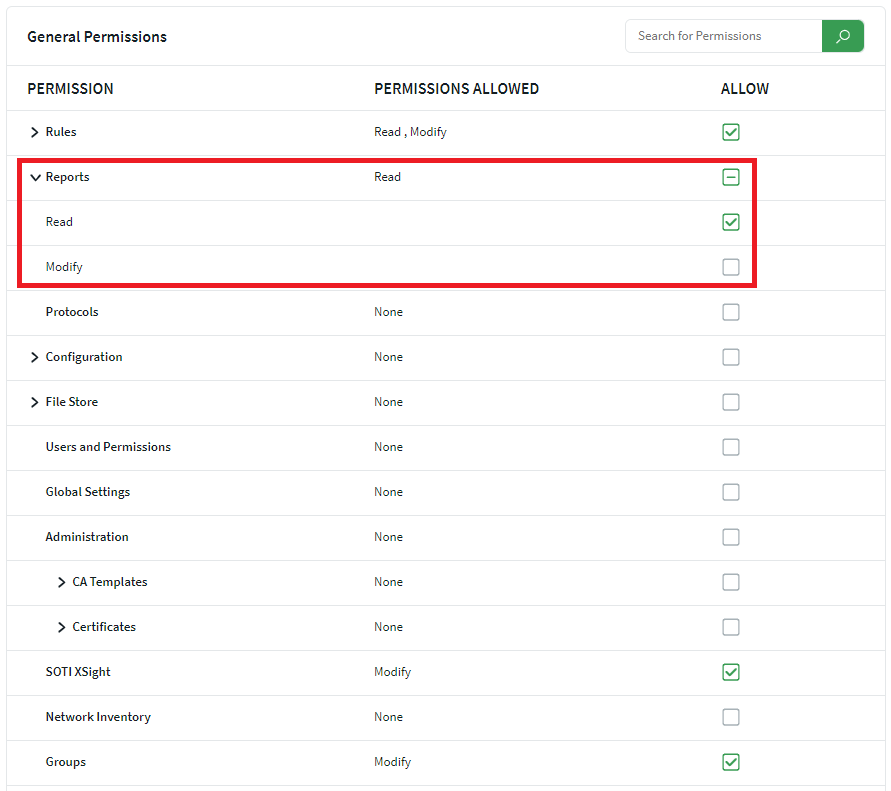
Note: A dash (–) in a parent node check box (for example, Reports) indicates
that some but not all child permissions are selected. In the example below,
"Read" is enabled, but "Modify" is not.
Procedure
- In the left pane, select the role you created.
- Select General Permissions. The General Permissions view appears on the right side of the screen.
-
Select the Allow check boxes beside the permissions you want to
assign.
Note: Some permissions include both Read and Modify options.
- Select Save.
Results
Adding Device Group Permissions to a Role
About this task
Note: By default, all new roles are assigned to All
Device Groups with basic "Read" and "Enroll/Unenroll" permissions.

Procedure
- In the left pane, select the new role you created.
- Select Device Group Permissions. The Device Group Permissions view opens on the right side of the screen.
- In the Device Groups area, select the check boxes beside the device groups and sub-groups you want to assign to the role. For example, select the "Manufacturing" subgroup within the "My Company" device hierarchy
- In the Permissions area, select the check boxes beside the capabilities you want to assign. For instance, you can grant "Read" and "Enroll/Unenroll" permissions for devices in the "Manufacturing" group.
- Select Save.