Outbound Email
About this task
Configure settings related to sending emails from SOTI XSight to the incident reporter and assignee when creating or updating incidents, providing information and updates related to incidents.
Note: To send and receive emails through Office 365 integration, you need to
configure, and obtain information from Microsoft Exchange Server (see Configuring Microsoft Exchange Server).
Procedure
- Login to the SOTI XSight web console as administrator.
- From the main menu, select
- Toggle Enable outbound emails.
-
In the Sender's Email dropdown menu, select
Add New Email.
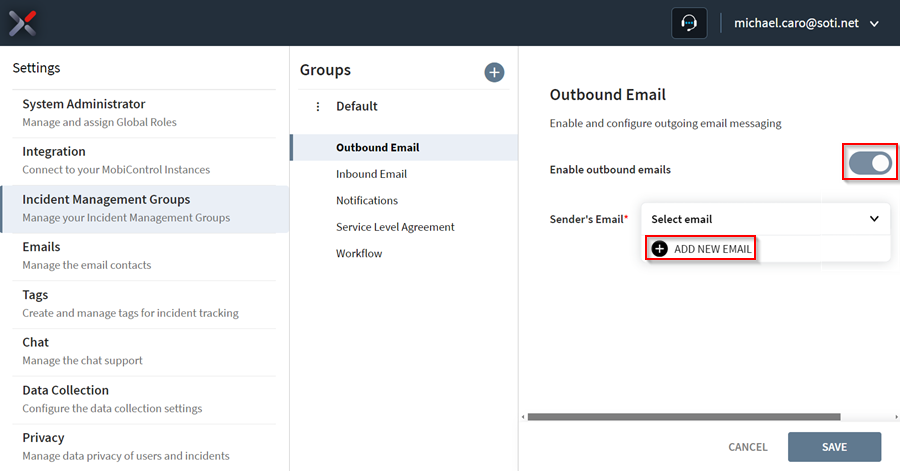 Note: All currently configured outbound email contacts are available in the Sender's Email dropdown menu.
 -
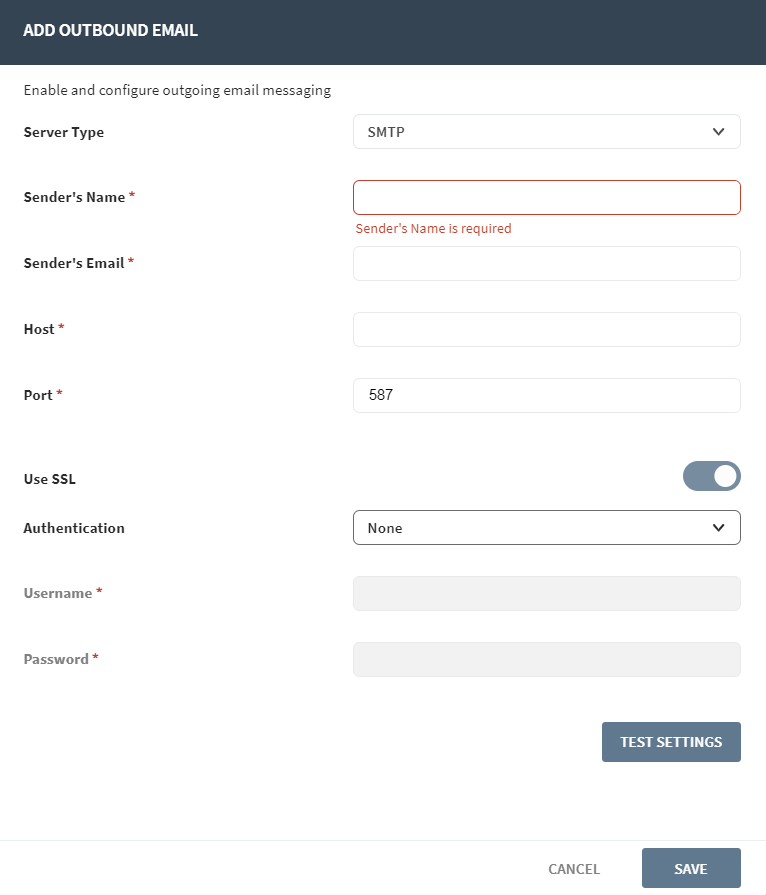
Configure the outbound email settings in the Add Outbound Email panel.
 Note: Use the following table to configure the outbound email settings.
Server Type Select the outbound email server type from the drop-down list: "SMTP" or "Office 365." Most fields in this section change depending on the server type you have selected. Sender's Name Appears for "SMTP." Enter the name to appear in the From field of emails. For example: "SOTI Support." Sender's Email Enter the address to send emails from. For example, "support@soti.net." Host Appears for "SMTP." Enter the hostname of the SMTP server to send emails. Port Appears for "SMTP." Enter the port used to send emails. Note: The default SMTP port is 25.Use SSL Appears for "SMTP." Toggle on to use secure communication with the SMTP server. If you select this option and the SMTP server does not support SMTPS, sending an email from the incident details view returns an error.
If you do not select this option, communication is secured using transport layer security if it is available on the SMTP server. If it is not available, the communication is not secured.Authentication Appears for "SMTP." Select the method to authenticate on the SMTP server: None (default) or Login. Username Appears for "SMTP." If you selected the Login authentication option, enter the username to authenticate on the SMTP server. Password Appears for "SMTP." If you selected the Login authentication option, enter the password to authenticate on the SMTP server. Client ID Appears for "Office 365." Enter the Client ID value you have obtained when registering with Microsoft. Tenant ID Appears for "Office 365." Enter your Microsoft Tenant ID. Client Secret String Appears for "Office 365." Paste the Client Secret value you obtained when registering with Microsoft. Test Settings After saving changes, select this button to send a test email using the current configuration. Errors (if any) display on the screen. - Select Test Settings to send a test email using the current configuration. Any errors display on screen.
- Select Save.