Configuring a Certificate Template
Before you begin
About this task
Procedure
- From the SOTI Connect main menu, select Administration.
- In the left pane, select Device Certificates and Certificate Authorities.
-
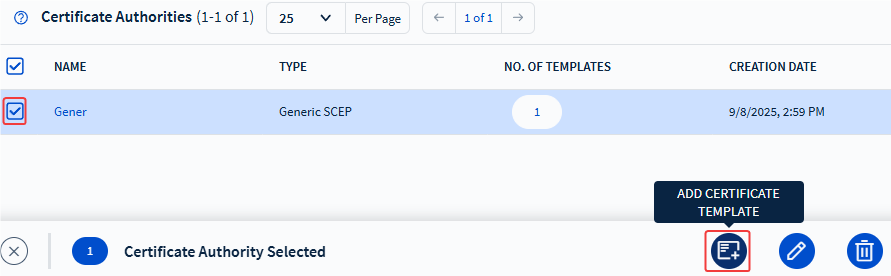
Select your configured Certificate Authority, then select Add Certificate
Template.
-
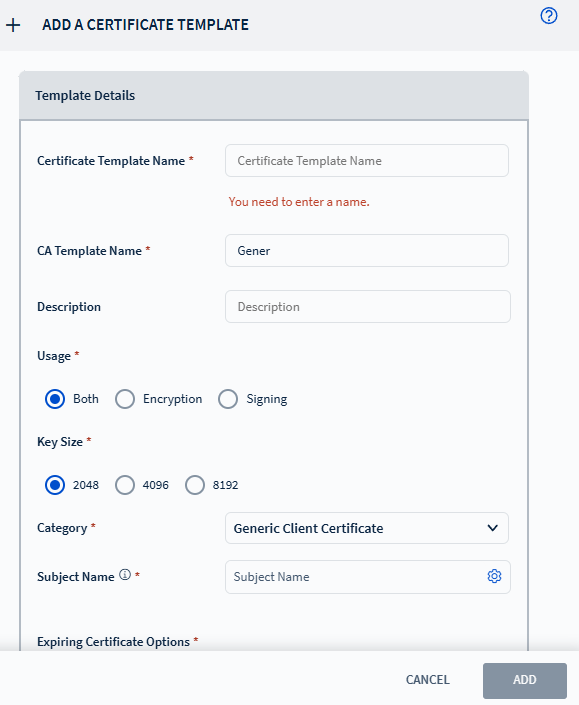
The Add a Certificate Template window appears.
-
Fill in the certificate template fields:
Certificate Template Name Enter a descriptive name for the template. CA Template Name The name of the CA template used as a base (fixed value). Description Describe the purpose and features of the template. Usage Choose the intended purpose of the certificate: - Both: For encryption and acceptance purposes.
- Encryption: For encryption purposes only.
- Signing: For signature authentication only.
Key Size The key size of the certificate. Choose from: - 2048
- 4096
- 8192
Category The category of devices this certificate applies to: - Generic Client Certificate: Use this when the other categories do not apply.
- MQTT Client Certificate: Use this when the MQTT server is configured to require MQTT certificates.
- HTTP Client Certificate: Use this when connecting to an HTTP server requires a certificate.
- Wi-Fi Client Certificate: Use this when connecting to a Wi-Fi network requires a certificate.
Subject Name Specify the subject name. You can include macros as part of the subject name to automatically populate with helpful identifiers. Only one identifier can be included in the name. Use additional Subject Name to apply more. Note: Your subject name should always begin with cn=.For example, cn=General_Template is a valid subject name, but General_Template is not.
Additional Subject Name Use additional subject names to offer further specificity when applying identifiers to a subject name through the certificate. Note: Additional subject names should always begin with User Principle Name=.For example, User Principle Name=Add_Sub_Name1 is valid, but Add_Sub_Name1 is not.
Expiring Certificate Options Choose how expiry is handled: - None: Expires without auto renewal or notification.
- Autorenew: Certificate is automatically renewed and deployed without administrator intervention. The certificate auto renews after a set amount of days before it expires, as you define in the Days Before Autorenew field. Autorenew Deploy After lets you set the clock time after which the certificate deploys, allowing you to schedule the deployment for less busy times of the operational day.
- Notify: Certificate renews automatically (but not automatically deployed) a certain amount of days before the certificate is set to expire, as you define in the Days Before Autorenew field.
Certificate File Deletion Deletes the certificate file but keeps the file history. Choose from: - Never
- On Deploy
- Scheduled
Subject Alternative Names Adds Subject Alternative Name. Specify the Common Name (CN) of the certificate in the subject name field, or add DNS name as subject alternative name. Note: Starting with SOTI Connect 2025.0.2 Subject Alternative Names is a mandatory field. - After filling in all fields, select Add to create the certificate template.