Creating an Enrollment Policy for a Directory/Federated Type Enrollment
Before you begin
Important: This article is for Windows desktop
devices running Supported Windows Versions for Windows Modern Desktop. For
instructions on enrolling devices running other versions of Windows, see Adding Windows Devices.
CAUTION: Do not manage Windows Modern Desktop
devices using an additional EMM, MDM, or
UEM
solution.
Restriction: Microsoft
Entra ID (Azure AD) IdP user groups can not be added directly for enrollment. To
enroll Entra ID users, create an enrollment policy using the Azure AD Join
(Cloud/On-Prem) method. See Enrolling with Azure Active Directory Join (Cloud) or Enrolling Windows Modern with Microsoft Entra Join (On-prem) for more details.
About this task
Note: The
users enrolling their devices must be members of the LDAP/ IdP user group. Users are
part of every enrollment policy involving an LDAP/ IdP group of which they are a
member. Its associated Enrollment Policy PIN defines which enrollment policy applies
during enrollment.
Procedure
- From the main menu in the top-left corner, select . The Enrollment Policies view displays.
- Select New Enrollment Policy. The Enrollment Policy wizard launches.
- Select the platform. The General tab displays.
- On the General tab, enter a name and description for the policy. Make the name brief and informative to distinguish it from others, especially if you plan to create many enrollment policies.
- Select Next. The Enrollment Type tab displays.
- From Enrollment Type, select Directory/Federated.
- Select Next. The Groups view displays.
-
From the Groups view, select to add an LDAP/ IdP user group.
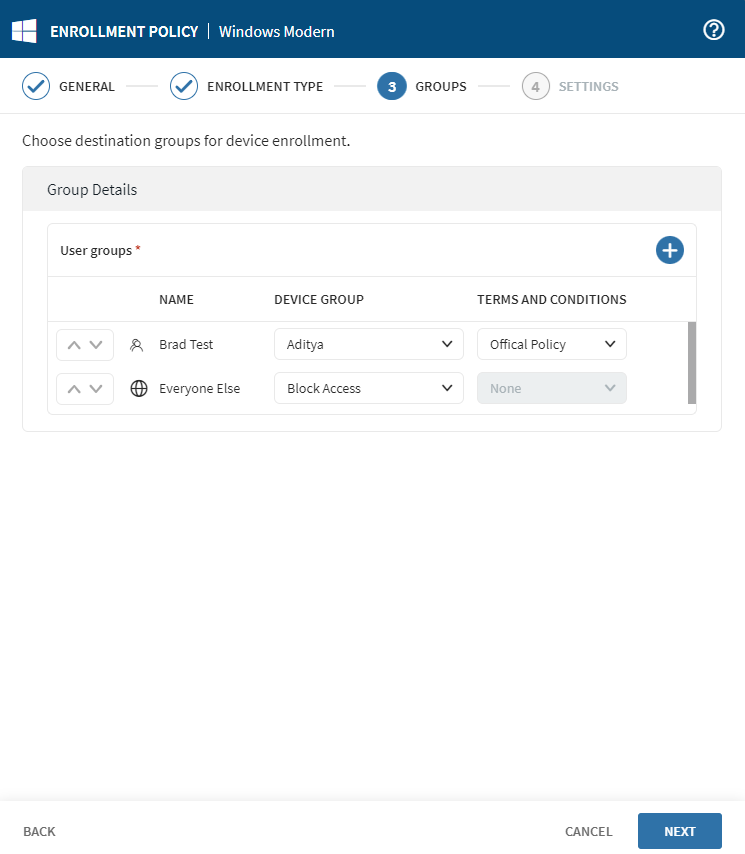
-
For each group, select a Device Group destination for
enrollment or select Block Access to prevent a user group
from membership in a device group under this policy.
Tip: If necessary, users have the option to set up a terms and conditions policy for their respective user groups in this section.
-
Select Next. The Settings view
displays.
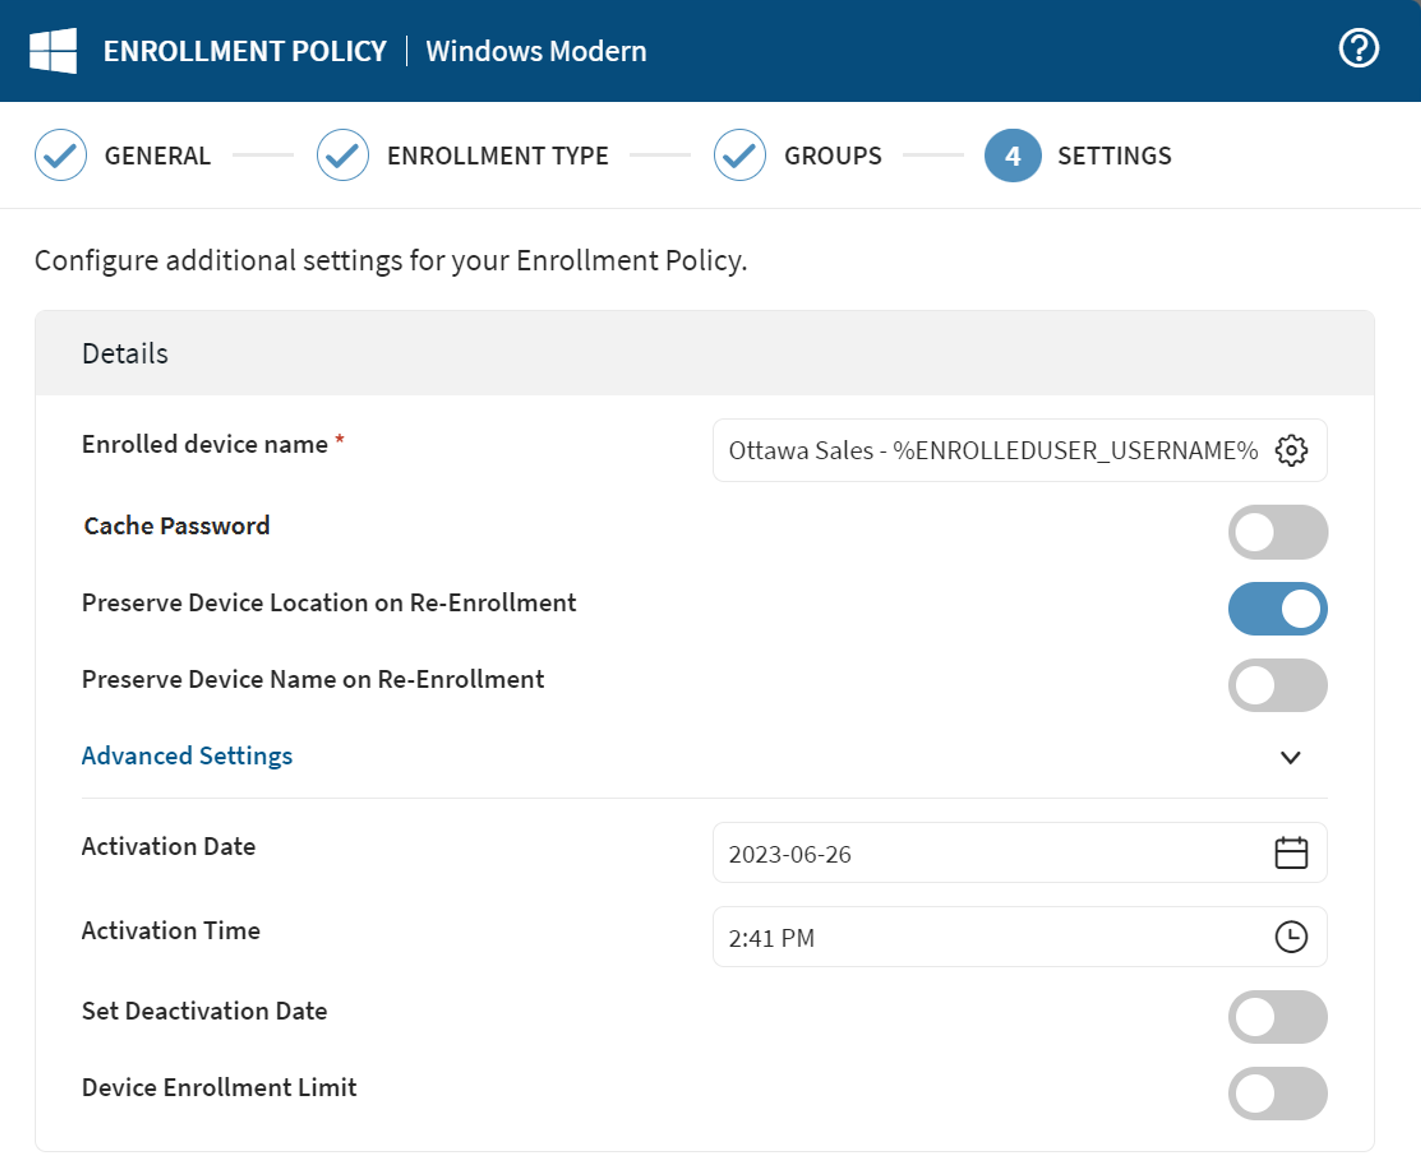
-
Update the settings as required.
Enrolled Device Name Select an identifier for the device. Select the gear icon to insert macros to autofill portions of the device name.
Example: The following example shows device naming using the Enrolled User Username (
%ENROLLEDUSER_USERNAME%) macro to generate device names like Ottawa Sales - sarah.
Cache Password Caches the LDAP/ IdP password entered by the device user during enrollment for 10 minutes. During this time, profiles targeting the device with configurations requiring account credentials (Email, VPN, WiFi, etc.) include the cached password in the configuration. This avoids repeat prompting for the same credentials. Preserve Device Location on Re-enrollment SOTI MobiControl remembers the group membership of the device when it is re-enrolled. Preserve Device Name on Re-Enrollment When a deleted device is re-enrolled, SOTI MobiControl remembers the deleted assigned device's name. Activation Date Specify the date that activates the policy. Activation Time Specify the time that activates the policy. Set Deactivation Date Specify the date and time to deactivate the policy. Device Enrollment Limit Set the maximum number of devices you can enroll using this enrollment policy. Note: You must enable Enrollment Restrictions to set a device enrollment limit. -
Select a certificate authentication authority. Select
Next.
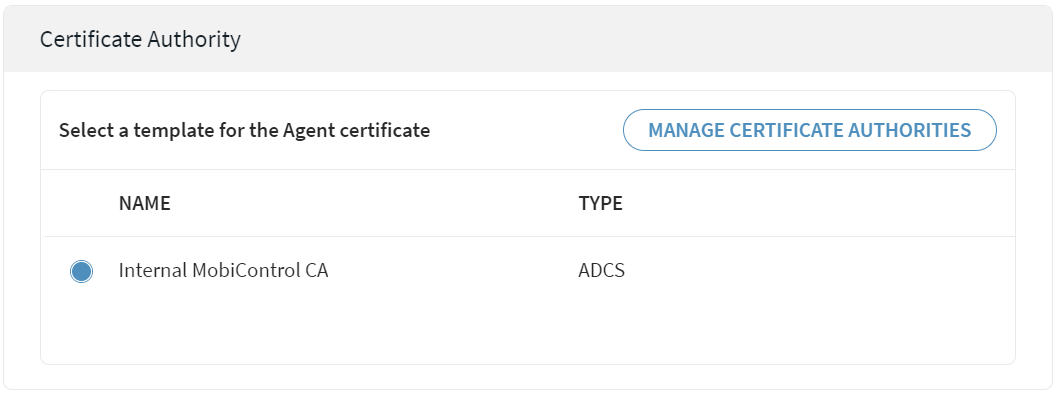 Tip: To add or update a certificate authority, select Manage Certificate Authorities. See Certificate Authority Page.
 - Select Finish. The Enrollment Policy Info window opens.
-
Copy the MDM server URL and Enrollment Policy PIN required for distribution to
users.
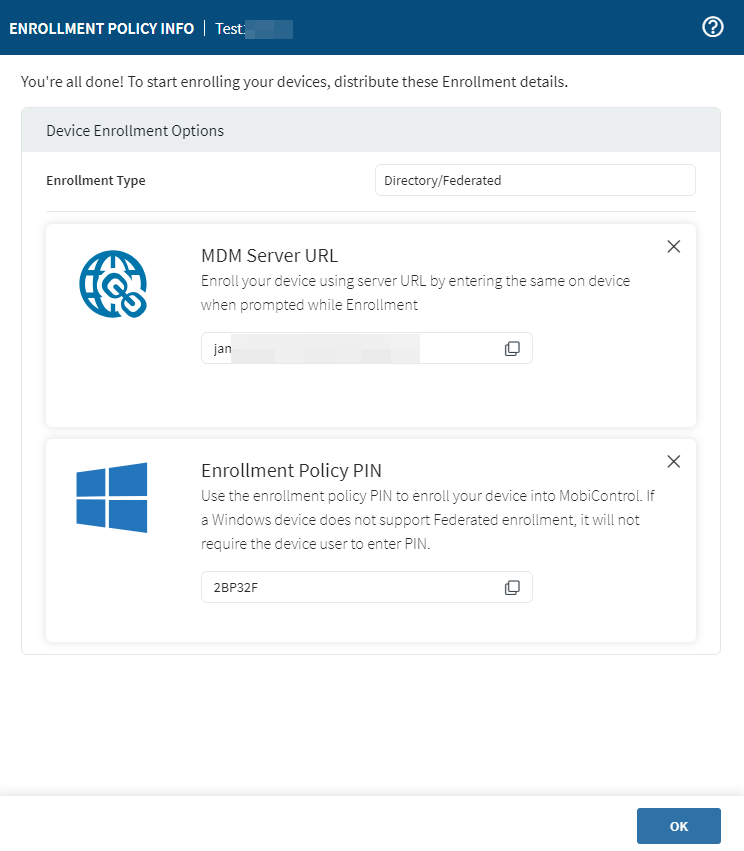
- Select Ok.
Results
Your Windows Modern Desktop enrollment policy is complete.