Setting Up HiveMQ for MQTT Device Brokering
Before you begin
Ensure you have the following:
- Latest version of HiveMQ server
- Installed SOTI Connect
- Installed MQTT Certificates (these are installed during SOTI Connectinstallation)
- Text editor software (Notepad ++ or similar)
- Keystore creation tool (Portecle or similar)
- Java Runtime Environment (JRE) 8+
- Java SE Development 11+
- Open JDK11(GA) (https://jdk.java.net/archive/)
About this task
HiveMQ is an enterprise-ready, publically hosted MQTT broker that acts as a connection tool between your MQTT devices and SOTI Connect. Other than the trial version, there are three versions of HiveMQ that users can download. For more information on HiveMQ, visit https://www.hivemq.com/hivemq/editions/. Contact sales for more information on installing an enterprise solution of HiveMQ.
We recommend using Hive MQ Professional edition for long-term use or using the HiveMQ Community edition if you want to test the broker first.
There are three security options that you leverage for communication between SOTI Connect, HiveMQ, and OEM Devices:
- Insecure TCP: no security features
- Server-side TLS: client only validates if server certificate is correct.
For SOTI Connect, the certificate signed by the Root CA
provided when adding the MQTT PA will be validated.Important: The sample procedure documented in this topic demonstrates server-side TLS.
- TLS with Client Certificates: the server certificate is validated and the client must provide a valid certificate signed by the same authority as the server certificate.
Procedure
-
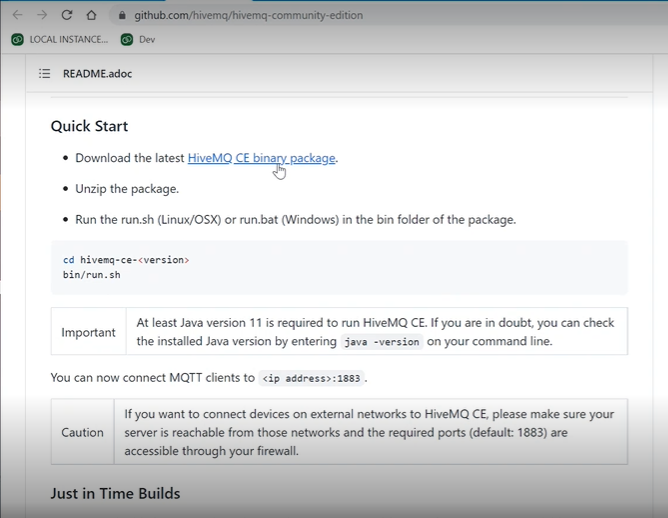
Download and install HiveMQ.
For manual installation, you can download HiveMQ files at https://github.com/hivemq/hivemq-community-edition. Scroll to the Quick Start section of the page and download the binary package:
For installation as a Windows service, you can download HiveMQ files at https://hivemq.com/additional-software/hivemq-windows-service.zip.
- Navigate to your SOTI Connect Certificate folder (this can be found in Program Files\SOTI\Connect\MQTT Certificates)
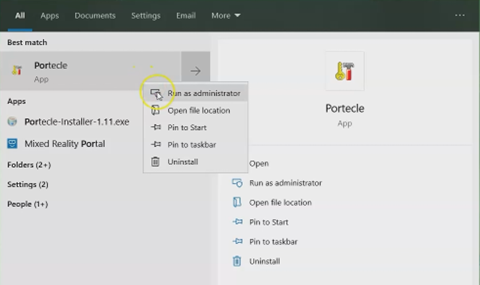
-
Run Portecle as an Administrator.
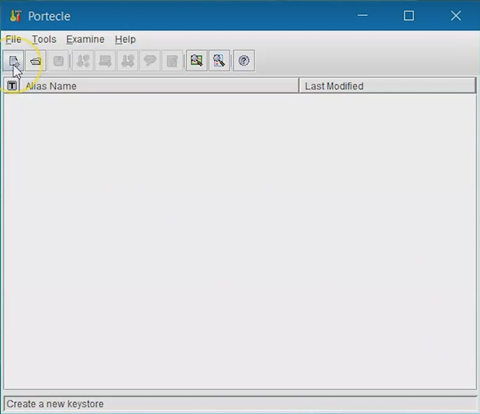
-
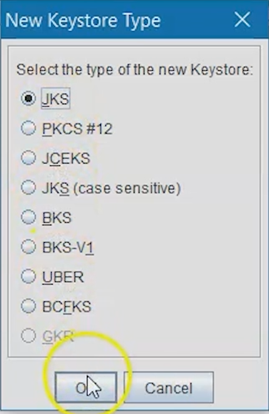
Click the New Keystore Type button and ensure you select
JKS as the Keystore. Click
OK.
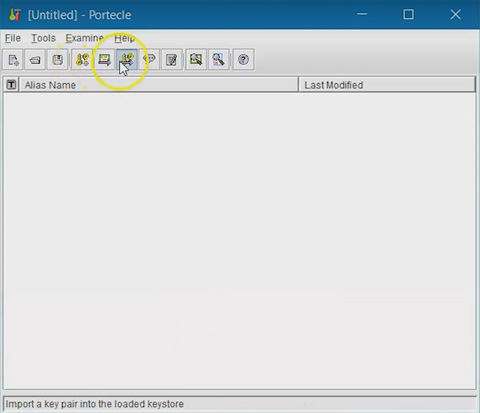
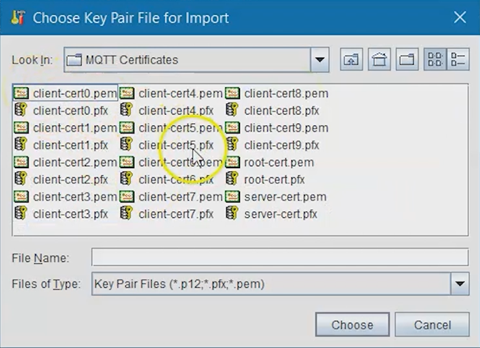
-
Click the Import Key Pair button and navigate to the
SOTI Connect Certificates folder. Select the file
called server-cert.pfx, then click
Choose.
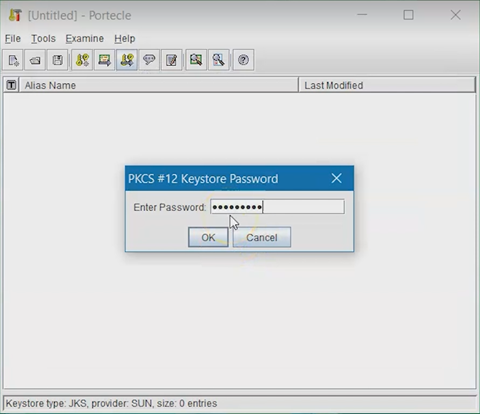
-
Enter the password for your MQTT certificate. You established this in the
SOTI Connect install process, then click
OK.
- Confirm the password and Key Pair.
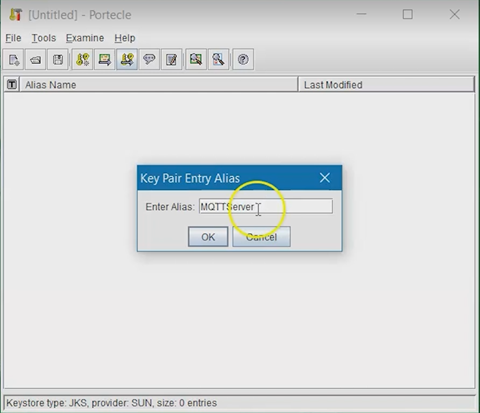
-
Enter an Alias for your Key Pair, then click
OK.
-
Enter a new password for this Key Pair.

-
Select the Key Pair and select the Keystore
password. Write your desired password (this password will be
used by the HiveMQ Server).
-
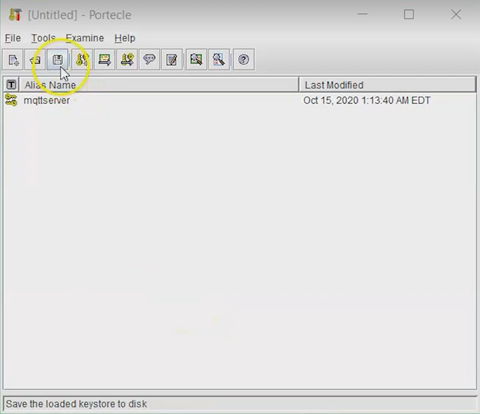
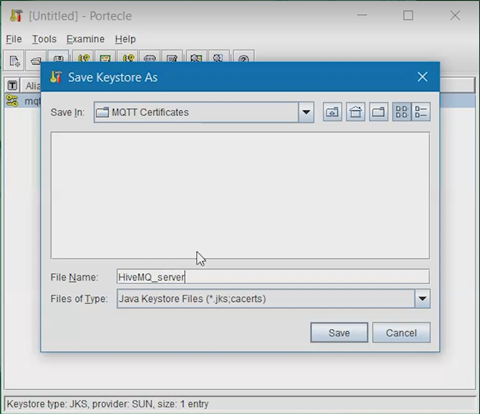
Name the Keystore, then click Save.
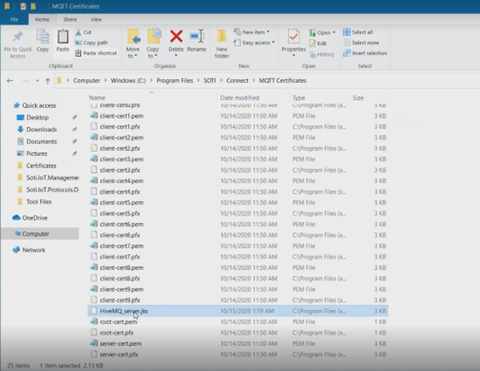
-
Navigate to your SOTI Connect MQTT Certificates
directory. Find the Keystore file and copy it.
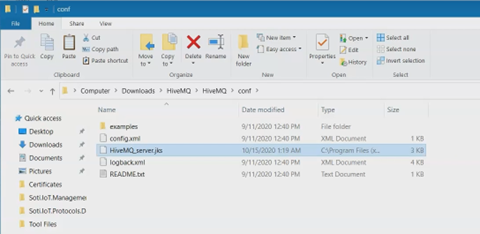
-
Navigate to your HiveMQ\conf folder and paste the copied
file into the folder.
-
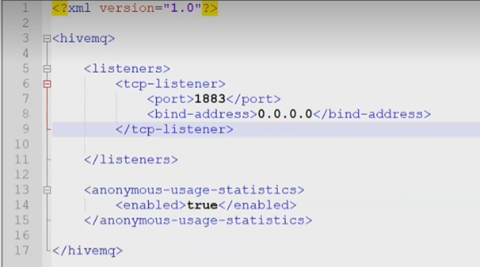
Open the config.xml file in the conf
directory with Notepad++ or a similar app that allows you to edit the xml.
Inside the xml file, you will see the default configuration and the file that
only contains the unsecured TCP listener on port 1883.
-
15. Create a TLS Listener on Port 8883. This will use the Java Keystore you
previously created.
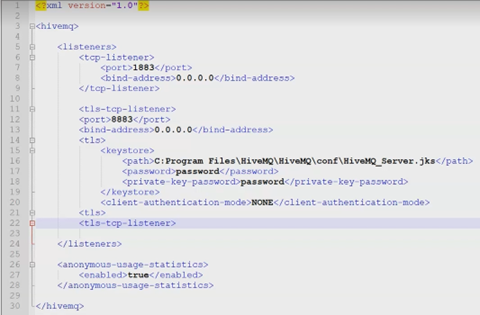
<tls-tcp-listener> <port>8883</port> <bind-address>0.0.0.0</bind-address> <tls> <keystore> <path>.conf/HiveMQ_MQTT.jks</path> <password>JKS_Password</password> <private-key-password>PrivateKey_Password</private-key-password> </keystore> <truststore> <path>.conf/HiveMQ_MQTT.jks</path> <password>JKS_Password</password> </truststore> <client-authentication-mode>NONE</client-authentication-mode> </tls> </tls-tcp-listener> - Ensure that the path is accurate and enter the password for the Java Keystore and the password for the Connect servers’ Private Key. Client authentication mode should be set to None as this is only used for TLS with client. Save the config file.
-
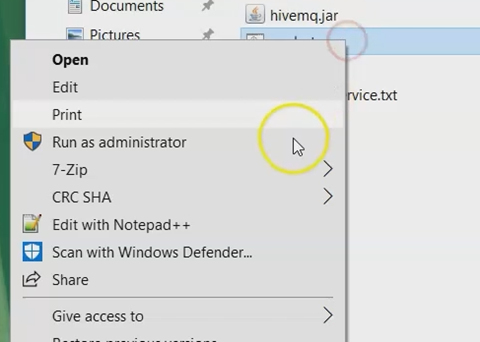
Navigate to the HiveMQ directory and open the bin sub-directory.
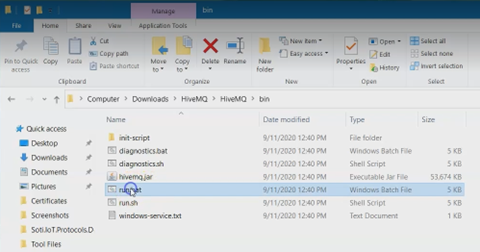
-
Run the run.bat file as administrator to start the
server.
 Your HiveMQ server is now connected to your SOTI Connect instance.
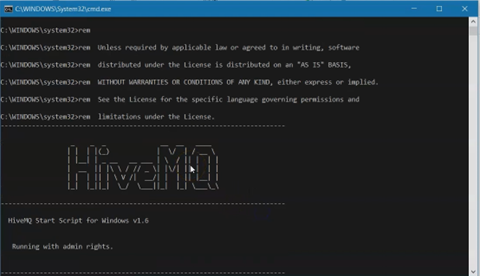
See also: