Uploading a File to the Content Library
Before you begin
About this task
Upload files to the Content Library.
Procedure
- There are several ways to reach the Content Library. In this example, select . The legacy console opens.
- From either the Android Plus or Apple platform tab, select the Content Library tab.
-
From Folders and Files, select Upload New
Files. The File Upload dialog box opens
(see File Upload).
Note: You can also drag files directly from your file explorer into the Content Library to open the File Upload dialog box.
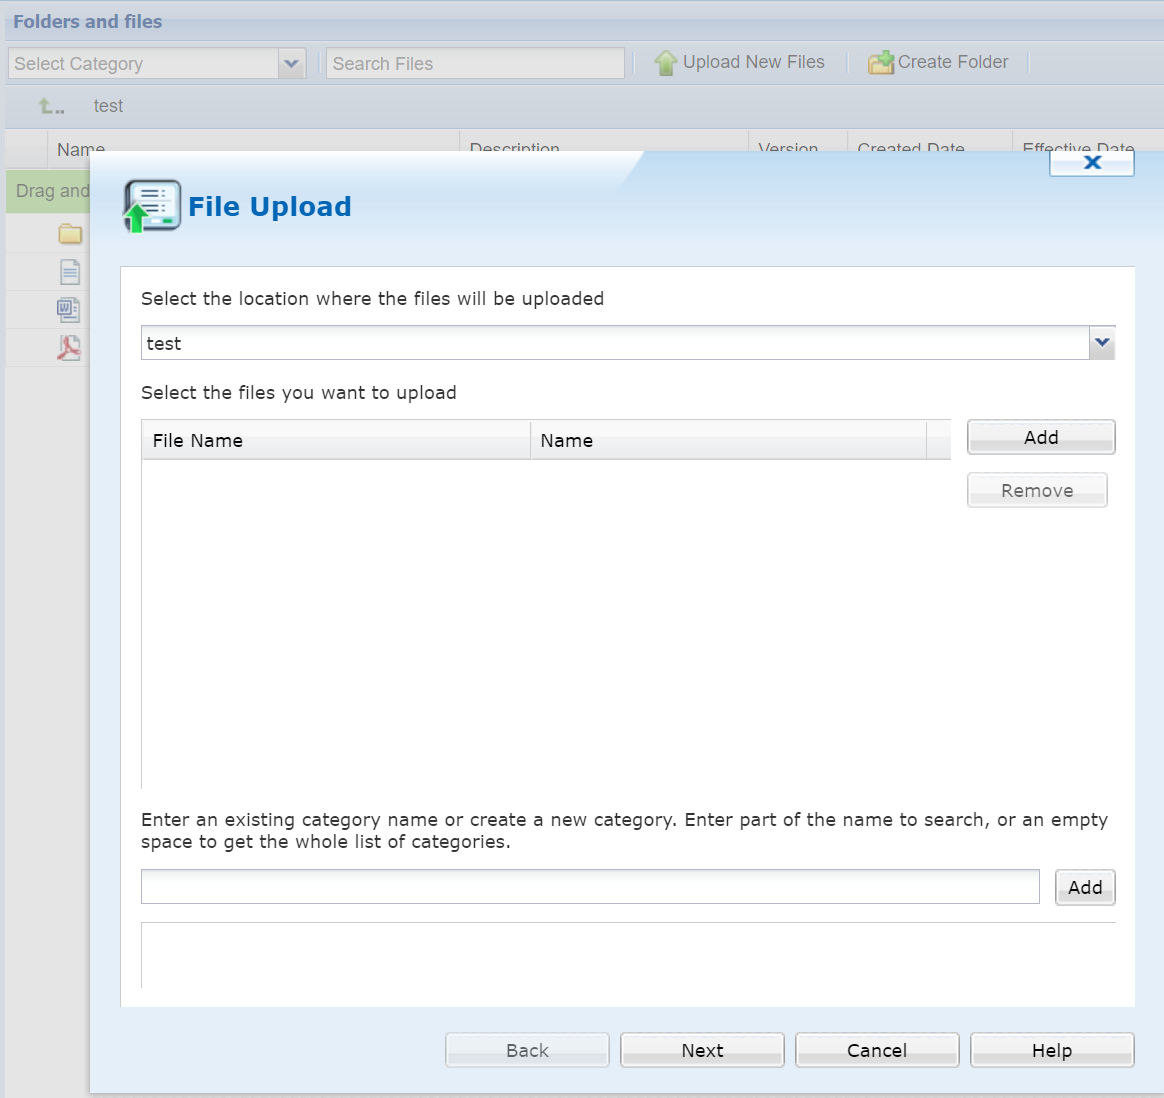
- From Select the location where the files will be uploaded, choose the library to store the files.
- Select Add to browse through your file system to select a new file or files.
- Optional: You can use categories to label the files you upload. To add a category, enter its name and select Add.
- Select Next.
-
Set the following for the selected file or files.
Effective Date Set a date for when the file selection goes into effect. Expiry Date Set a date for when the file selection expires. Note: Files with expiration dates are unavailable to device users after the date passes.Delivery Method Choose a file delivery method. Choose from:- On Demand
- Push
- WiFi
- Ethernet (macOS only)
- Cellular (Android or iOS only)
- While Roaming
Security Note: These settings are available for iOS only.SOTI MobiControl defaults to the most secure file settings. You may permit some file uses. Choose from:- Allow Sharing
- Allow Cut/Paste
File Description Enter a description about the file selection upload. - Select Finish to upload the file(s) to the deployment server.
Results
Uploaded files appear in the main Folders and Files section of the Content Library.