Configuring SOTI Connect Components
Before you begin
- Make sure the SOTI Connect Installer version matches the version of SOTI Connect installed.
- Close all running Windows Services and Task Manager applications.
- Use the same database connection credentials (for example, SQL Server address,
username, and password) across all machines when updating components as the ones
used during installation. Important: Credentials are case-sensitive. Mismatched casing may cause errors in the Logging Service startup.
About this task
Procedure
- Extract the SOTI Connect installation package (.zip file) to a temporary folder.
- Double-click the SOTI Connect Installer.exe and select allow changes to the system when prompted.
-
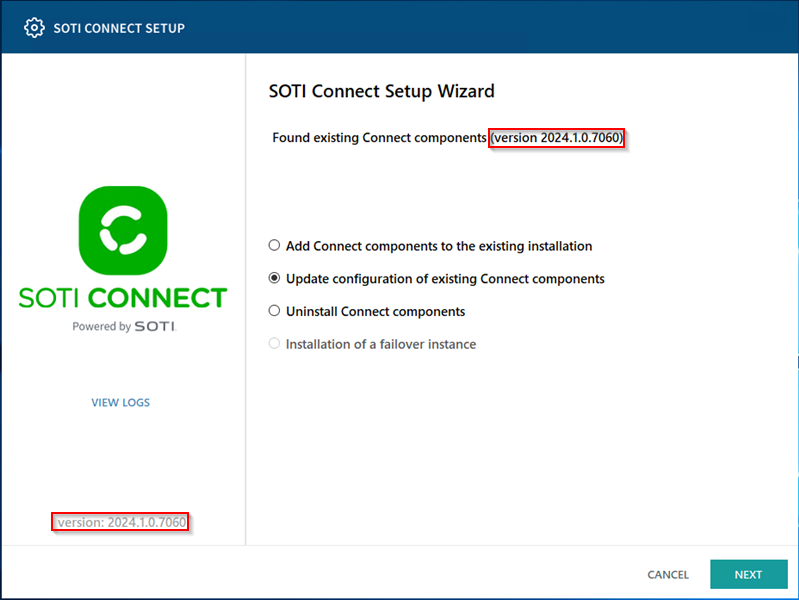
In the Setup Wizard, select Update Configuration of Existing Connect
Components, then select Next.
-
On the Select Components screen, choose the components you want to update/
reconfigure, then select Next.
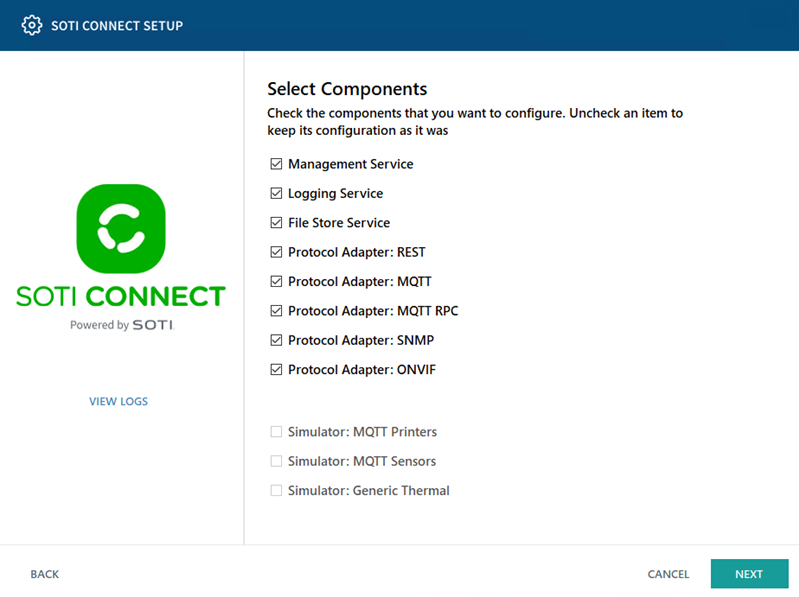 Tip: All installed components are pre-selected. Deselecting a component does not uninstall it; unselected components remain unchanged.
 -
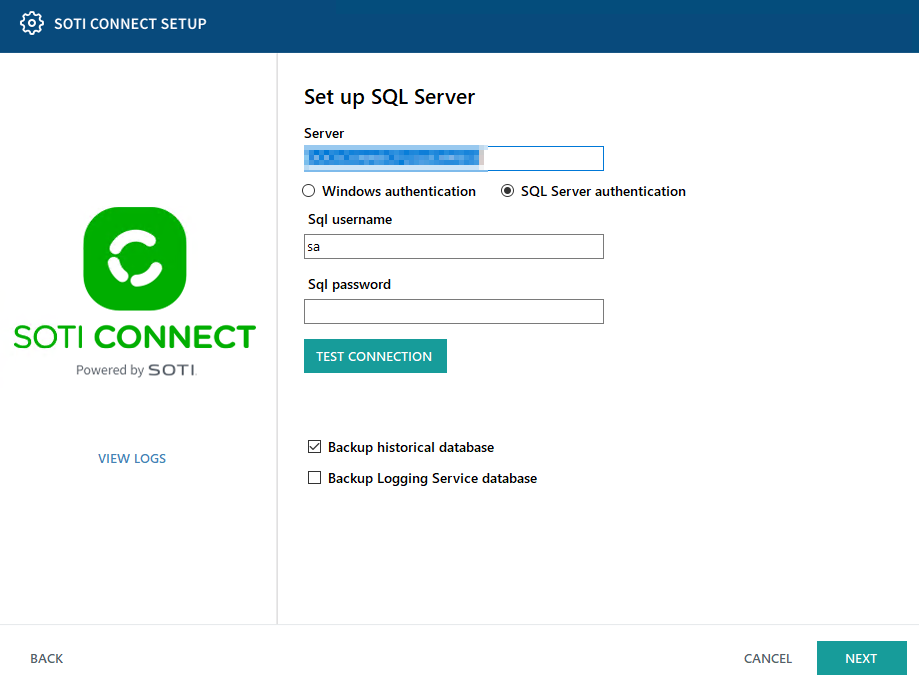
In the Set up SQL Server screen, enter the SQL configuration details, then
select Test Connection to validate the configuration, then select
Next.
-
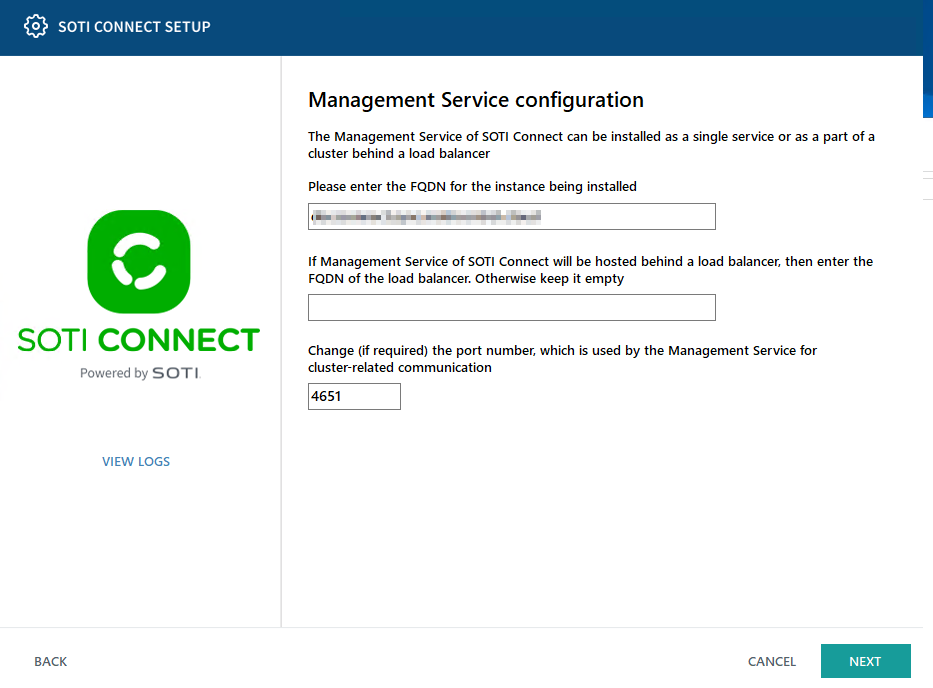
In the Management Service configuration screen, enter in Management Service
connection details, then select Next.
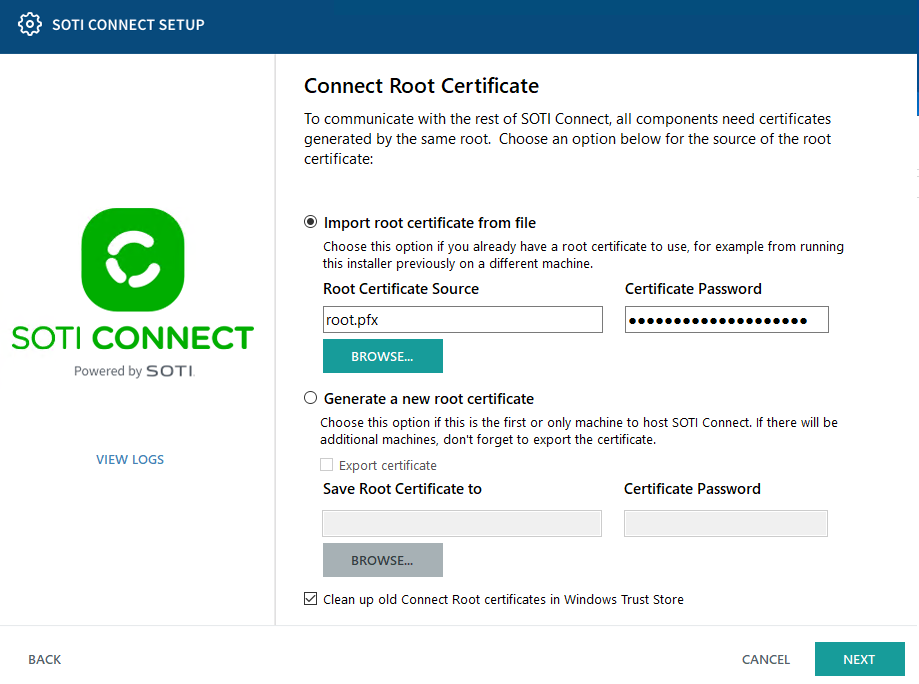
-
Choose whether to import a root certificate from an existing file or generate a
new one, then select Next.
-
Configure HTTPS server certificates by selecting one of the following
options.
- Generate from Connect Root Certificate.
- Upload a PKCS#12 server certificate (
.PFX). - Use a certificate already installed in the Windows Certificate Store (requires thumbprint).
-
Follow the on-screen instructions in the wizard to complete
configuration.
Important: Fully exit the installer before continuing.
Results
Troubleshooting: If errors occur during configuration, review the
logs in the installation folder (
InstallerUI.log).