Adding Microsoft Entra ID Directory Service Connection
Before you begin
This process requires:
- A Microsoft Azure account
- Access to Microsoft Azure Portal
- Authentication of SOTI MobiControl with your Microsoft Azure account.See Microsoft Azure documentation for more information.
- Azure AD Join Cloud Enrollment listed in default applications
About this task
Follow this procedure to add a Microsoft Entra ID directory service connection in SOTI MobiControl.
Procedure
To begin, you must collect configuration information from Microsoft Azure
Portal.
- Open the Microsoft Azure Portal (https://portal.azure.com).
- Select Microsoft Entra ID.
-
In the Overview tab, copy the following details for later
use:
- Tenant ID
- Primary Domain
-
In the left-hand menu, select App Registrations.
The App Registrations view opens.
-
Select Endpoints.
The Endpoints window opens.
- Copy the Federation Metadata Document URL.
Next, add the Azure tenant.
-
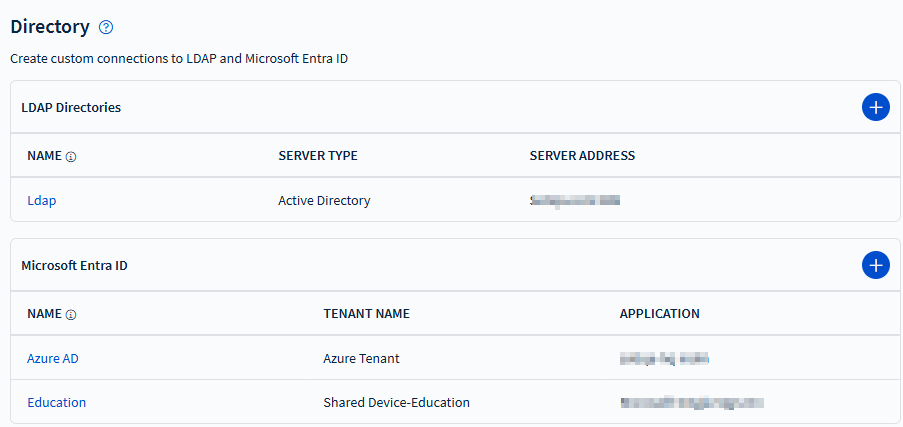
From the SOTI MobiControl main menu, select Global
Settings > Services > Directory.
The Directory view opens.
-
In the Microsoft Entra ID panel, select
Add to add a tenant.
The Microsoft Entra ID Connection window opens.
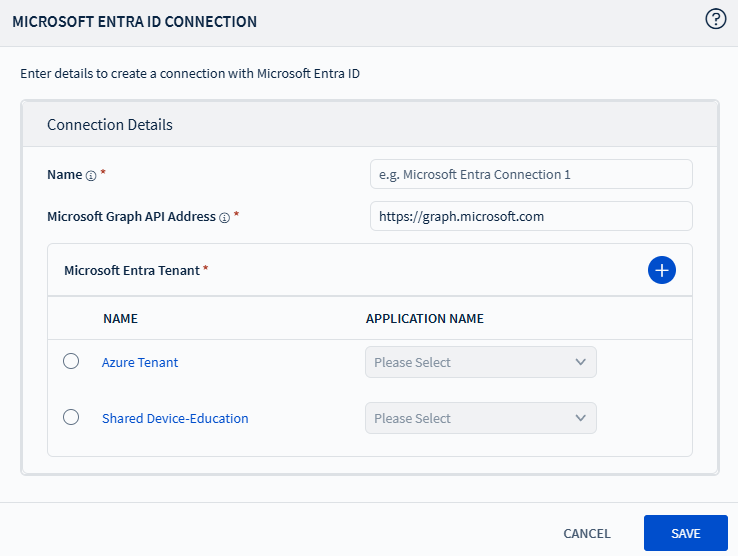
- Enter a short descriptive name for the connection.
- Enter Microsoft Graph API Address URL.
-
In Microsoft Entra Tenant, select
Add.
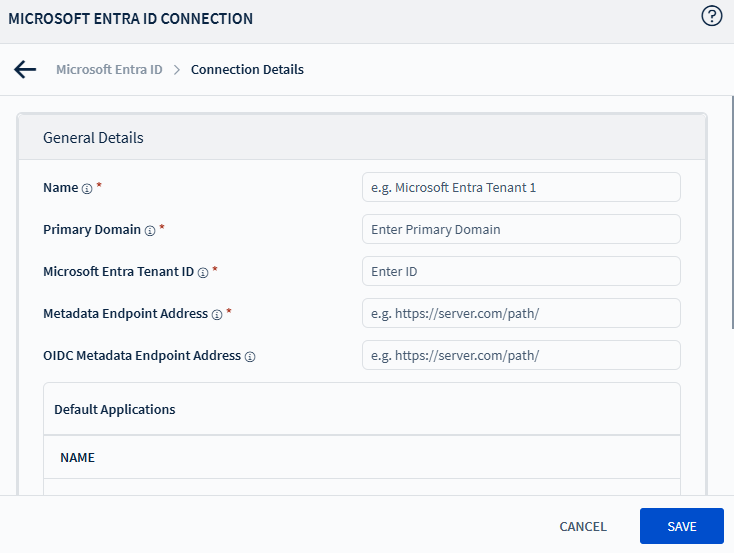
The Microsoft Entra ID > Connection Details view appears.
-
Enter values for the following fields:
Name A short descriptive name for the tenant. Primary Domain The primary domain copied from the Azure Portal. Microsoft Entra Tenant ID The tenant ID copied from the Azure Portal. Metadata Endpoint Address The federation metadata document URL copied from the Azure Portal. OIDC Metadata Endpoint Address (Optional) The OpenID Connect metadata endpoint in Azure, provided by Microsoft when you sign up for Azure AD. -
Select Save.
The tenant is available for selection to complete the connection.
Complete the connection details.
- From Microsoft Entra Tenant, select the tenant name you just added.
- From Application Name, select Azure AD Join Cloud Enrollment.
-
Select Save.
The Microsoft Sign In dialog displays.
- Select Continue.