Installing the Main Management Service (MS)
About this task
This procedure describes how to install the main SOTI Connect Management Service. See Installing the Failover Instance for failover instance installation instructions.
Important: Close Windows Services
and Task Manager applications before preforming any
installation related activities.
Procedure
- On the server where you want to install the main Management Service, extract the SOTI Connect installation package (.zip file) to a temporary folder.
- In the temporary folder, run the SOTI Connect installer executable (SOTI Connect Installer.exe). The SOTI Connect Setup Wizard is displayed.
- When prompted, allow the installer to make changes to your system.
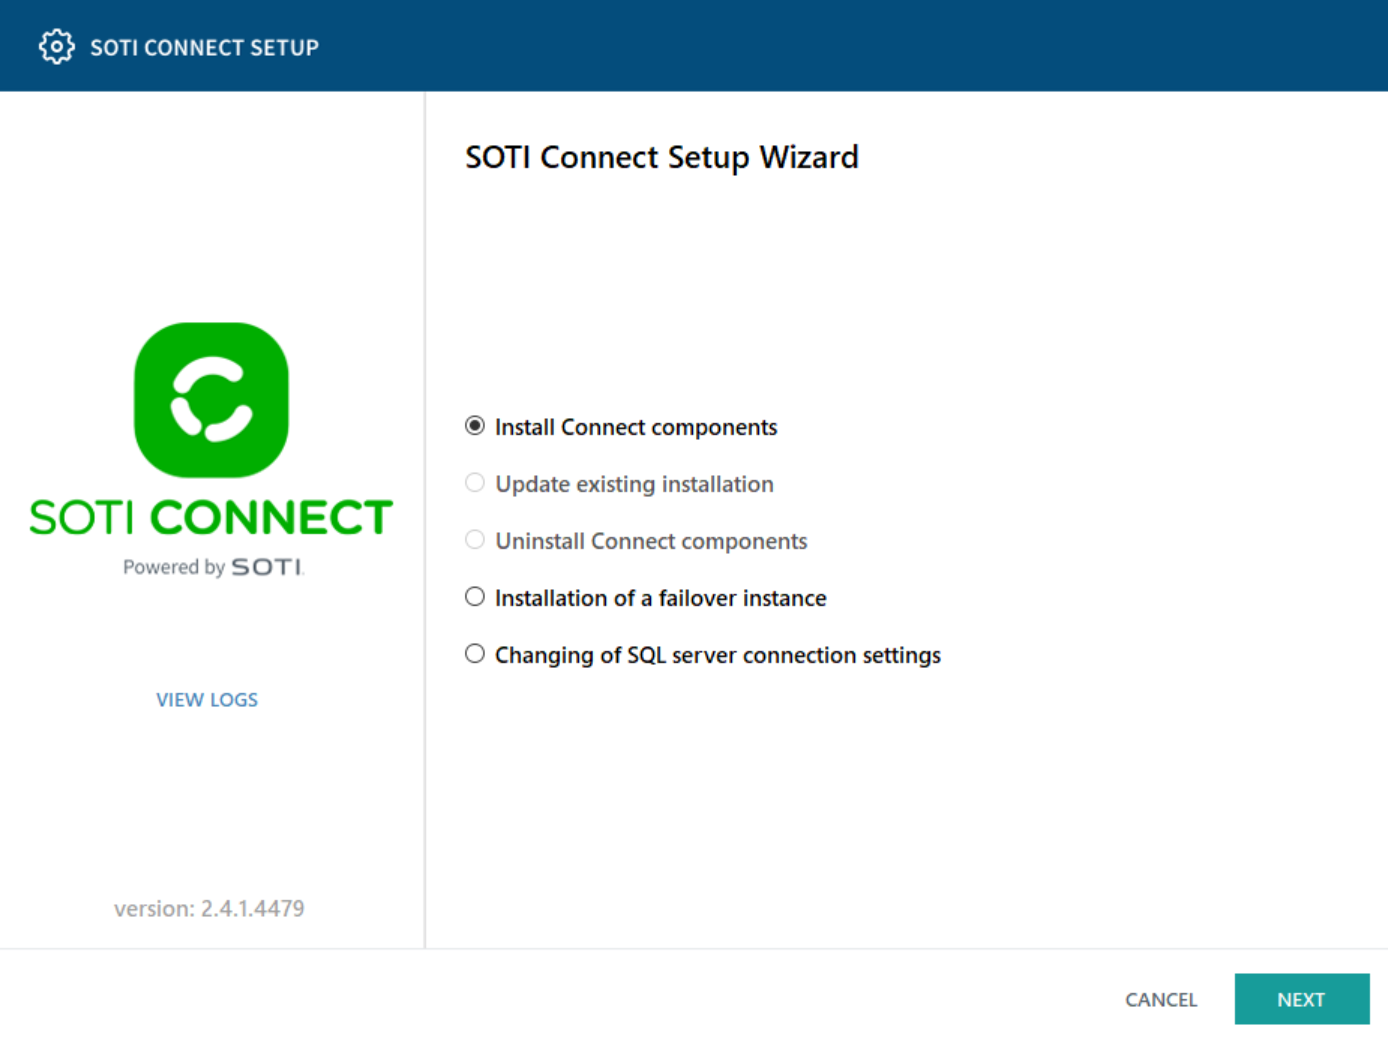
-
Select Install Connect components. Select
Next.
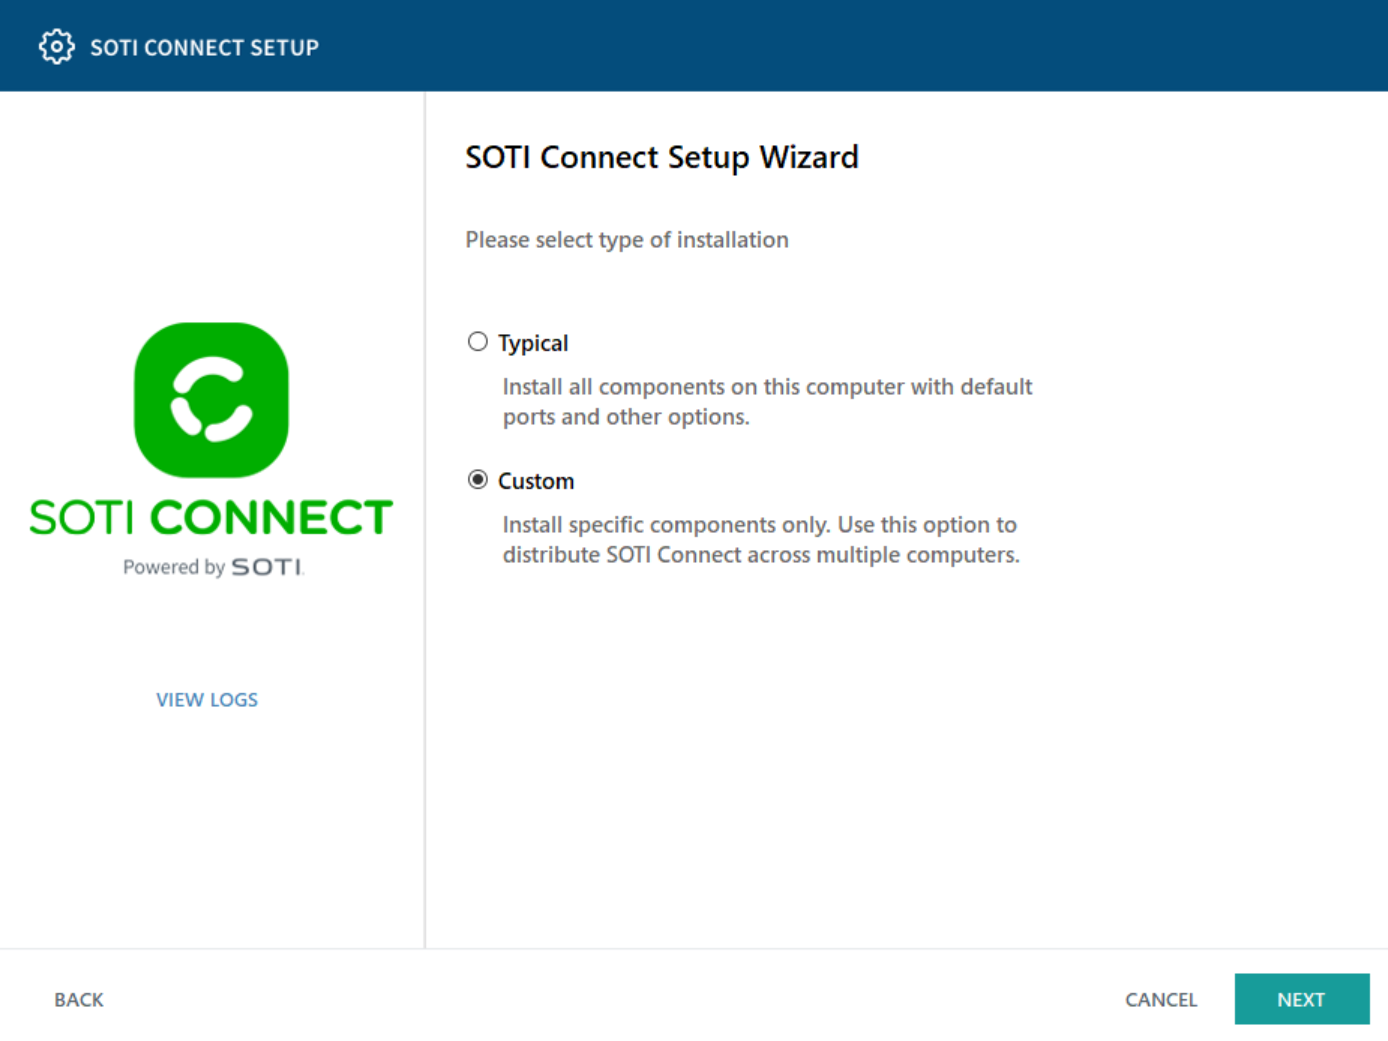
-
Select Custom installation and select
Next.
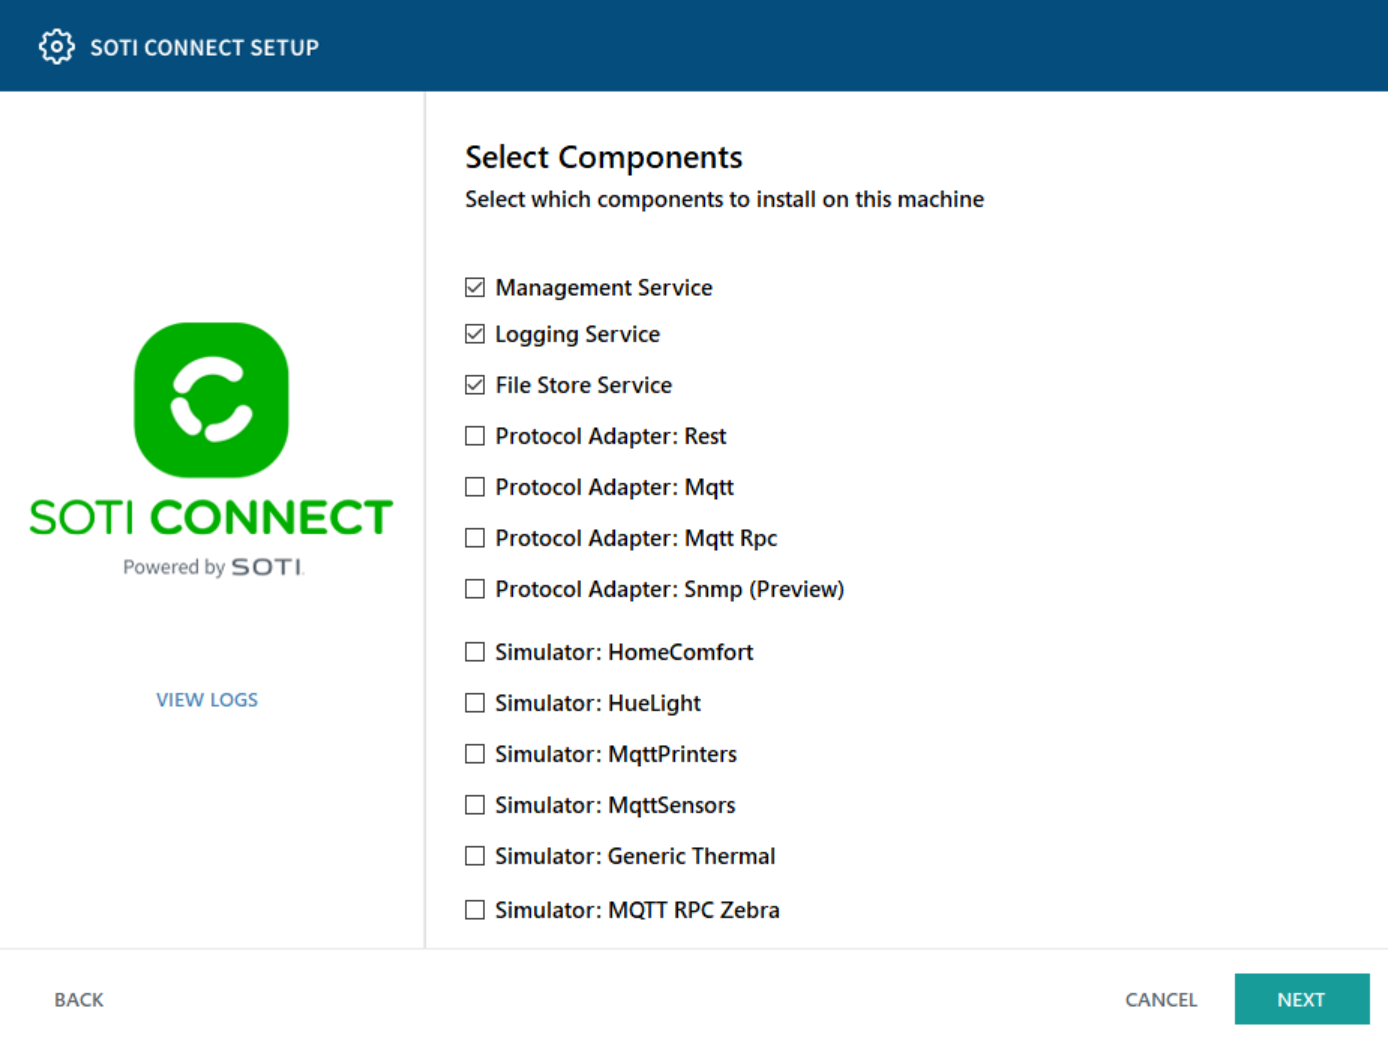
-
Select Management Service, File Store
Service, and other components as needed. This includes the
Logging Service (this cannot be installed as a separate component). You can
install the File Store Service as a separate component, see Installing FS with MS and Installing a Standalone FS. Select
Next.
-
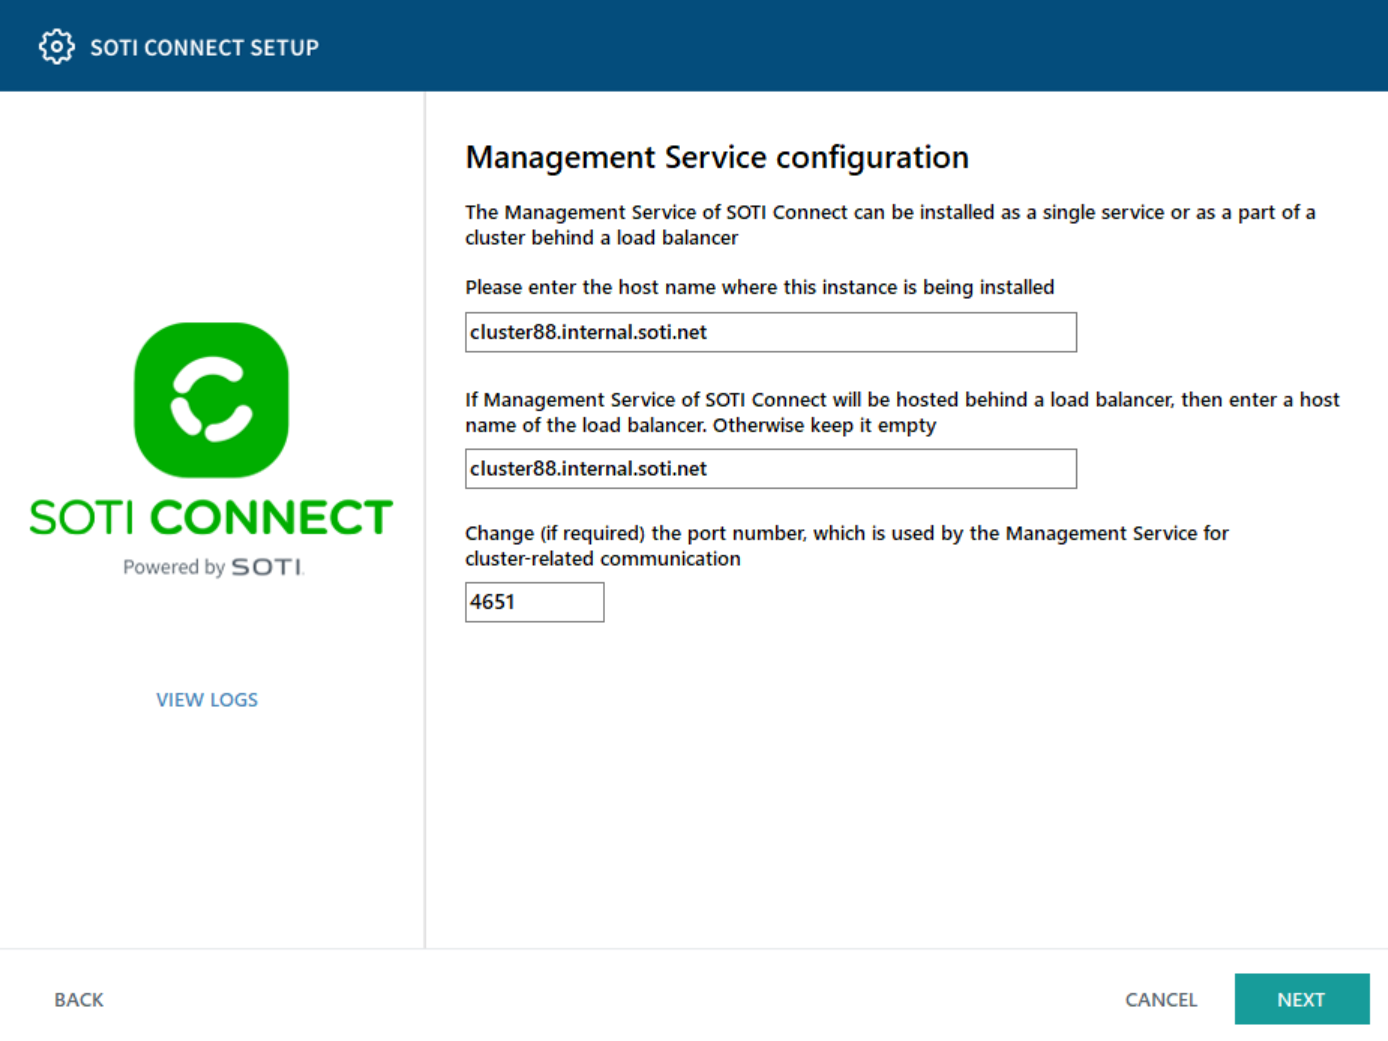
In the host name field, enter the VM's FQDN where the MS
will be installed. This hostname is used by the protocol adapters (PAs). In the
load balancer field, enter the load balancer's
hostname. This hostname is used during installation to generate a server HTTP
certificate (if you choose to generate a new root certificate in step 8). Select
Next.
-
Import an existing root certificate or generate a new one. Enter the password
and select Next.
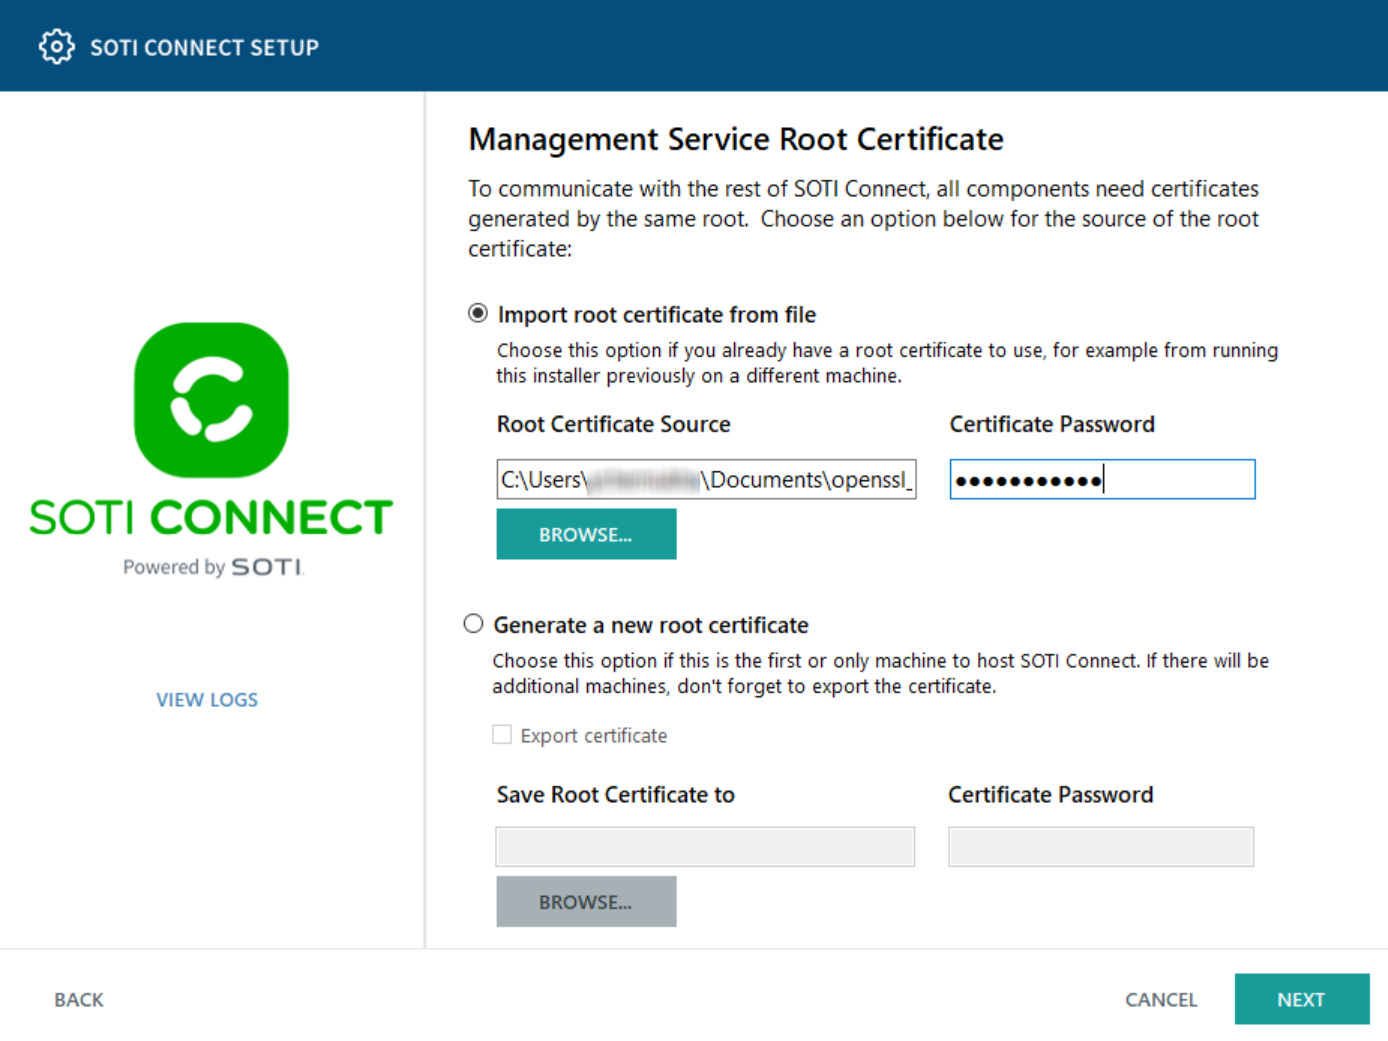 Note: Optionally, you can download the root certificate from the SOTI Connect Web Console's main menu, navigate to .
 -
Add a server certificate. For a failover installation, you can select any
available options. For example, use the root certificate from the previous
step.
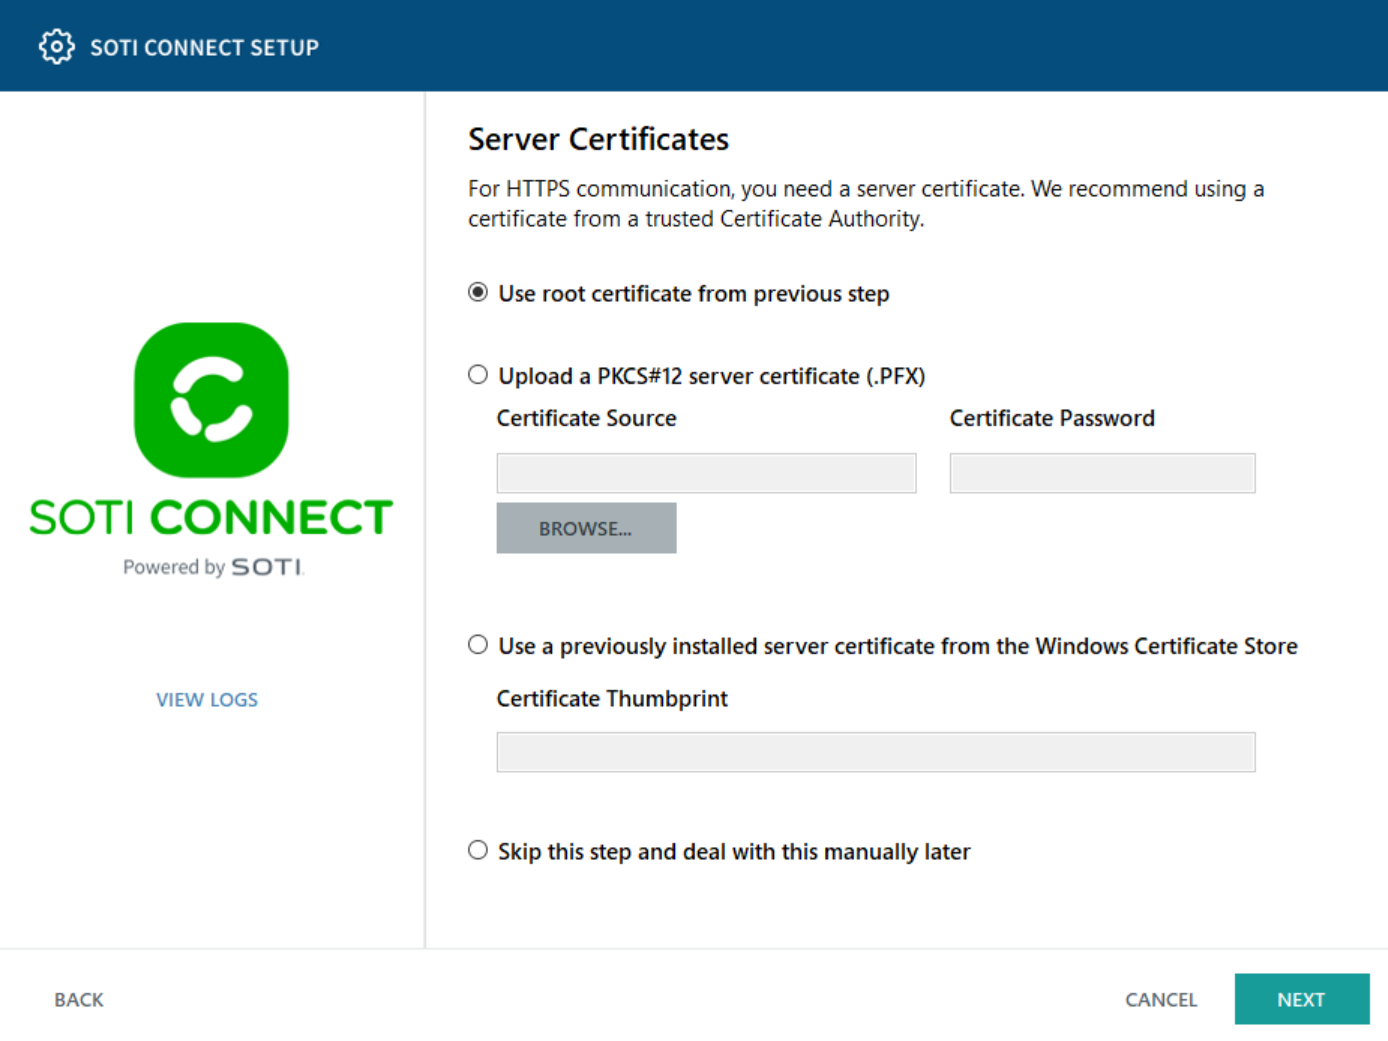
-
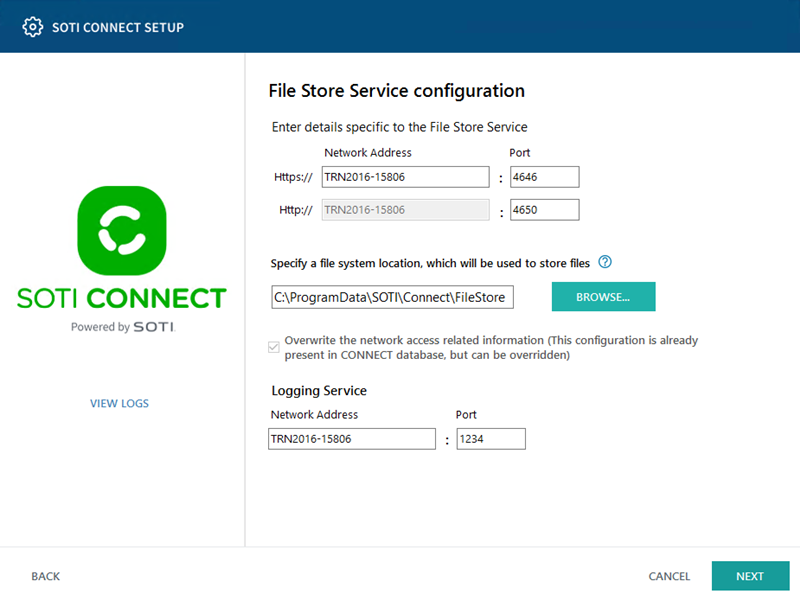
On the File Store Service configuration screen, enter the
following information and select Next.
-
On the File Store Service HTTPS Certificate screen,
provide the appropriate HTTP server and HTTP root certificate information as
follows and select Next.
- Select Generate server certificate. Reuse root certificate from Management Service if FS is installed along with MS. In this case, the HTTP certificate is generated from the MS root certificate (either custom or auto-generated) and is used as the FS HTTP root certificate.
- Select Generate server certificate. Upload independent root
certificate to upload a custom root HTTP certificate
that will be used for server HTTP certificate generation and later, for
its validation.Note: If you have used a custom root certificate for MS installation, use the same for FS. If you have a custom HTTP certificate for FS, select it. If you are using the auto-generated MS root certificate (default), you can export it from the installer during the MS installation or you can export it by navigating to .
- Select Upload server certificate and corresponding root certificate to upload the HTTP root certificate and HTTP server certificate. Use this option if your certificate is provided by a trusted certificate authority.
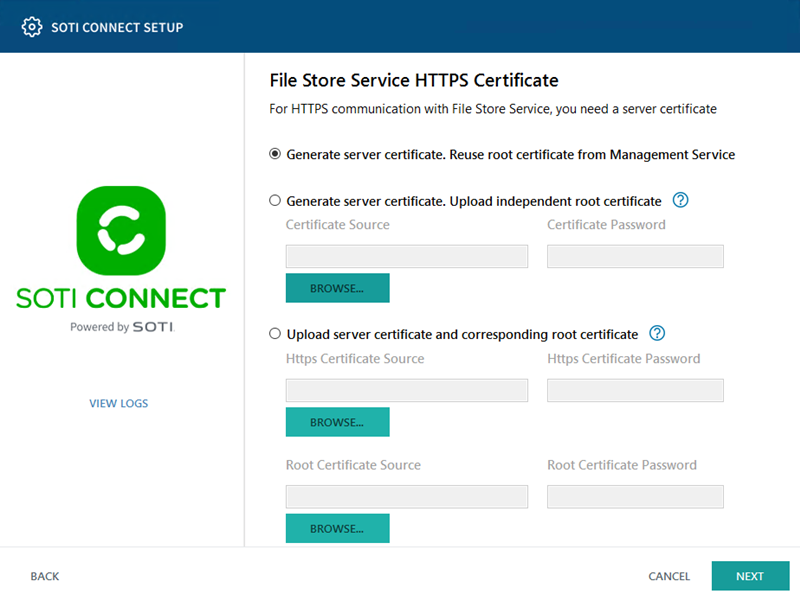
To update HTTPS certificates, see File Store Service (FS).
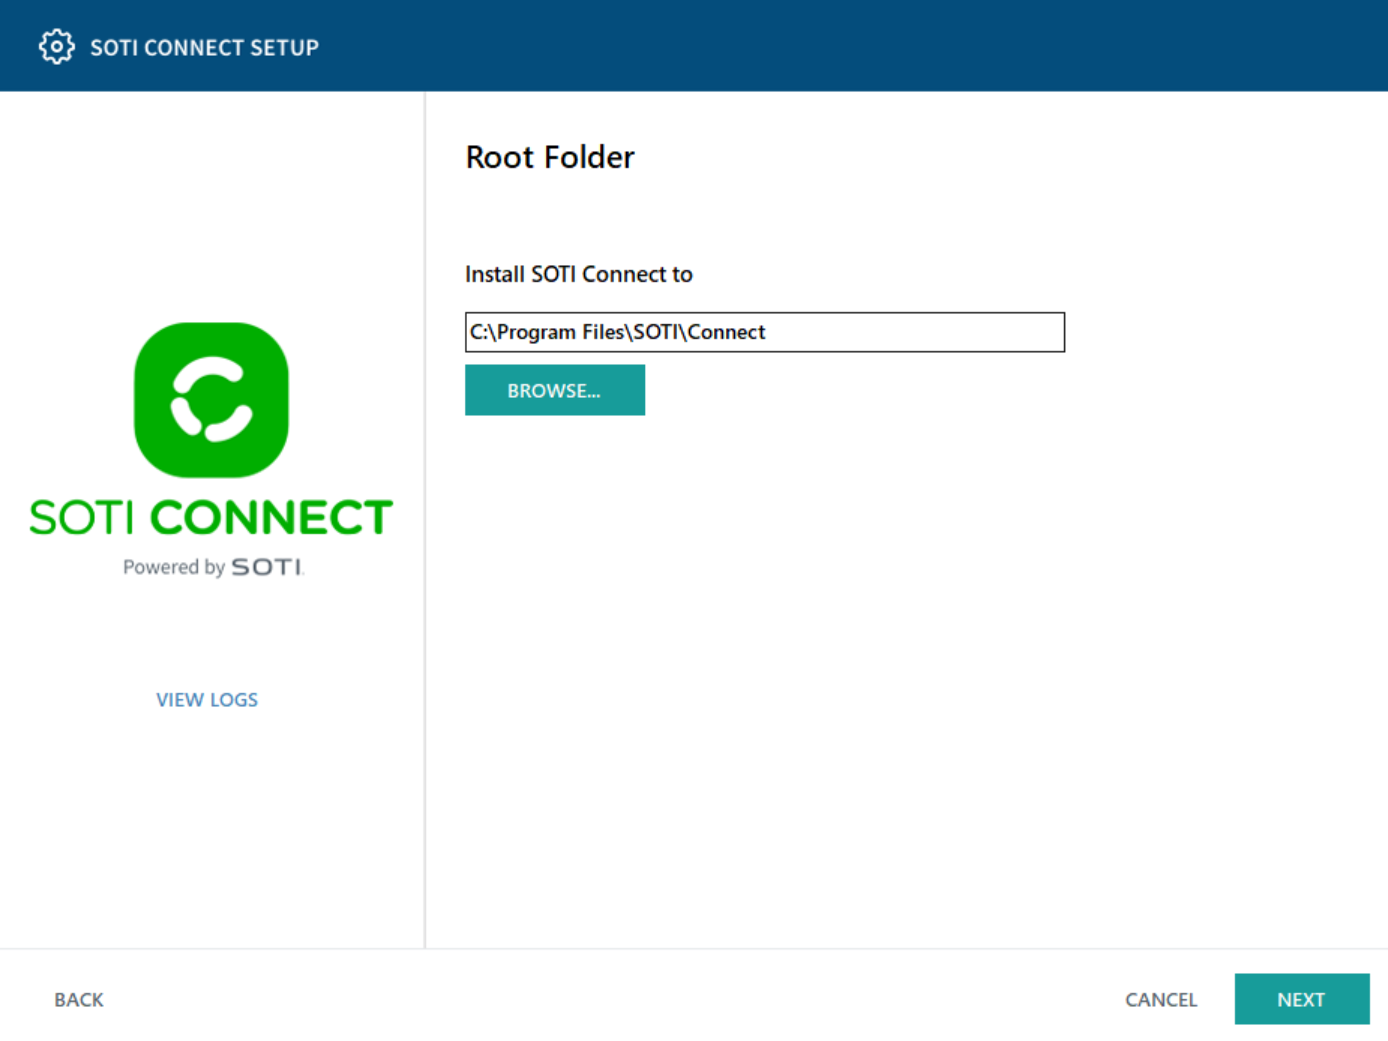
-
Choose a location to install SOTI Connect.
-
Define how the MS will connect to the SQL server. Localhost cannot be used for
the MS failover installation because it must be able to use the same SQL server
as the main MS. During a failover installation, the installer will connect to
the active MS instance and request connection information.
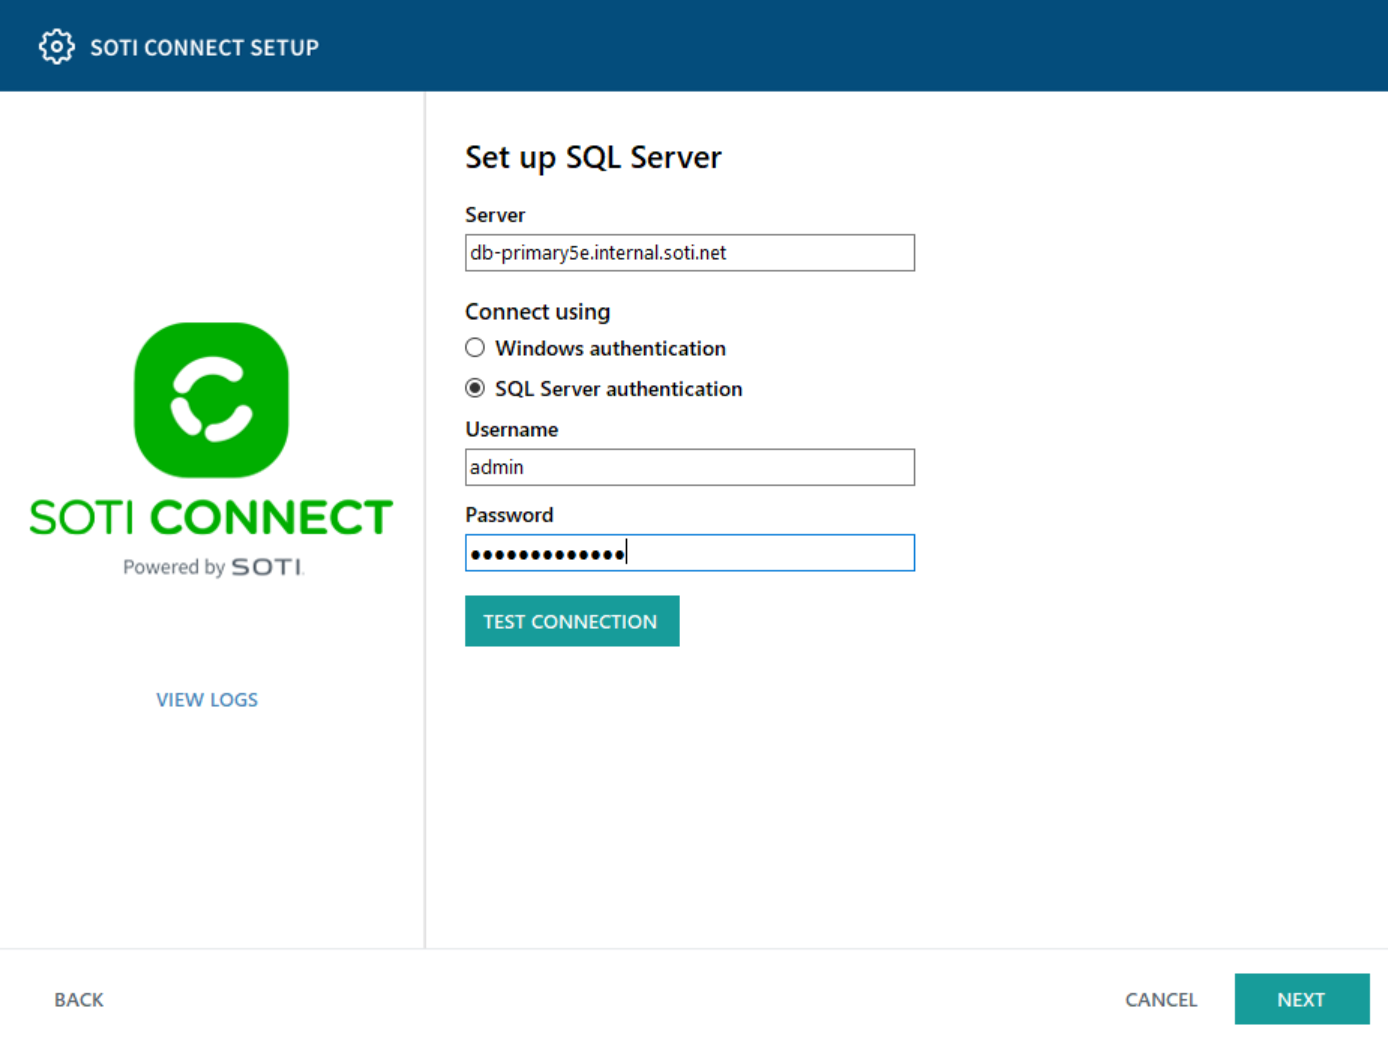
- Add the hostname of your SQL instance. Select SQL server authentication and enter a username and password. Select Test Connection.
- Select Next, then Install.
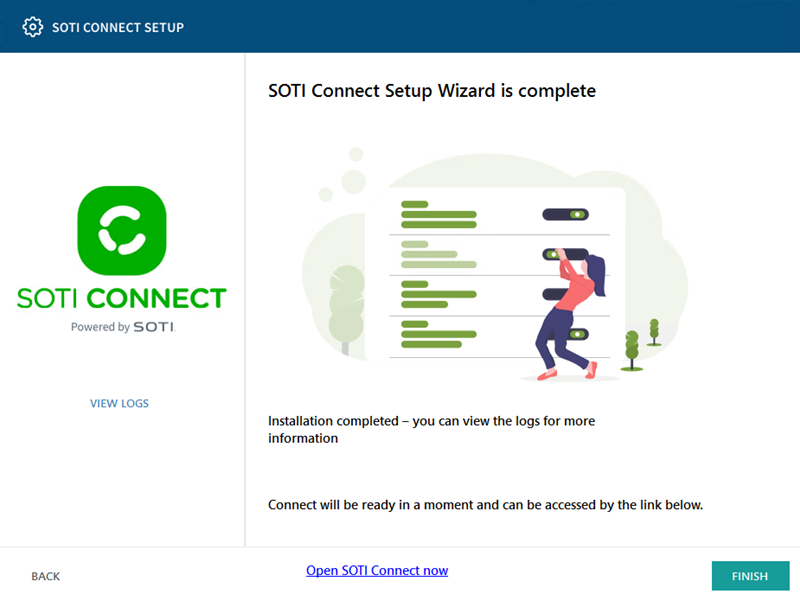
-
Once the installation is done, select Finish. Sign in to
SOTI Connect to see the installed active MS.