Using Signal Policies to Trigger Webhook Actions
Before you begin
- You must sign in to the SOTI MobiControl web console as a user with Manage Webhooks and Manage Signal Policies permissions.
- You must have already created a webhook (see Creating a Webhook).
About this task
Procedure
- Select
-
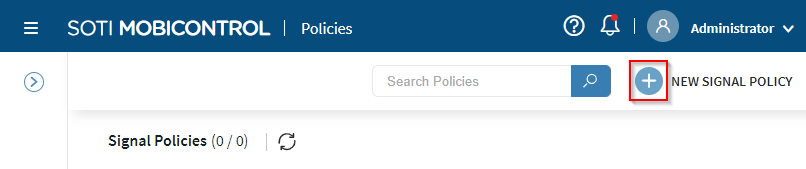
In the Signal Policies panel, select the New
Signal Policy icon .
-
In the General tab of the Create Signal
Policy panel, enter a Name and
Description for the signal policy and select
Next.

-
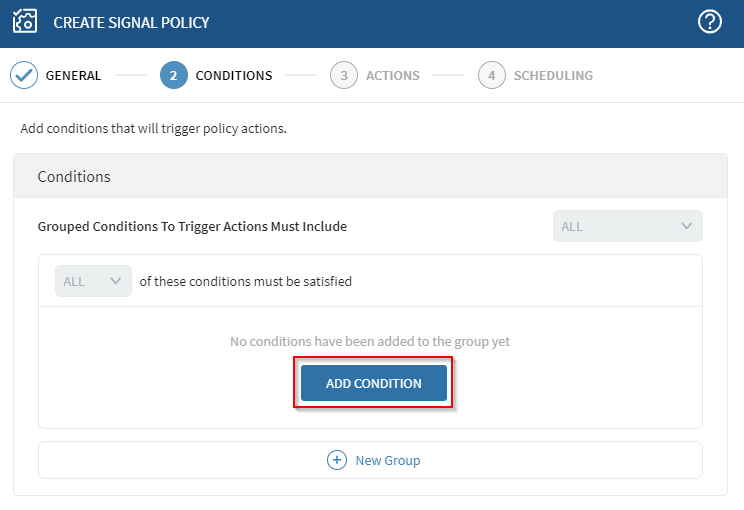
In the Conditions tab of the Create Signal
Policy panel, select Add Condition.
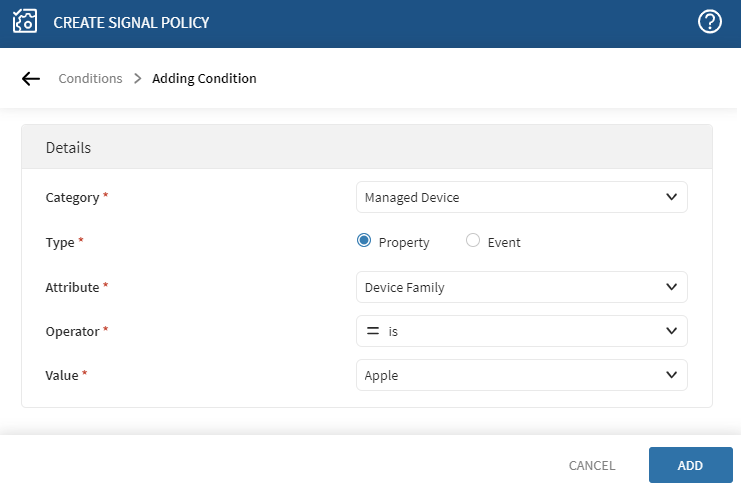
-
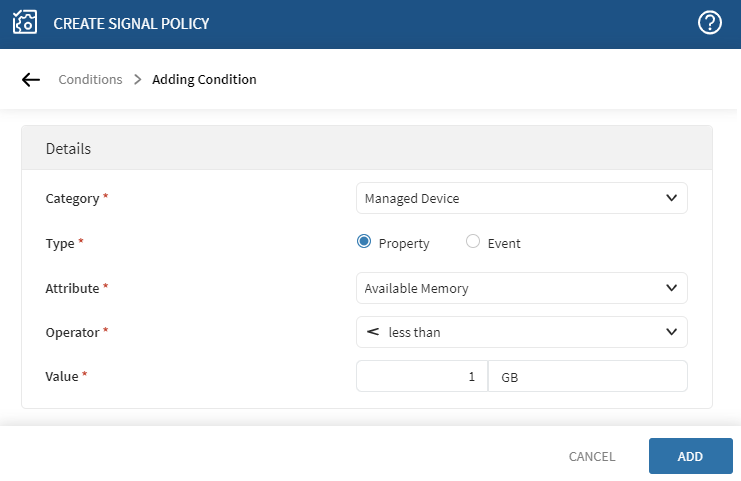
In the Adding Condition panel, enter the conditions that
trigger the signal policy. In this example, the signal policy must detect when
Apple devices have less than 1 GB of memory. This step adds a condition to
filter Apple devices.
-
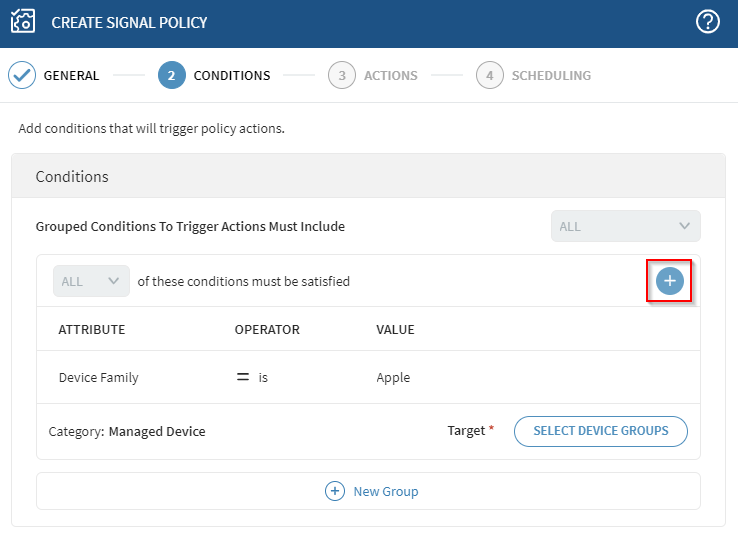
In the Conditions tab of the Create Signal
Policy panel, select the Add
icon to add another condition. This
condition detects devices with less than 1 GB of available memory. This
condition, together with the previous one creates a signal policy that detects
when an Apple family device has less than 1 GB of memory.
-
Select the values as displayed below and select
Add.
 Note: You can add conditions to create more complex signal policies.
-
The Conditions tab of the Create Signal
Policy panel lists the conditions you have added.
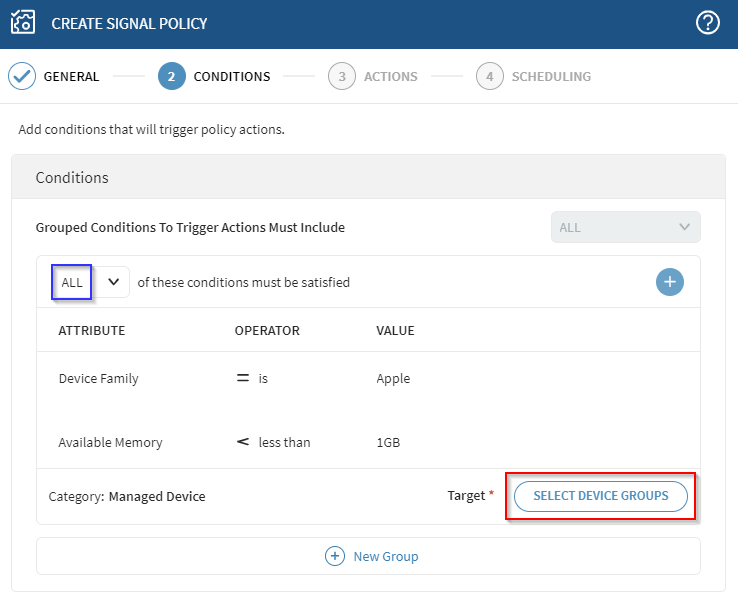 Note: In the blue box, All conditions must apply for the signal policy to trigger. You can change this to Any to make the signal policy trigger when any of the conditions apply.Specify a target group of devices to apply the signal policy to by choosing Select Device Groups.
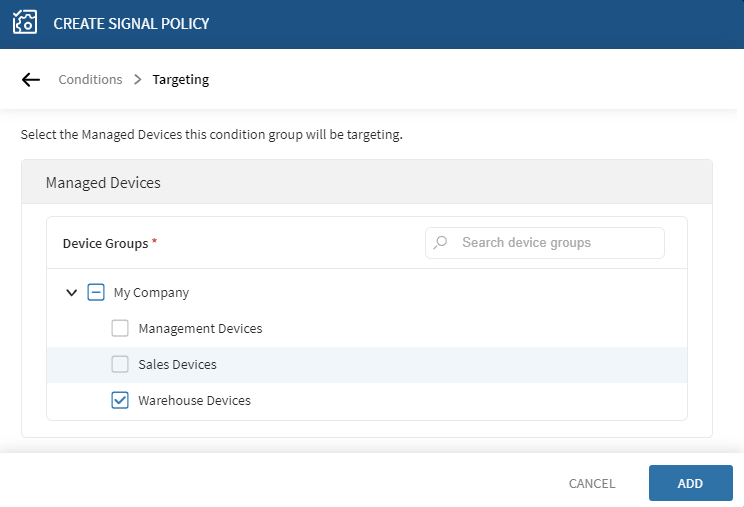
- Select Add to add the device group and then select Next in the Conditions tab of the Create Signal Policy panel.
-
In the actions tab of the Create Signal Policy panel,
select Add Action.
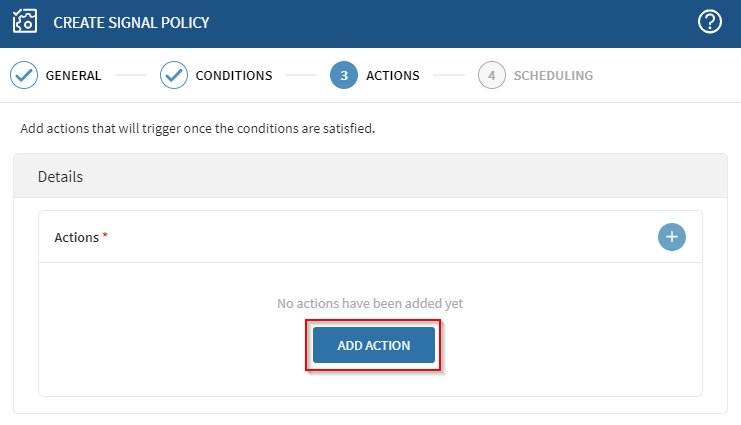
-
In the Adding Action panel, select Trigger
Webhook from the Action drop-down list.
Select the Webhook for this policy to trigger. Enter a
Subject for the signal policy. Select the attributes
from the Source Attributes table to include in the webhook
payload. Use the search bar to find specific device attributes. Select
Add.
 Note: When using the search bar to find device attributes, the Selected value in the blue box may change based on the attributes returned in the search.Note: A signal policy can choose from several different types of actions. Refer to the following table of signal actions from the Add Signal Policy Actions section:
Option Description Relocate Device Automatically move devices that trigger the policy from their current device group to a different one.
Send Email Send an email notification to recipients indicating that the policy has been triggered. Add email contacts to the To, CC, and BCC fields.Important: Separate the recipients with a semicolon, and do not use spaces.Use the Macro button in the Subject and Message fields to add dynamic information, such as Device ID or Policy Name, to the email. See Adding Signal Policy Macros for more details.Warning: Macros may contain sensitive or personal information. Use caution when composing emails with them.Remember: For Custom Attribute and Custom Data to be selectable from the macro menu, you must first create them.Set Custom Attribute Sets the value of a custom attribute on a managed device. Note: Supports Android Plus, Apple, Linux, Windows Desktop Classic, Windows Mobile/CE, and Windows Modern devices.Trigger Alert Send an alert to the SOTI MobiControl notification panel.
Use the Macro button in the Alert Title and Message fields to add dynamic information, such as Device ID or Policy Name, to the alert. See Adding Signal Policy Macros for more details.Remember: For Custom Attribute and Custom Data to be selectable from the macro menu, you must first create them.From the Priority dropdown menu, choose one of the following priorities:- Low
- Medium (default)
- High
Once you trigger the alert, it displays in the Notifications panel with its chosen priority. See SOTI MobiControl Console Alerts and Announcements for more details.
Trigger Webhook Send automated JSON or XML data to a URL when the policy triggers. From Webhook, select a predefined webhook. Specify a Subject for the destination URL and select Source Attributes to include it in the payload. Important: You can define webhooks in . See Using Signal Policies to Trigger Webhook Actions.Allow Exchange Access When the Signal Policy is triggered, SOTI MobiControl grants the selected devices permission to connect to the Microsoft Exchange Server Enterprise Resource Gateway (ERG).
Note: Supports Android Plus, Apple, Windows Mobile/CE, and Windows Modern devices.Allow SOTI Hub Access Enables SOTI Hub access to a device that SOTI MobiControl has blocked or did not have access to.Note: Supports Android Plus and Apple devices.Allow SOTI Surf Access Enables SOTI Surf access to a device that SOTI MobiControl has blocked or did not have access to. This action only applies to devices that have SOTI Surf installed. Note: Supports Android Plus and Apple devices.Block Exchange Access When the Signal Policy triggers, SOTI MobiControl blocks access to the Microsoft Exchange Server Enterprise Resource Gateway for the targeted devices. Note: Supports Android Plus, Apple, Windows Mobile/CE, and Windows Modern devices.Block SOTI Hub Access This action triggers when you activate a Signal Policy. This temporarily blocks device users from accessing content in SOTI Hub. Note: Supports Android Plus and Apple devices.Block SOTI Surf Access This temporarily blocks device users from accessing SOTI Surf. This action only applies to devices that have SOTI Surf installed.Note: Supports Android Plus and Apple devices.Check-in Synchronize the device with the SOTI MobiControl Deployment Server.
Note: Supports Android Plus, Apple, Linux, Windows Desktop Classic, Windows Mobile/CE, and Windows Modern devices.Clear SOTI Hub Cache Clear the cache and delete all downloaded content from SOTI Hub on the device, except mandatory files. Note: Supports Android Plus and Apple devices.Clear SOTI Surf Cache Delete all downloaded content from SOTI Surf on the device, except for mandatory files. This action only applies to devices with SOTI Surf installed.Note: Supports Android Plus and Apple devices.Log Out Shared Device SOTI MobiControl remotely logs out all active users from the device simultaneously.
Logging out of a shared device remotely signs out all current users.Note: Supports Android Plus and Apple devices. This action is only applicable to devices that have a shared device configuration.Send Message Send a message directly to the devices that the policy triggers. You can limit the message's display duration on the devices and choose a type of message, such as Error or Warning.Note: Supports Android Plus, Apple, Windows Desktop Classic, Windows Mobile/CE, and Windows Modern.Send Script Automatically run scripts on devices based on specific conditions or events.
Select a type of action:
- Server Initiated: The device receives a command from SOTI MobiControl before performing the action.
-
Device-Initiated: The device can evaluate
conditions and perform the action without needing to connect to
SOTI MobiControl. For the list of
available conditions that device-initiated can evaluate, see
List of Device Side Evaluation Properties. Note: Android devices running SOTI MobiControl Agent 2026.0.0 or later support device-initiated scripting while satisfying conditions set to ALL.
Each action type supports the following script types:- Device-initiated: Legacy and JavaScript scripts
- Server Initiated: Legacy, JavaScript, PowerShell 32-bit Compatibility, and PowerShell Native scripts
Choose a script from Execute Script, then select the delivery method.
Choose from:
- MobiControl Agent: Send the script through the installed agent. Ideal for online devices actively connected to the SOTI MobiControl server.
- Platform Notification Service: Use the platform's native OS messaging system. Choose this method when you need immediate delivery or when the agent is inactive.
- SMS: Deliver the script via a text message. Use this method for devices that have limited or no internet access.
Tip: The Execute Script list populates from the Manage Scripts dialog box, containing previously saved scripts. See Manage Scripts and Sending Scripts to Devices for more details.Note: Supports Android Plus, Apple, Linux, Windows Desktop Classic, Windows Mobile/CE, and Windows Modern.Soft Reset Perform a soft reset to close all open applications and clear data stored in the device’s RAM.
Note: Supports Android Plus, Apple, Linux, Windows Desktop Classic, Windows Mobile/CE, and Windows Modern devices. -
In the Actions tab of the Create Signal
Policy panel, a summary of the added actions displays. Select
Next.
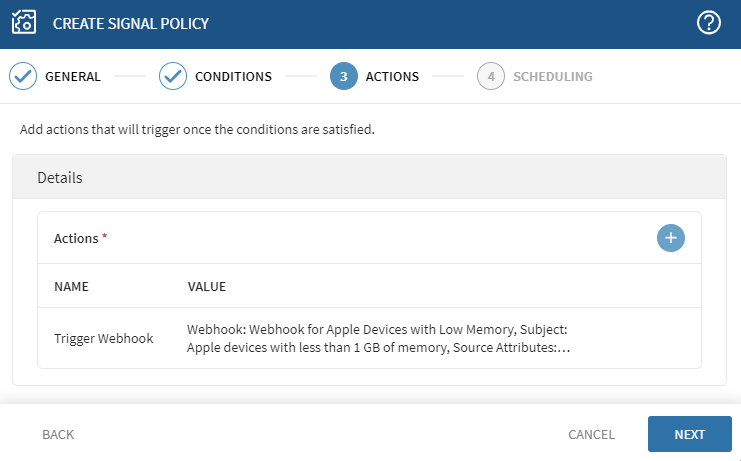 Note: You can make the signal policy trigger more actions by selecting the Add icon.
-
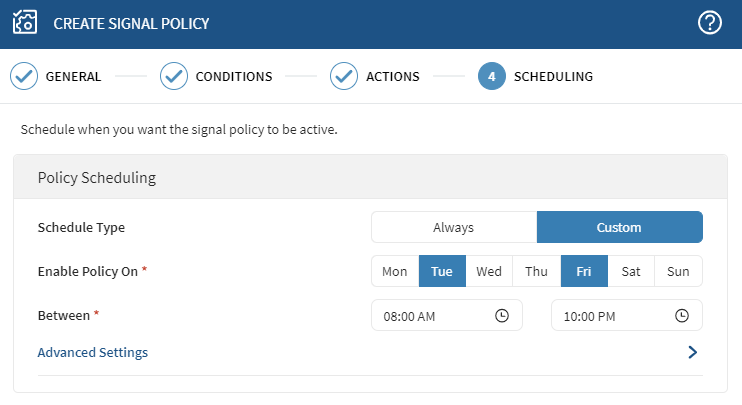
In the Scheduling tab of the Create Signal
Policy panel, specify when the signal policy is in effect. Select
Always to put the signal policy in effect immediately
and indefinitely. Select Custom to specify the days and
time during each week that the signal policy is in effect. In this example, the
signal policy is active every Tuesday and Friday from 8:00 AM to 10:00 PM.
 Note: The default activation date and time when selecting Always as the Schedule Type is the date and time of the creation of the signal policy. By default, the deactivation date is not set, so the signal policy is in effect indefinitely.In the Advanced Settings part of the Scheduling tab, you can set activation and deactivation dates and times. If the optional Set Deactivation Date is not set, the signal policy remains in effect indefinitely. You can deactivate the policy by editing the policy and adding a deactivation date and time, or by deleting the signal policy.In the example below, the signal policy is in effect from 8:00 AM on June 12, 2023 to 10:00 PM on June 30, 2023.
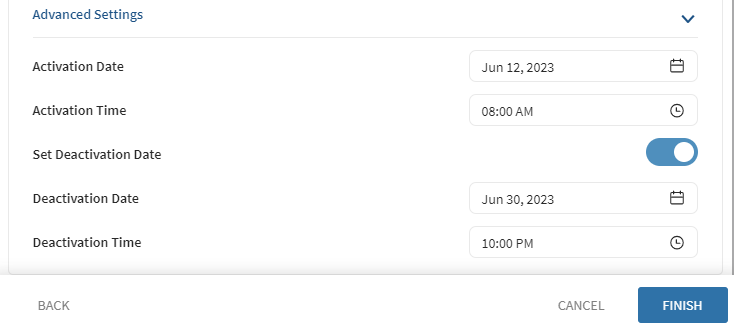
-
Select Finish to complete the creation of the signal
policy. The newly created and activated signal policy displays in the
Signal Policies panel.
