Configuring Windows Autopilot Deployment in Microsoft Endpoint Manager
Before you begin
- Obtain your hardware ID. See Capturing the Hardware ID and Resetting the OOBE.
- Configure company branding. See Configuring Company Branding and Bypassing Intune Auto-enrollment.
- Have administrator permissions to Microsoft Endpoint Manager.
About this task
Procedure
- Sign in to Microsoft Endpoint Manager.
-
Select .
- Select Import to upload the AutopilotHWID.csv file obtained in the first step of the Windows Autopilot Enrollment process. See Capturing the Hardware ID and Resetting the OOBE.
-
Select Import again to process the file.
Note: The import process may take up to 15 minutes.
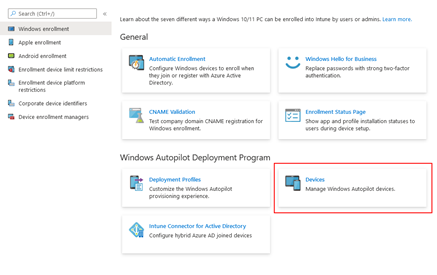
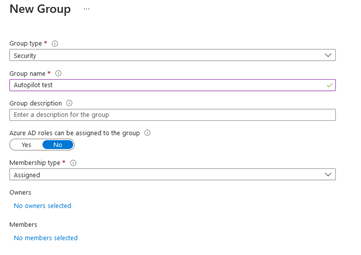
- Create a device group for Windows Autopilot. Navigate to .
-
Configure the group as follows:
-
Group type: Security
-
Group name: (Choose a relevant name)
-
Assign Entra ID roles: No
-
Membership type: Assigned
-
- Create a Windows Autopilot Deployment profile by navigating to to create a Windows Autopilot Deployment profile.
-
Name the profile and set Convert all targeted devices to
Autopilot to No.
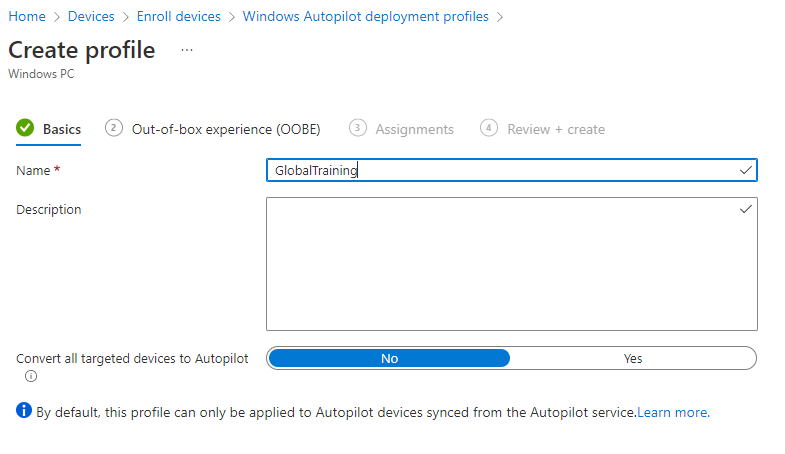
- Select Next.
-
In the out-of-box experience (OOBE) section, configure the following:
Option Description Deployment mode User-Driven Join to Azure AD as Azure AD joined Microsoft Software License Terms Hide Privacy Settings Hide Hide change account options Hide User Account type Standard Allow pre-provisioned deployment No Language (Region) Operating System default Automatically Configure keyboard Yes Language (Region) Operating System default - Select Next to proceed to assignments.
- Select the Autopilot group you created in step six.
- Select Next. The Review and create tab opens.
- Select Create to create the Deployment Profile.
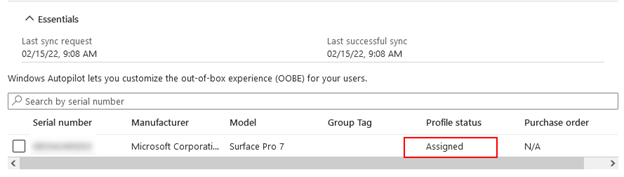
-
Navigate to and ensure the Profile status appears as
Assigned.