Enroll Devices Using Android Management API (AMAPI)
About this task
This procedure describes the specific settings required to enroll devices using Android Management API (AMAPI) when creating Android enrollment policies.
Procedure
- From the main menu on top-left corner, select . The Enrollment Policies window opens.
- Select Add Enrollment Policy. The Enrollment Policy wizard launches.
- Choose Android Enterprise under Android platform.
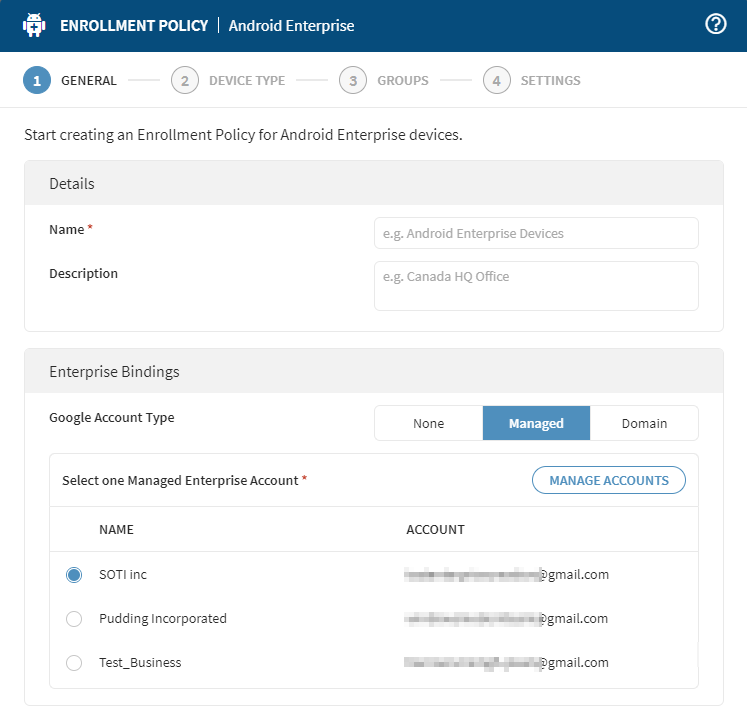
- On the General tab, enter unique name and description for the enrollment policy.
-
For Enterprise bindings, select Managed and choose at
least one enterprise account (mandatory) and select Next.
The Device Type window appears.
Note: For enrolling the device via AMAPI, it is mandatory to select a Managed Enterprise Account.

-
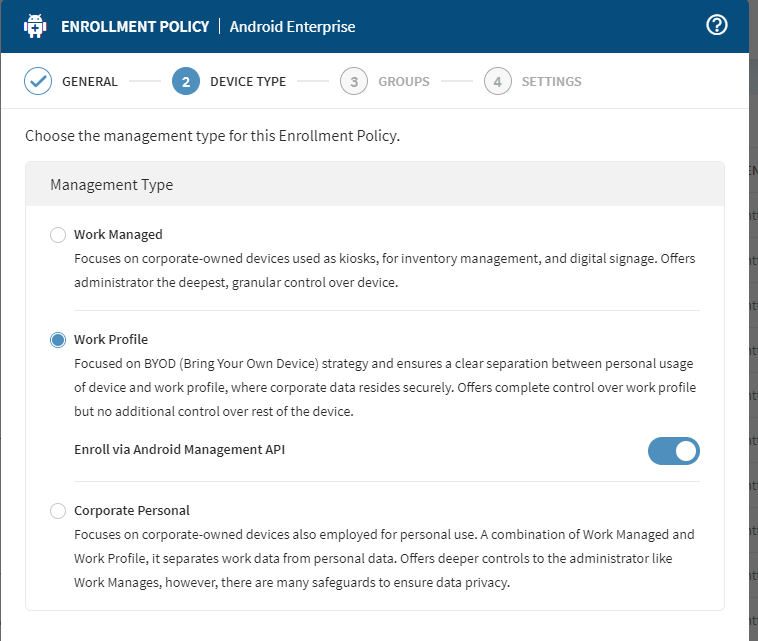
Select your device management type from Work Profile or
Corporate Personal and select
Next.
 Note: Enroll via Android Management API enables by default.
 -
On the Group window, choose if you require authentication
for device enrollment. Choose Device Group(s) and select
Next. See for more details.
Note: When you select No authentication, the devices enrolls without user verification.
- Complete the enrollment policy configuration as required and then select Finish to create enrollment policy. See Creating an Android Enterprise Device Policy for more details.
-
Enrollment Policy Information window appears.
Companion App Enrollment ID and an
Enrollment URL is available for use when enrolling
your devices.
Once devices are successfully enrolled, go to the Devices view on the main menu. Under Device Details window the Device Policy Controller indicates Android Device Policy.
What to do next
- See Device Side Actions for Enrollment for completing enrollment process.
- See Android Enterprise Work Profile Configurations and Android Enterprise Corporate Personal Profile Configurations for details on configurations available for AMAPI enrolled device(s).