Active Directory/LDAP Integration
Before you begin
This section describes the use of Active Directory (AD), or more generally, Lightweight Directory Access Protocol (LDAP) integration in SOTI Connect. AD is a directory service developed by Microsoft for Windows domain networks. A directory is a hierarchical structure that stores information about objects on the network.
LDAP is an open, vendor-neutral, industry standard application protocol for accessing and maintaining distributed directory information services over an Internet Protocol network. Distinguished Name (DN) is a sequence of Relative Distinguished Names (RDN) connected by commas. An RDN is an attribute with an associated value in the form attribute=value. For example, CN=Jeff Smith,OU=Sales,DC=Fabrikam,DC=COM.
Creating an LDAP Connection
About this task
Procedure
-
From the SOTI Connect web console, select .

-
Select the
Add icon (see blue box above) to add a new LDAP
Connection. This opens the
LDAP
Directories panel.
-
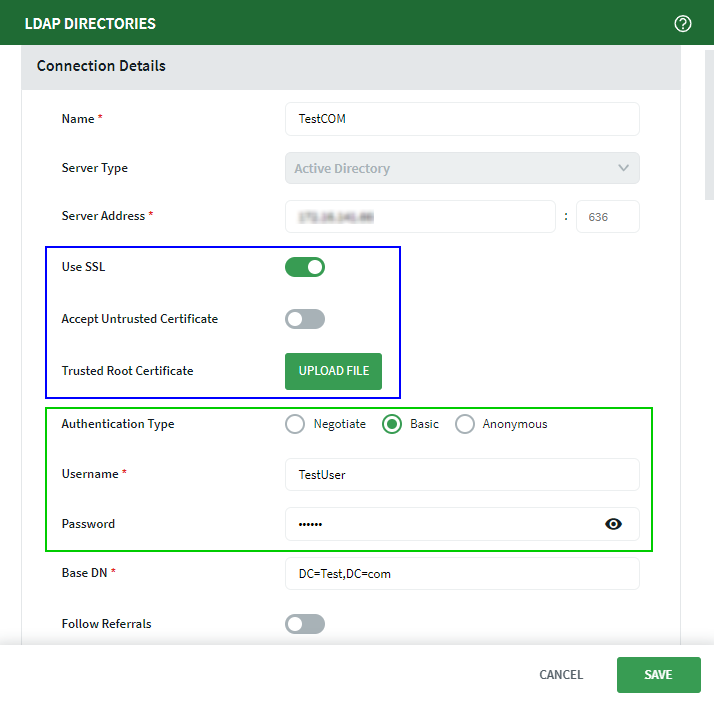
In the Connection Details of the LDAP Directories
panel, enter required information and any optional information:
- Name - An arbitrary connection name.
- Server Address - Server to connect to (for
example
my-ladp.company.com).Note: You cannot create two LDAP connections at the same time to the same server in SOTI Connect. - Use SSL - Toggle if using SSL (see blue box in step 2 diagram).
- Accept Untrusted Certificate - Toggle if using untrusted certificates. Visible if you select Use SSL (see blue box in step 2 diagram).
- Trusted Root Certificate - Upload a trusted root certificate. Visible if you select Use SSL and you do not select Accept Untrusted Certificate (see blue box in step 2 diagram).
- Authentication Type - Select the authentication type. Username and Password are not required when you select Authentication Type of Anonymous (see green box in step 2 diagram).
- Username - The username to use when connecting to the LDAP server. The user must have enough permissions. Visible and required when you select Authentication Type of Negotiate or Basic (see green box in step 2 diagram).
- Password - The password associated with the username (optional). Visible and required when you select Authentication Type of Negotiate or Basic (see green box in step 2 diagram).
- Base DN - The root of the storage for the data location (see the DN explanation in the Before you begin section).
-
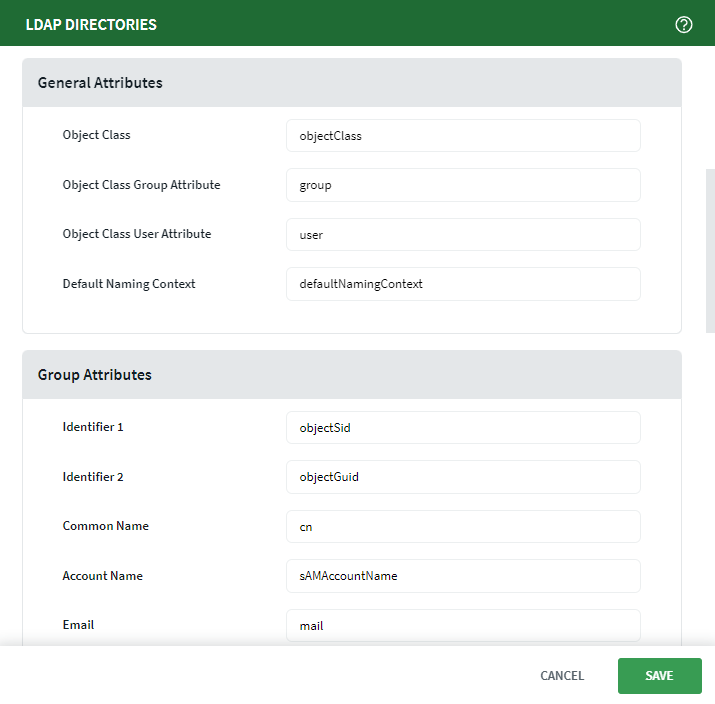
Configure the Schema Attributes Dictionary:
-
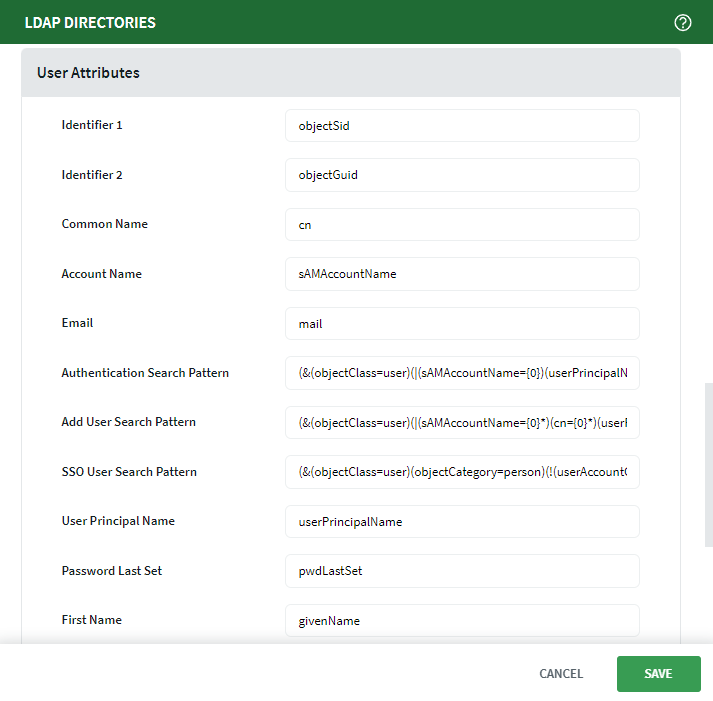
The default attributes are available in General Attributes, Group Attributes and User Attributes sections of the LDAP Directories panel. Only make adjustments if necessary. It is uncommon to make changes to the schema.
Note: Custom attributes are supported (see Custom Attribute 1, Custom Attribute 2 and Custom Attribute 3 at the bottom of the LDAP Directories form in the User Attributes section).Note: Schema attributes names are not translated as those are LDAP query terms and the form itself is dynamic (BE data driven).
-
-
Select Save to create the connection.
Note: The connection is only created if the LDAP server is accessible.Note: Once you create the connection, you can import users and groups from LDAP without an activated connection. Activation means that LDAP users can log in with their LDAP credentials.Note: The SSL certificate is optional. You only need to upload it if the computer with the SOTI Connect installation does not trust the certificate authority of the LDAP server (for example, when using self generated certificates). The SSL certificate should be in
*.pem,*.crtor*.cerformat. The certificate should not contain the secret key and should not be password protected. Once uploaded, you can see the certificate thumbprint and expiration date.Note: The Trusted Root Certificate attached to the LDAP Connection Configuration form must be the direct parent of the Server SSL Certificate. It is different from the root if there are many certificates in the chain. This holds true for all SSL/HTTPS configurations in SOTI Connect.Note: The LDAP server's SSL certificate server address in SAN/CN must exactly match the LDAP server address in the configuration. This applies to all SSL connections, including LDAP.
Enabling/Disabling an LDAP Connection
About this task
Procedure
-
From the SOTI Connect web console, select .
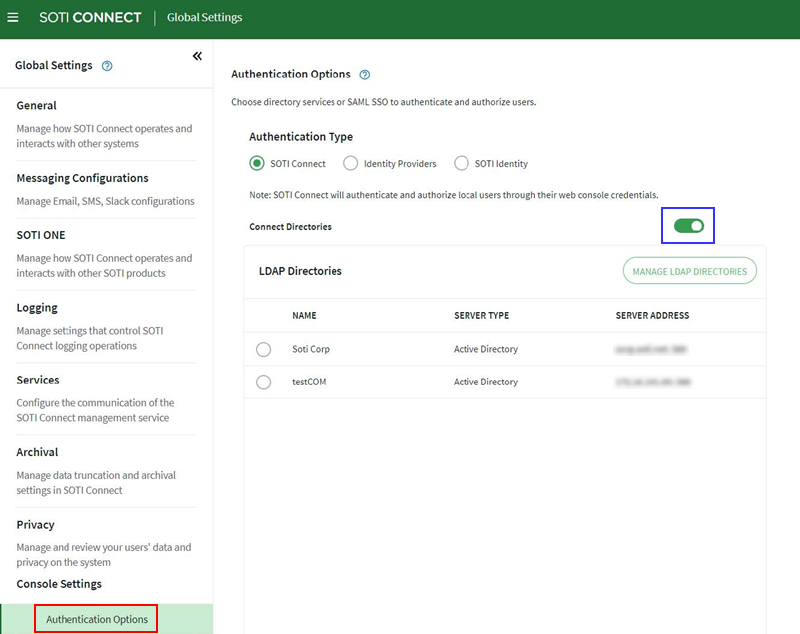
- Select SOTI Connect for Authentication Type.
-
Toggle Connect Directories on to enable LDAP
Authentication (see blue box above in step 1 diagram).
- There can be multiple LDAP connection configurations.
- You can only enable/activate a single LDAP connection at a
time.Note: The LDAP connection activation affects the logged-in users. Authentication types in SOTI Connect are exclusive. Activating an LDAP authentication type disables IDP authentication types and vise versa. Logged-in users are forcefully logged out if their authentication type is no longer active.Note: SOTI Connect logs out all logged-in users when the authentication type changes.
Creating (Importing) a User or Multiple Users
Procedure
- In SOTI Connect web console, select Users and Permissions.
- In the Users tab, select the Create New User icon to add a new user from LDAP.
- Select the Directory user tab to create (import) a user from LDAP.
- Search for the user by their username, login, or email. You should also be able to see the name of the organization you are searching within, as defined by the LDAP connection settings.
-
Select one or more users from the search results.
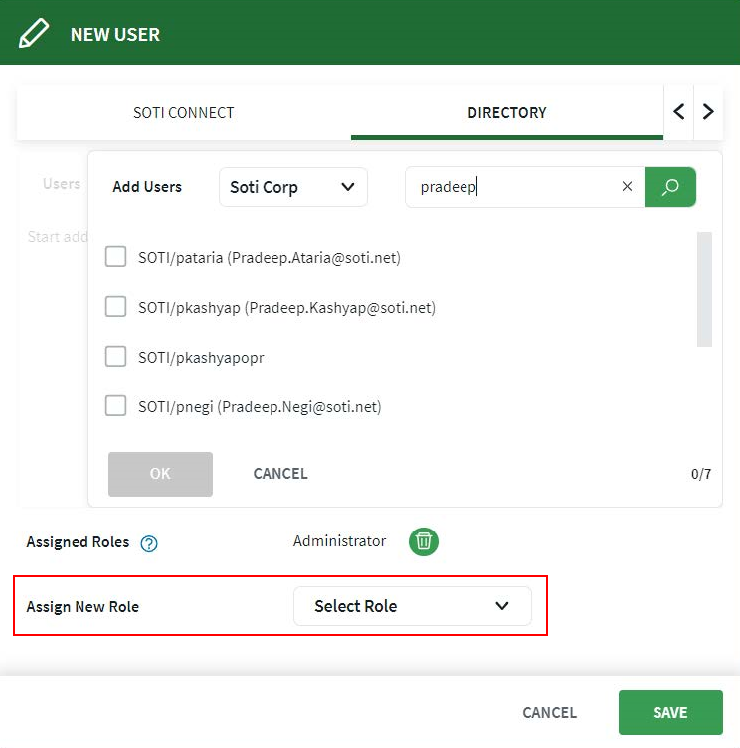
- You can keep the default Assigned Roles or use Assign New Role to assign required SOTI Connect roles.
- Select Save
Creating (Importing) a Group
Procedure
- In the SOTI Connect web console, select Users and Permissions.
- Select the Groups tab.
- Select Create New Group.
- Select the Directory group type to create (import) from LDAP.
- Search by Group Name.
- Select a group from the search results.
- Assign the roles to assign to the LDAP group members.
- Select Create.
Authenticating with LDAP Credentials
Before you begin
- An enabled LDAP (AD) connection (see Enabling/Disabling an LDAP Connection).
- A created or imported user of type Directory.
- You are not logged in to SOTI Connect.
Procedure
-
Enter the AD user login using one of the following formats:
- company\username
- username@company
- username (in this case the company comes from the LDAP connection settings)
- Enter the AD user password.
-
Select Login.
Note: The AD user login does not involve any redirects and is indistinguishable from an internal user login.The AD user is logged in.