Installing and Setting Up SQL Server
About this task
SQL Server is a sophisticated application, with many different ways to install, configure, administer, and secure it. If you are an experienced database administrator, you might have preferences and requirements for using SQL Server. The instructions below are intended for those with limited experience so they can get up and running quickly. The following steps assume you do not have a SQL Server instance installed. They will guide you through downloading and configuring the free SQL Server Express edition.
During SOTI Connect installation, you require more database privileges than during the normal operation of SOTI Connect. This means you should reduce the level of access after installation is complete:
- Normal working operations:
db_ownerrequired - During new install or upgrade of SOTI Connect:
Sysadminis required. The SA account is a super admin with permissions for any scenario. - Service running as local system and DB is installed on the same server: The service
is run by the computer with
Local System > NT AUTHORITY\Systempermissions. NT needsSysadminpermissions during an upgrade. - Service running as local system and the DB is installed on a remote server: The
database does not use the local system or
NT AUTHORITY\System, but becomesMachineName$(for example,domainname\computername). Using Microsoft SQL Server, add the user or the group containing the user to thedb_ownerrole. - Service running as a service account: Ensure the user account is also in the DB as an
account with the correct permissions. For example, if the user account
samplecompany/ConnectMDMis running the service,ConnectMDMwith the domainsamplecompany, the account must be given the needed permissions.
Downloading and Installing SQL Server and SQL Server Management Studio
Before you begin
- Decide where you will install SQL Server. We recommend installing the databases on a separate machine (server or VM).
- Note the connection string as it appears in the installation process. You will need this later when you install SOTI Connect.
Procedure
-
Download Microsoft SQL Server 2019 Express
to your local machine.
If you encounter installation issues, update Windows and reboot. Repeat updating and rebooting until there are no more updates to install.Note: You might have to restart your SQL Server instance multiple times throughout this installation process so that security changes you make to your database setup can take effect.
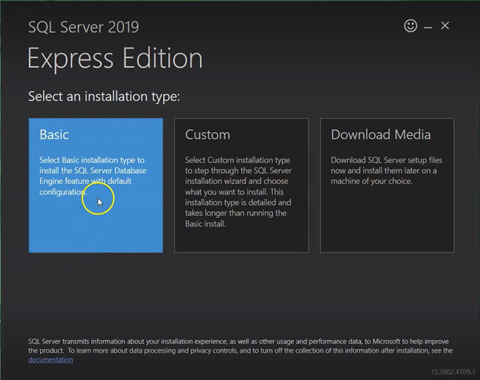
- Run the SQL Server installer .exe file on your local machine.
-
Select the Basic installation type to download SQL
Server and all related utilities.
-
Accept the license terms and conditions. Keep the default installation
location on the C: drive, then select
Install.
The installer will download and install all the required SQL Server packages. When everything has been installed sucessfully, you will see a notification page that looks like the following:
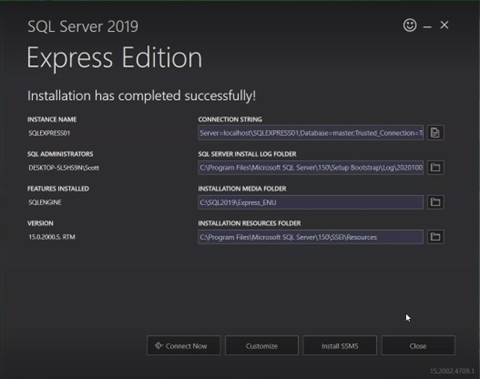
-
Note the server address in the Connection String
field. You will need to refer to this when you are installing SOTI Connect.

- On the installation successful notification page, select the Install SSMS button to begin downloading and installing SQL Server Management Studio.
- When the SSMS installation .exe file finishes downloading, run the .exe. In the installer window, select where you want to install the SQL Server Management Studio. Keep the installation location on your machine's C: drive.
-
Select Install.
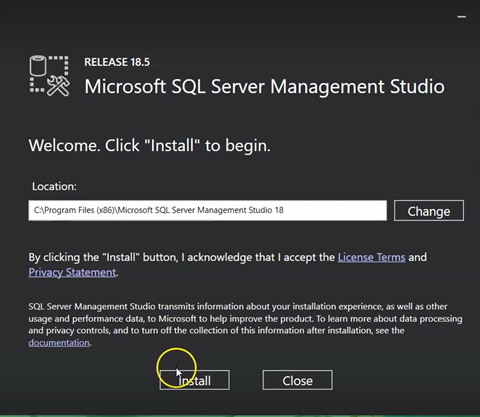 Once the installation is complete, the Setup Completed screen opens.
 - Close all your applications and restart your machine.
Configuring SQL Server to Work with SOTI Connect
Procedure
- Open the SQL Server Management Studio.
- Establish a connection to the SQL Server instance by entering the server address you previously noted from the installation successful notification page's Connection String field.
-
Select Connect.
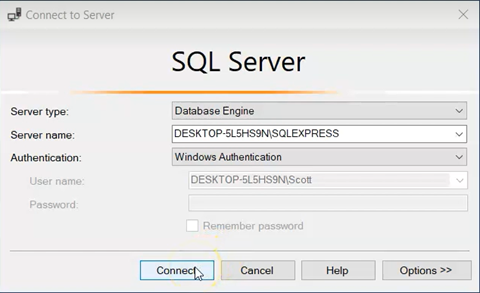 When SQL Server connects successfully, you will see the instance name in the list.
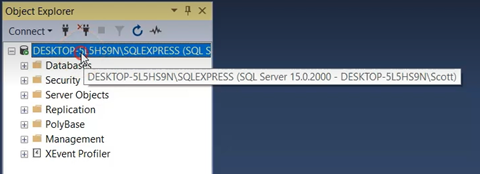
-
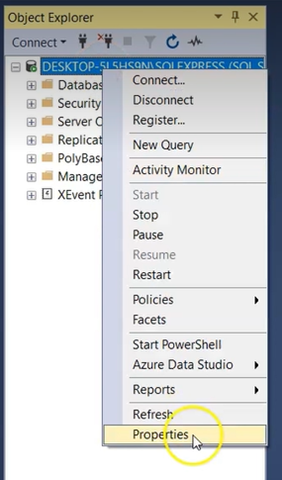
Change the server authentication to SQL Server and Windows
Authentication mode. Right-click the instance name and select
Properties.
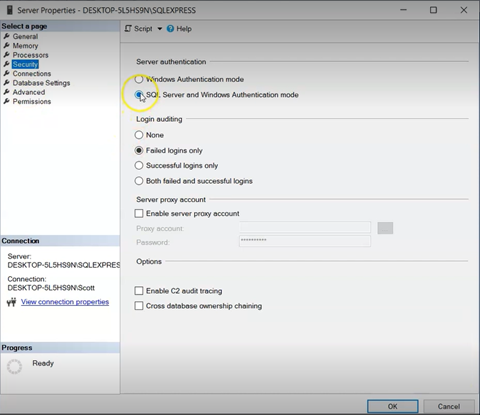
- In the left pane, select Security.
-
Select SQL Server and Windows Authentication mode in
the Server authentication section. Select
OK to save your changes.
- Determine if you want to use a local SQL account or a Windows account for authentication. The following instructions reference a local account.
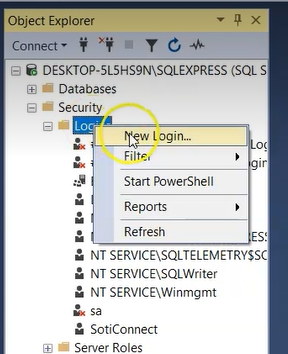
-
Expand the Security folder and right-click
Logins. Select New
Login.
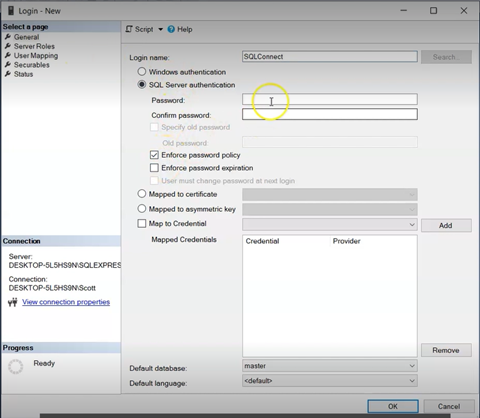
-
Enter a Login name, select SQL Server
authentication, and create a suitably complex password for
the login.
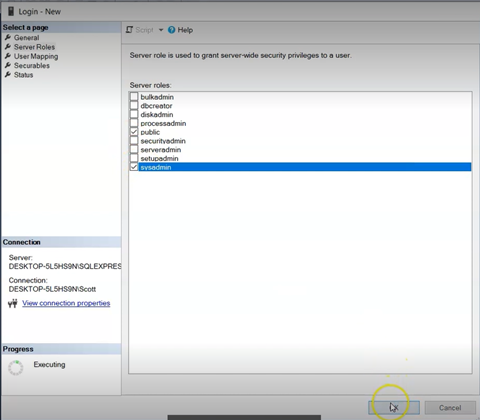
-
In the left pane, select Server Roles, select the
sysadmin checkbox, and select
OK.
 You should see a new login account under the Logins header in the left panel.
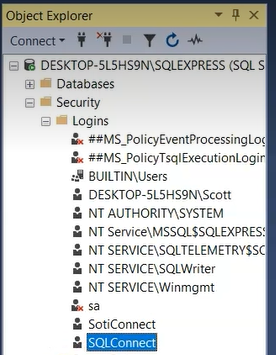 Important: Use this login for your database when you install SOTI Connect.
 -
Ensure NT AUTHORITY\SYSTEM has the sysadmin role
assigned to it. Right-click NT AUTHORITY\SYSTEM and
select Properties. Under Server
Roles, verify that the sysadmin
checkbox is selected.
Note: This login is used if SOTI Connect is installed using Windows Authentication.
If the database runs on a remote server, the login will not be
NT Authority\System. It will beMachineName$(for example,domainname\computername). - Keep SQL Server Management Studio running, then run the SQL Server Configuration Manager utility, included as part of SQL Express.
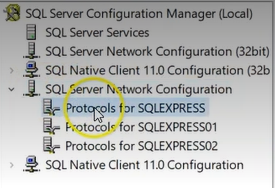
-
In the SQL Server Configuration Manager utility, expand SQL
Server Network Configuration and select Protocols
for SQLEXPRESS (or the protocol for your SOTI Connect instance name if it is different).
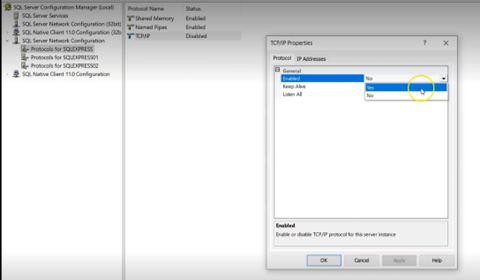
-
Right-click the TCP/IP protocol to enable it and select
Properties.
-
Select the IP Addresses tab, empty any IP TCP
Dynamic Ports fields and set the IPAII
TCP Port to
1433.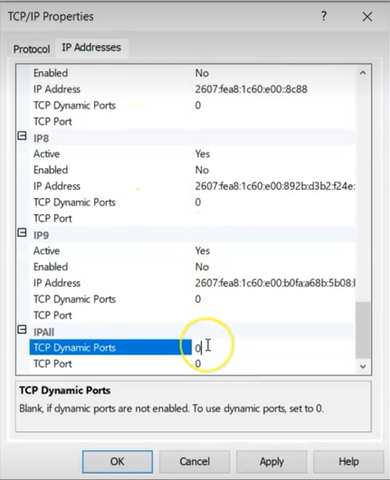
- Select Apply, then select OK.
- Restart your SQL Server instance and SQL Server Management Studio to apply your changes.
Results
SQL Server Security Notes
The above steps should get you up and running with SQL Server quickly. Keep reading for additional information about securing access to the database and minimizing permissions.
During SOTI Connect installation, more database privileges are required than during the normal operation of SOTI Connect. This means you should reduce the level of access after installation is complete.
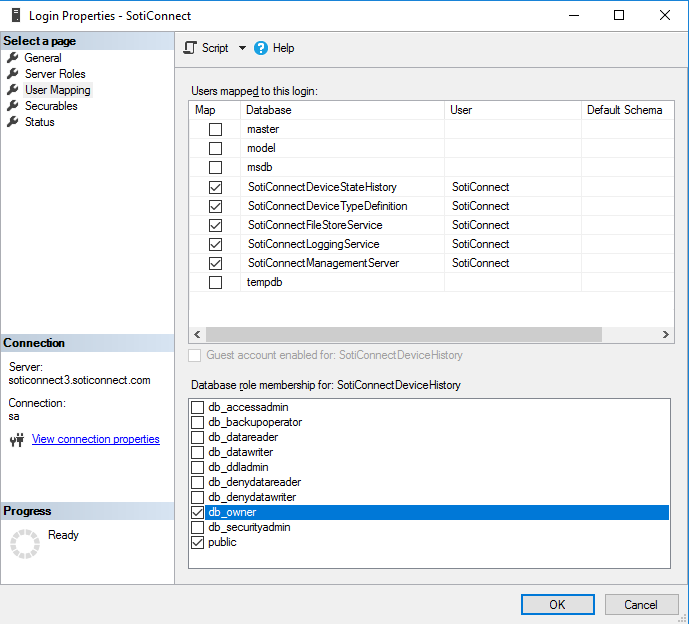
If you used the SQL Server authentication option (i.e., using the SotiConnect login in the example above), you should remove the sysadmin role after SOTI Connect installs. You should also confirm that the SotiConnect login has db_owner user mappings for all the SOTI Connect databases.
You must restore the sysadmin role to the SotiConnect user before running the SOTI Connect installer again.
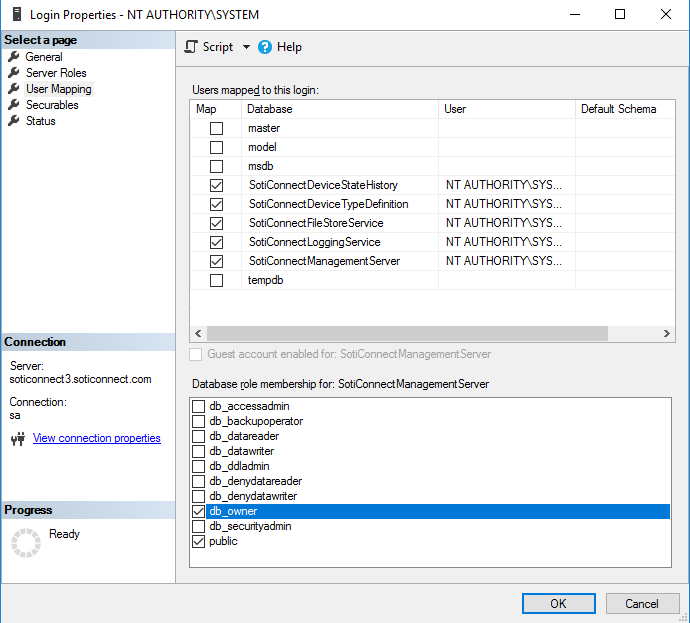
If you used the Windows authentication method to install SOTI Connect, you should remove the sysadmin role from the NT AUTHORITY/SYSTEM login. You should also confirm that this login has db_owner user mappings for all the SotiConnect databases.
You should also remove the sysadmin role from the user who ran the SOTI Connect installer. You must restore the sysadmin role to that user before running the SOTI Connect installer again.