Typical (All-In-One) Installation
Before you begin
Ensure you have a SQL Server already installed.
About this task
Use the following steps to install SOTI Connect:
Procedure
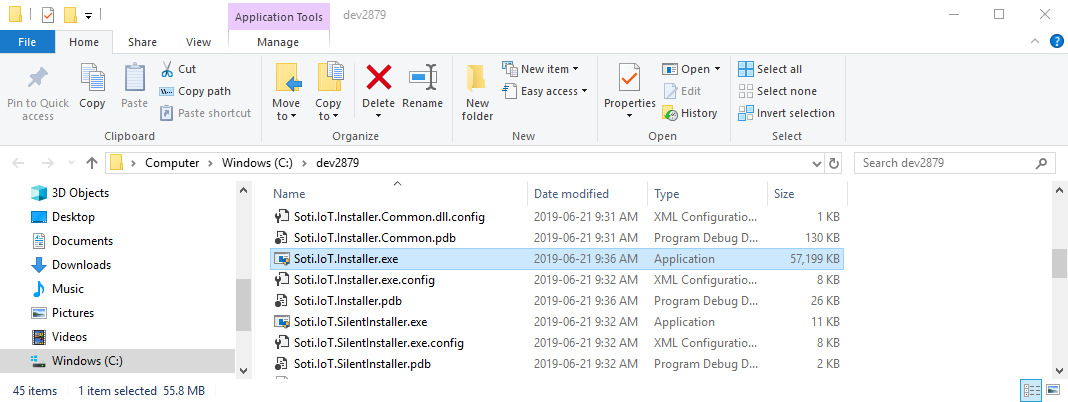
- Extract the SOTI Connect installation package (.zip file) to a temporary folder.
-
In the temporary folder, double-click the installer (Soti.IoT.Installer.exe).
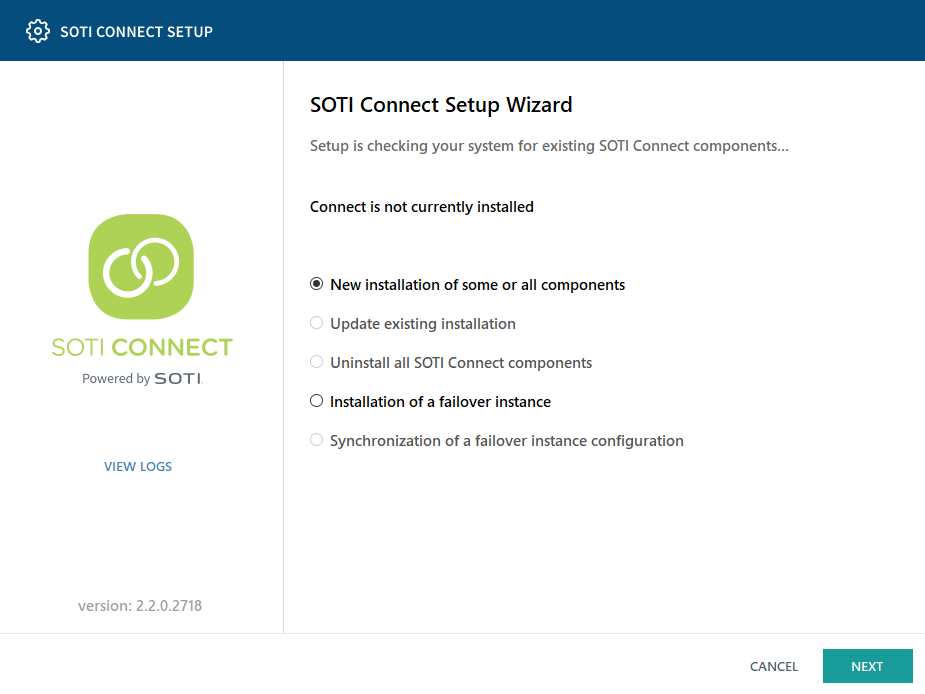
When prompted, confirm that you want to allow the installer to make changes to your system.
-
In the installer, select New installation of some or all components. Click Next.
-
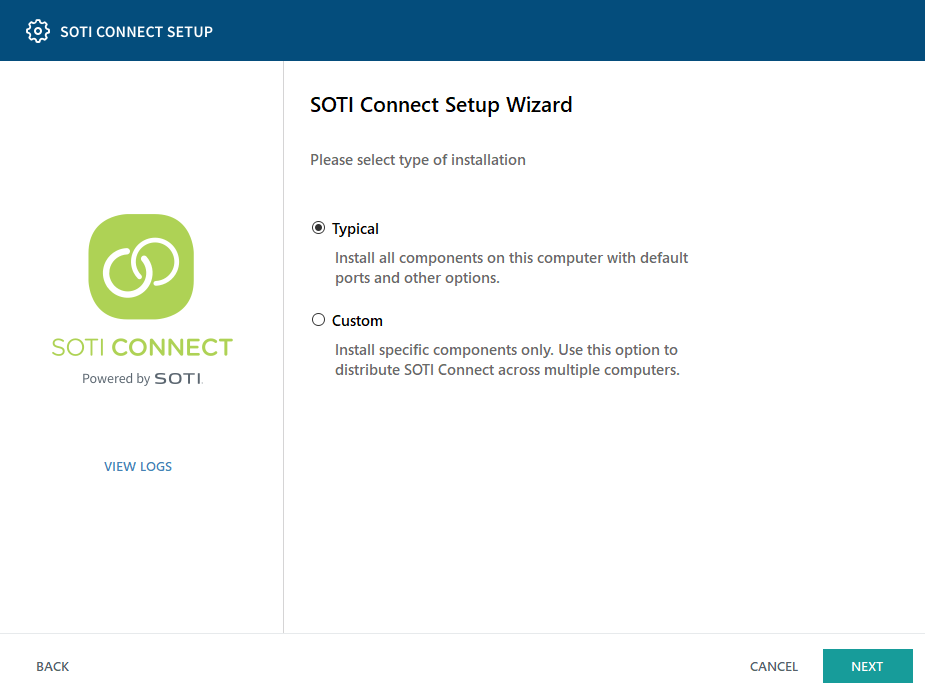
For the installation type select Typical. Click Next.
-
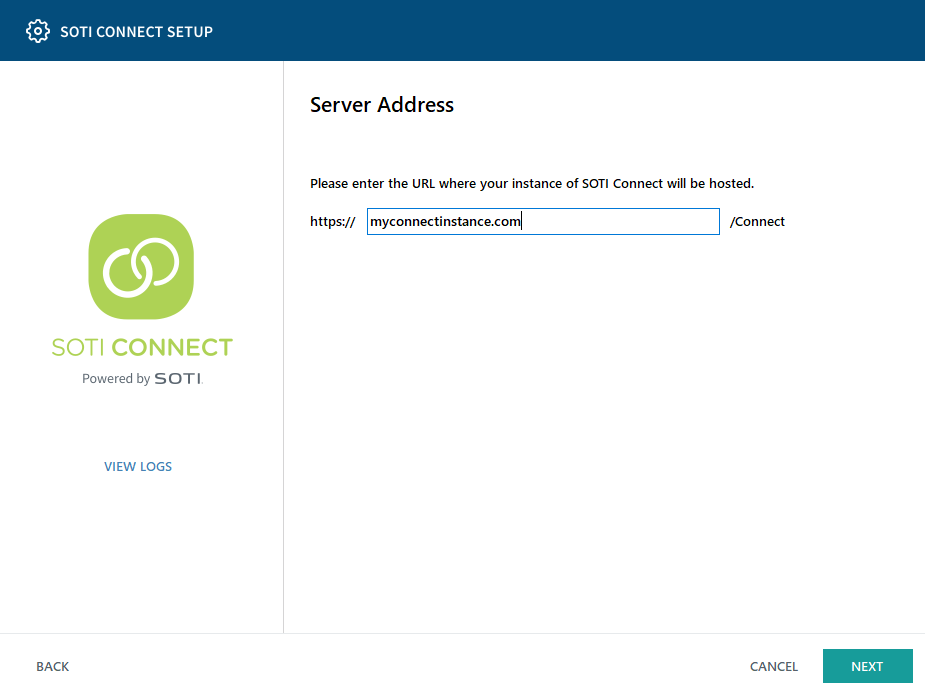
Enter the URL where your instance of SOTI Connect will be hosted. Click Next.
-
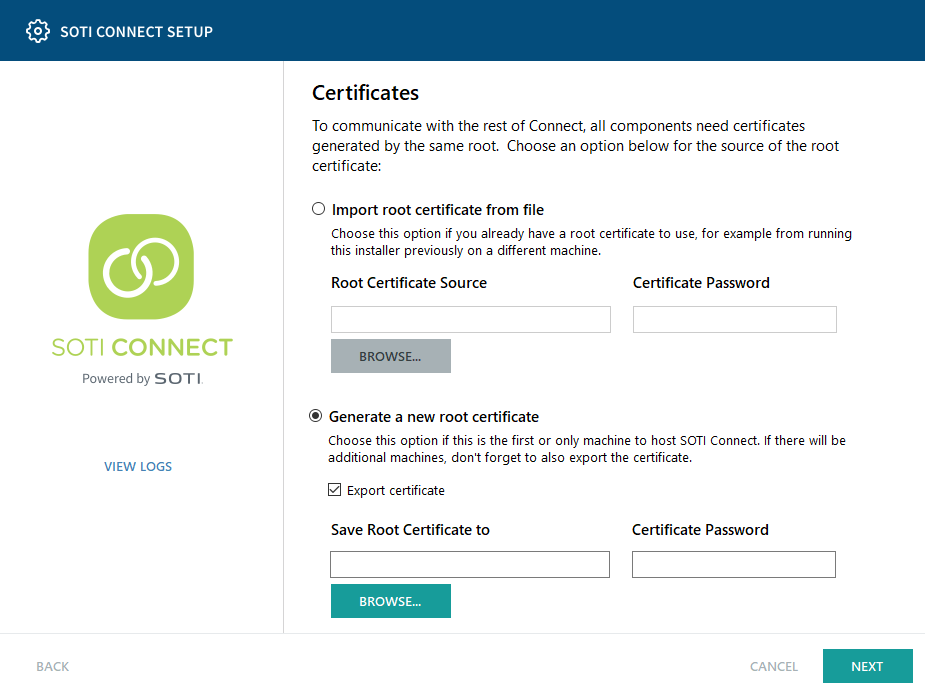
Select whether you want to import a root certificate from an existing file or
generate a new root certificate. Click Next.
Select Generate a new root certificate if you are performing a typical installation where all components are located on the same machine.
-
For HTTPS communication you need a server certificate. Select one of the
following options, then click Next.
Option Description Use root certificate from previous step Select this option to generate and use another certificate from the same root certificate used in step 6. Upload a PFX certificate Select this option if you have a certificate file you want to use (for example, one you purchased from a trusted certificate authority). Use a previously installed certificate from the Windows Certificate Store Select this option if the certificate you want to use is already installed in the Windows trusted store and you know its thumbprint value. This method allows you to specify a password-protected certificate without needing to know the password. Skip this step and deal with this manually later Select this option if one of the following applies: - there is already a certificate being used for HTTPS communication
- you want to manage the certificate later directly from your operating system
Note: This option is not recommended unless you are comfortable performing manual installation of a certificate.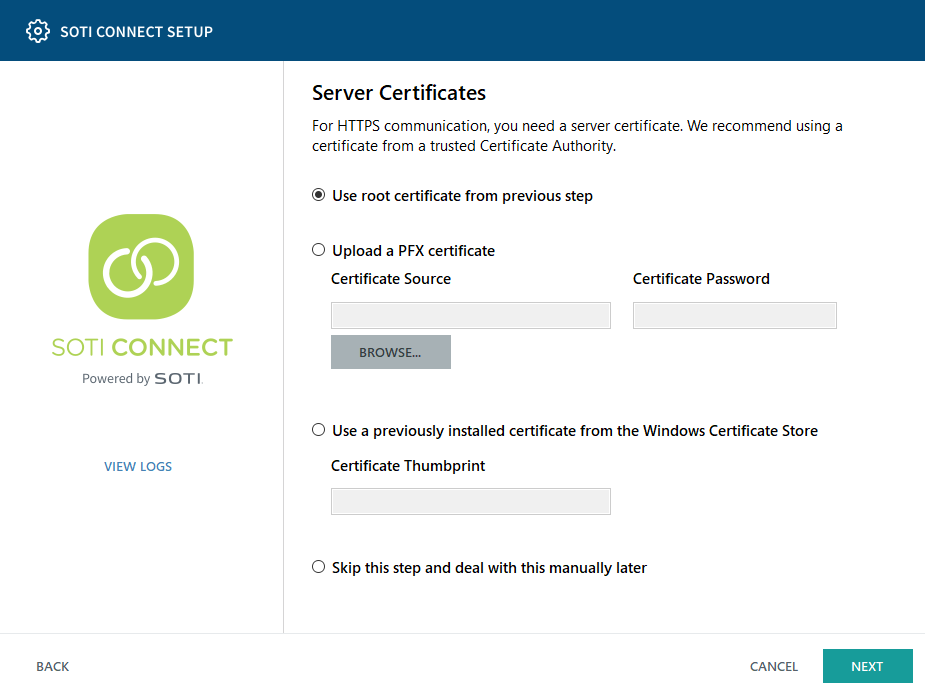
-
Enter details specific to the REST Protocol Adapter and the URL where the
webhook receiver will be hosted. Click Next.

-
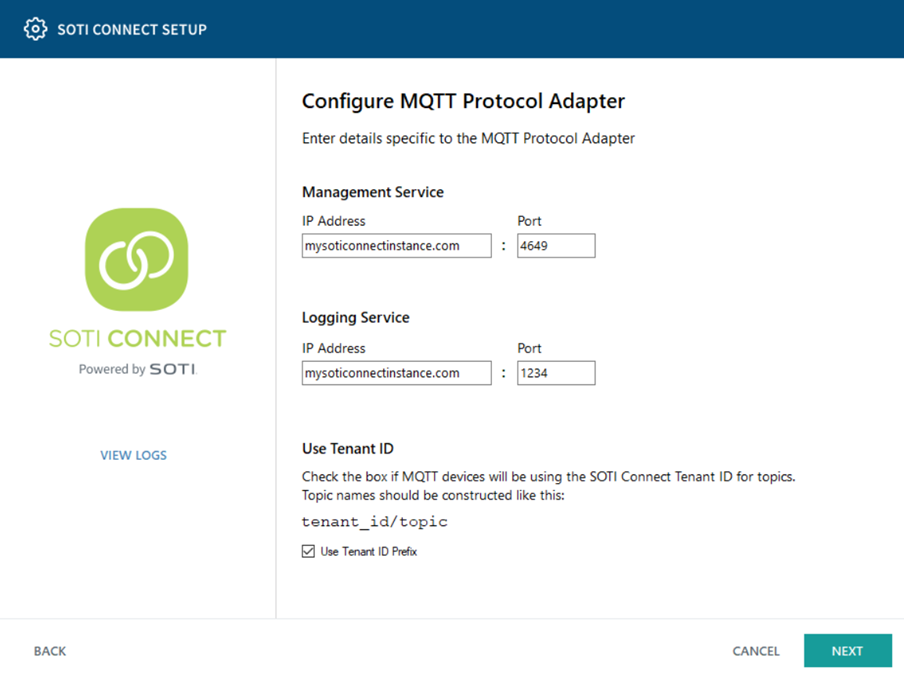
Enter details specific to the MQTT protocol adapter. Click Next.
The MQTT protocol adapter is preconfigured. The connection addresses and ports entered in this panel must match the addresses and ports where these services are listening.
Select the Use Tenant ID Prefix option if you want your MQTT devices to recognize only this single instance of SOTI Connect.
-
Enter the settings for the MQTT printer simulator. Click Next.

-
Enter the settings for the MQTT sensor simulator. Click Next.

-
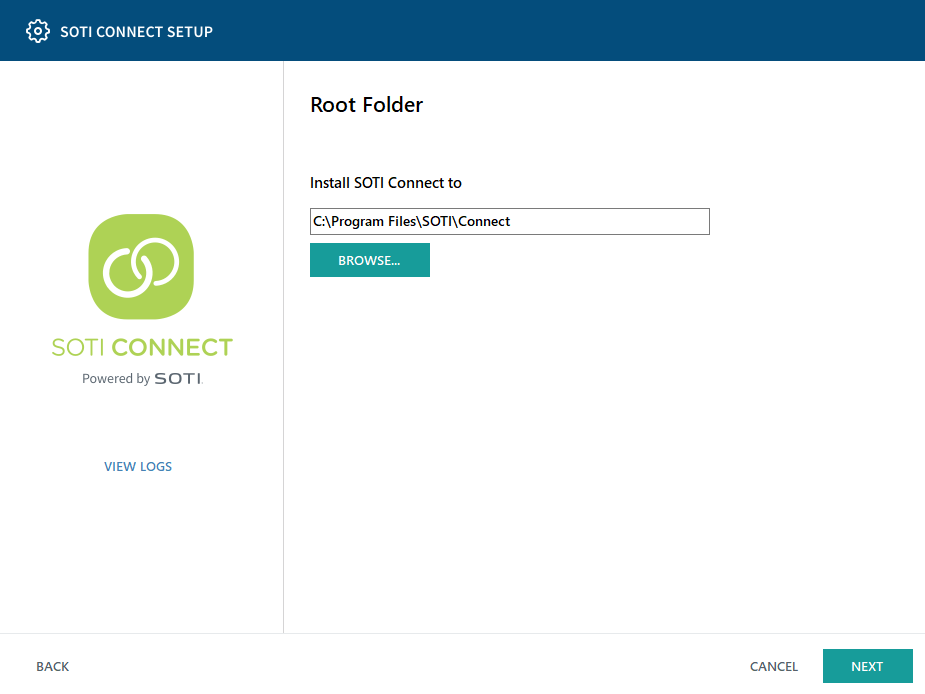
Click Browse to select the root installation folder, or accept the default location. Click Next.
-
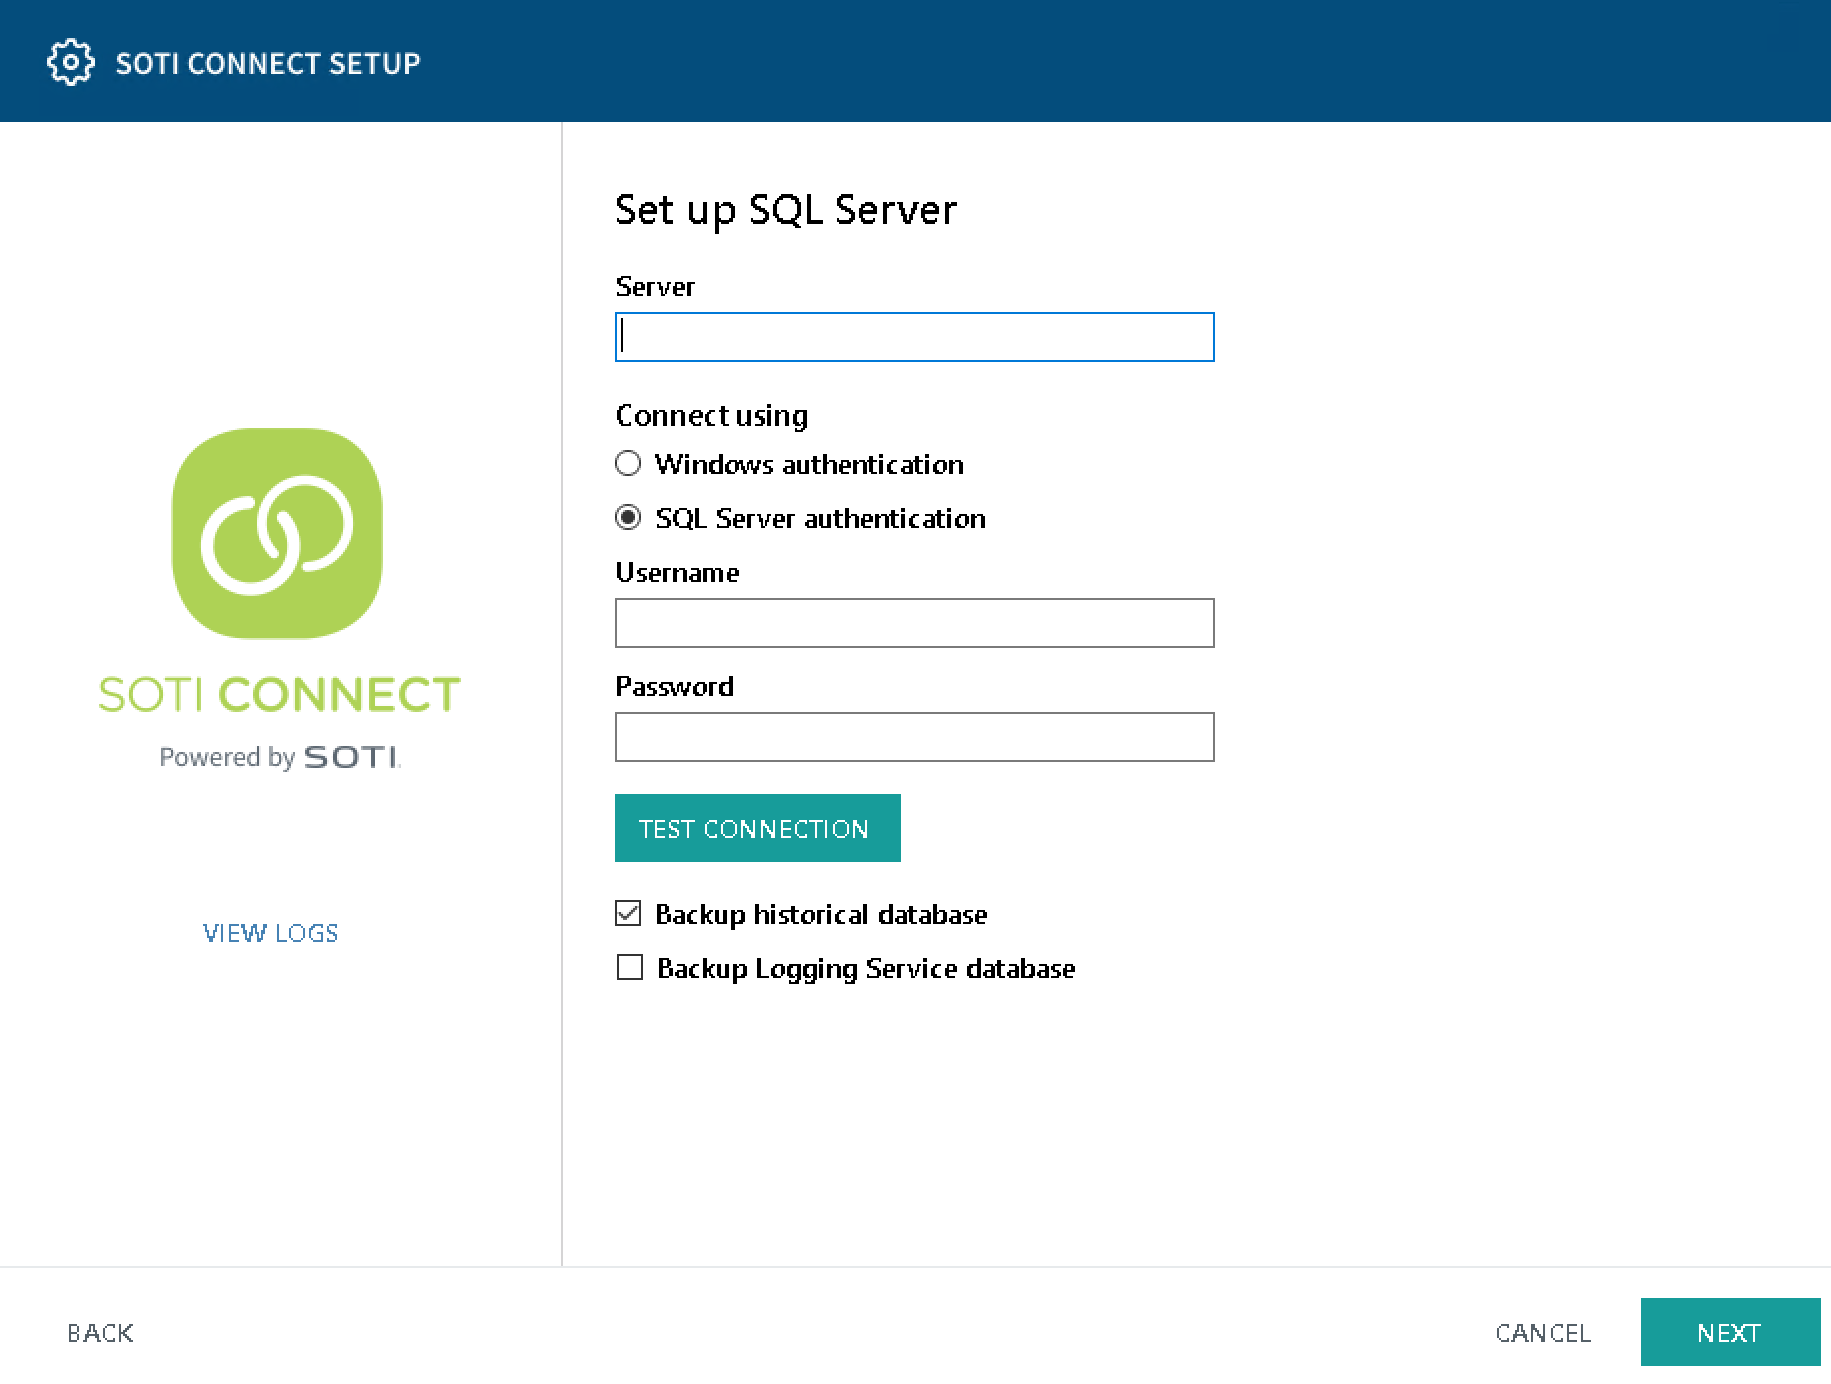
Enter the information required to connect to your SQL Server database. Click Next.
All SQL Server database connections default to localhost. If you have more than one instance, you must specify the instance as localhost\SQLEXRESS.
If you have multiple instances of SQL Server or SQL Server Express running on your machine, be sure to select the right one. The connection string in the Server field can vary.
As part of installation, a backup will be made of the main SQL database. You can optionally also select to Backup historical database and Backup Logging Service database by clicking those boxes.
Select Windows Authentication if that is how you prefer to connect to the SQL Server database. Note that the SOTI Connect service using the database will run as the LOCAL SYSTEM account. If you select Windows Authentication, ensure that the account running the Management Service (the default LOCAL SYSTEM) has sufficient privileges in SQL Server.
-
Enter and confirm a temporary administrator password (you will be asked to change it when you log into SOTI Connect for the first time), and generate a client ID and client secret other applications will require to access the API. Click Next.
Note: Be sure to store the client ID and client secret in a secure location.

-
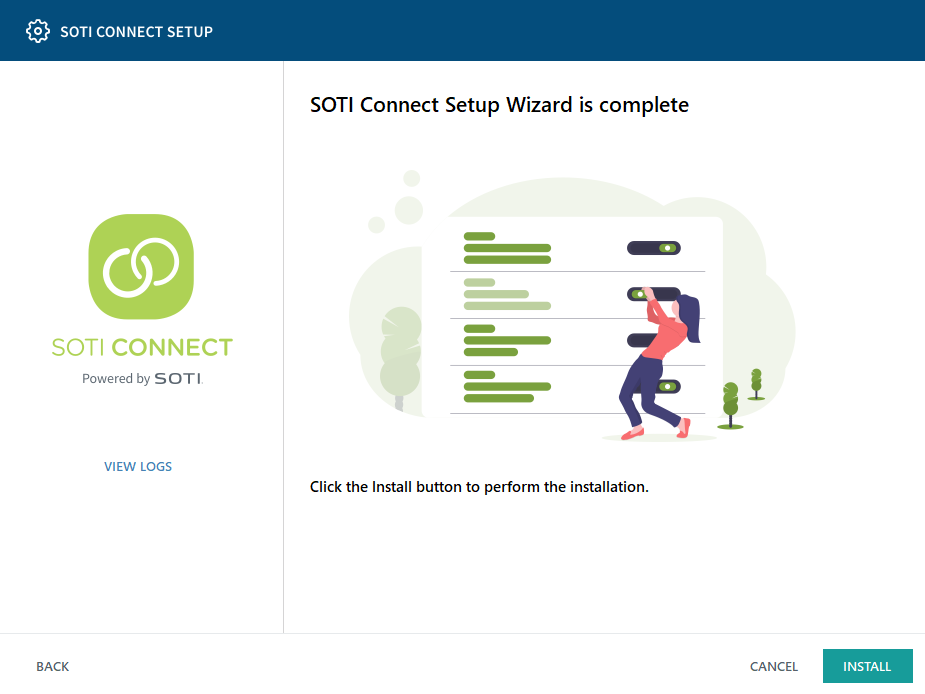
Click Install to start installing SOTI Connect.
-
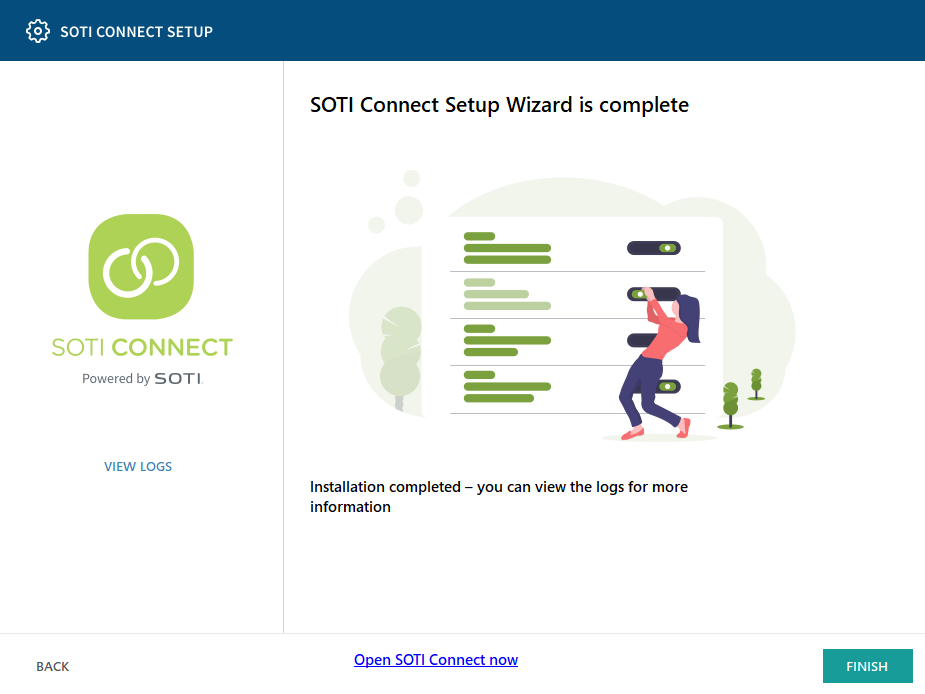
Click Finish to complete the SOTI Connect installation.
Results
You have now installed SOTI Connect.
What to do next
We recommend that you use the Watchdog utility (installed with SOTI Connect) to check that SOTI Connect services are running. You will need to run the utility as an administrator. You can access it from the same directory where you installed SOTI Connect.