Setting Up SQL Server
About this task
SQL Server is a sophisticated application, and there are many different ways to install, configure, administer, and secure it. If you are an experienced database administrator, you might have your own preferences and requirements for using SQL Server. The instructions below are intended for those with limited experience so they can get up and running quickly. The following steps assume you do not have an SQL Server instance installed, and will guide you through downloading and configuring the free SQL Server Express edition.
Procedure
- In a web browser, go to https://www.microsoft.com/en-ca/sql-server/sql-server-editions-express.
-
Download Microsoft SQL Server 2017 Express to your local machine and install it. Use the default instance name
SQLEXPRESS.If you encounter installation issues, update Windows and reboot. Repeat updating and rebooting until there are no more updates to install. - Install SQL Management Server Studio (SMSS) and open it.
- Connect to the recently installed SQL Server using Windows Authentication.
- Right-click on the server name and select Properties.
- In the left pane, click Security.
- Under Server Authentication, select SQL Server and Windows Authentication mode.
-
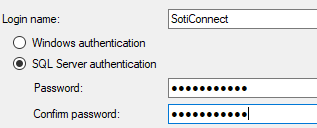
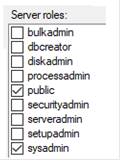
Go to and create a new login named SotiConnect.
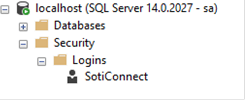
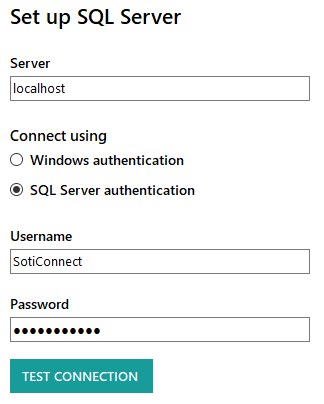
This login can be used during installation of SOTI Connect when using SQL Server authentication.
- Run the SQL Configuration Manager which comes with the SQL Server Express installation.
- Go to SQL Server Network Configuration for your SQL Server Express instance.
- Click on Protocols for SQLEXPRESS.
- Make sure TCP/IP is enabled.
-
Double-click TCP/IP, switch to the IP Addresses tab, scroll down to IPAll, and set your TCP port to 1433. Make sure TCP Dynamic Ports is empty.
We recommend that you enable Named Pipes.
- Restart your SQLExpress service instance from Windows Services.
-
In SSMS, go to and make sure a login named
NT AUTHORITY\SYSTEMexists. Create it if necessary, and give it the sysadmin server role.This login will be used if SOTI Connect is installed using Windows authentication.
Note that the current user running the SOTI Connect installer must also have the sysadmin role within SQL Server if Windows authentication is being used for the SQL Server connection.
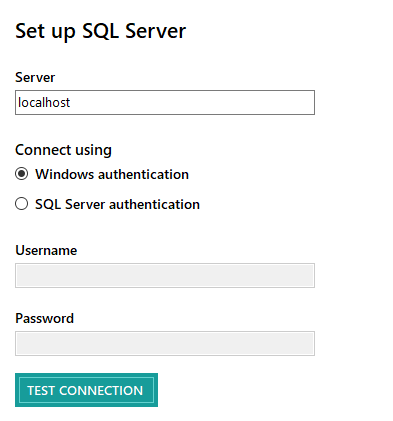
Results
SQL Server Security Notes
The above steps should get you up and running with SQL Server quickly. Keep reading for some additional information about securing access to the database and keeping permissions to the minimum.
During SOTI Connect installation, more database privileges are required than during normal operation of SOTI Connect. This means you can reduce the level of access after installation is complete.
If you used the SQL Server authentication option (that is, using the SotiConnect login in the example above), then you can remove the sysadmin role after installation of SOTI Connect is complete. You should also confirm that the SotiConnect login has db_owner user mappings for all the SOTI Connect databases.
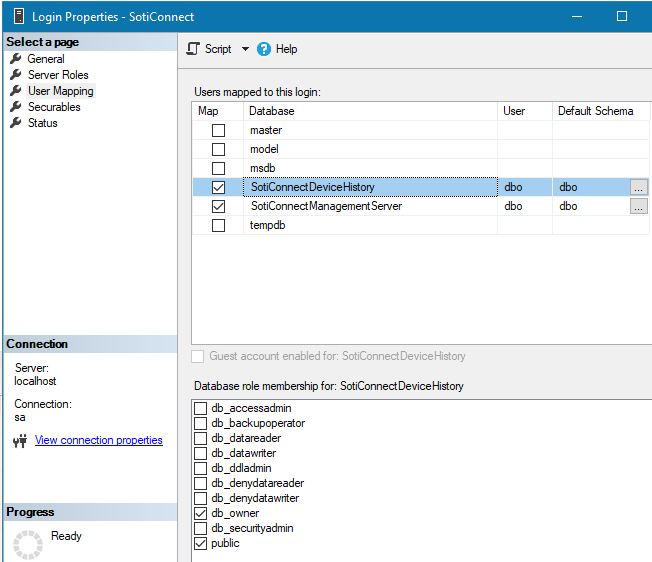
You will need to restore the sysadmin role to the SotiConnect user before running the SOTI Connect installer again.
If you used the Windows authentication method to install SOTI Connect, you can now remove the sysadmin role from the NT AUTHORITY/SYSTEM login. You should also confirm that this login has db_owner user mappings for all of the SotiConnect databases.
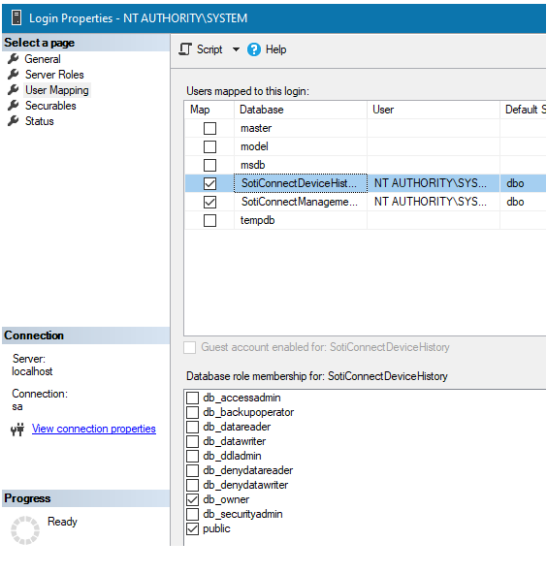
You can also remove the sysadmin role from the user who ran the SOTI Connect installer. You will need to restore the sysadmin role to that user before running the SOTI Connect installer again.
See also:
