Installing the ExchangeOnlineManagement Module
About this task
PSModulePath environment variable if necessary.Note: In a multi-Deployment Server (DS) environment, you must
install PowerShell 5 and the ExchangeOnlineManagement module on each DS
server.
Before you begin
Procedure
- Open PowerShell as an administrator.
-
Run the following command:
Install-Module -Name
                        ExchangeOnlineManagement -RequiredVersion 3.4.0 -Scope
                    AllUsers
Important: If a newer version of ExchangeOnlineManagement is already installed, uninstall it before proceeding. Use the following command:Uninstall-Module -Name ExchangeOnlineManagement -
Enter
Ato accept all prompts. The module installs via PowerShell.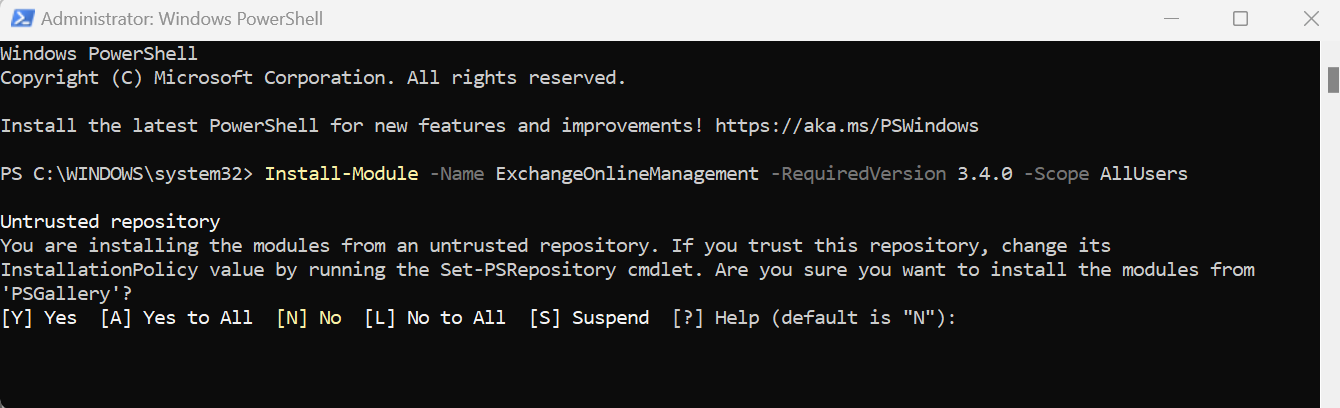
-
After installation, verify that the module directory is included in the
PSModulePathenvironment variable:- Run the following command to locate the installation path:
Get-Module -ListAvailable -Name
                                ExchangeOnlineManagement
- Run the following command to locate the installation path:
-
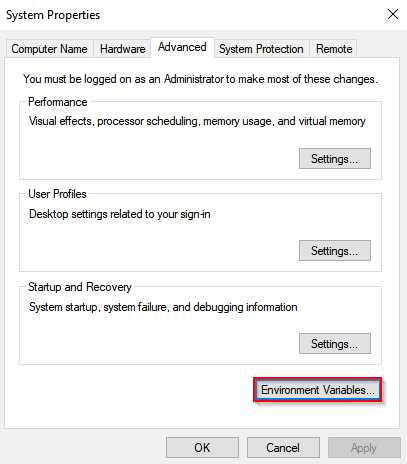
If the module path is not listed in the
PSModulePath, update it:-
In the System Properties window, select
Environment Variables.
-
In the Environment Variables window, find
PSModulePathin the System Variables section and then select Edit.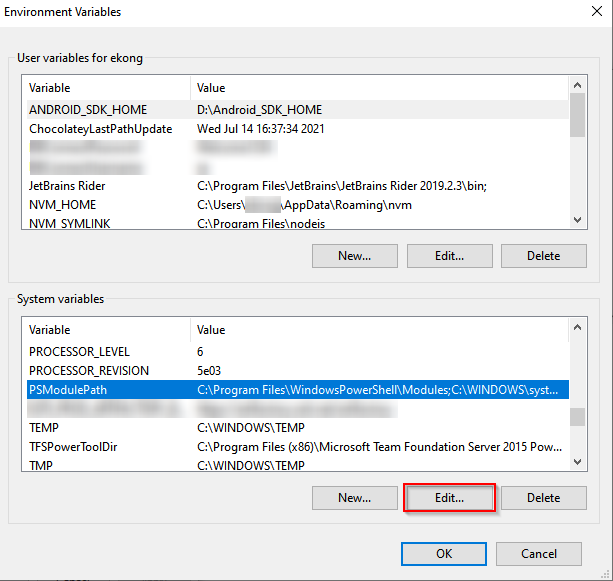
-
In the System Properties window, select
Environment Variables.