Installing the Failover Instance
About this task
Once the active instance is installed, you can install the failover instance.
Important: Close Windows Services
and Task Manager applications before preforming any
installation related activities.
Procedure
-
Run the SOTI Connect installer executable (SOTI
Connect Installer.exe). The SOTI Connect Setup
Wizard is displayed.
Important: Be sure to use the same version of the installer. Failure to do so will result in an unsuccessful installation.
-
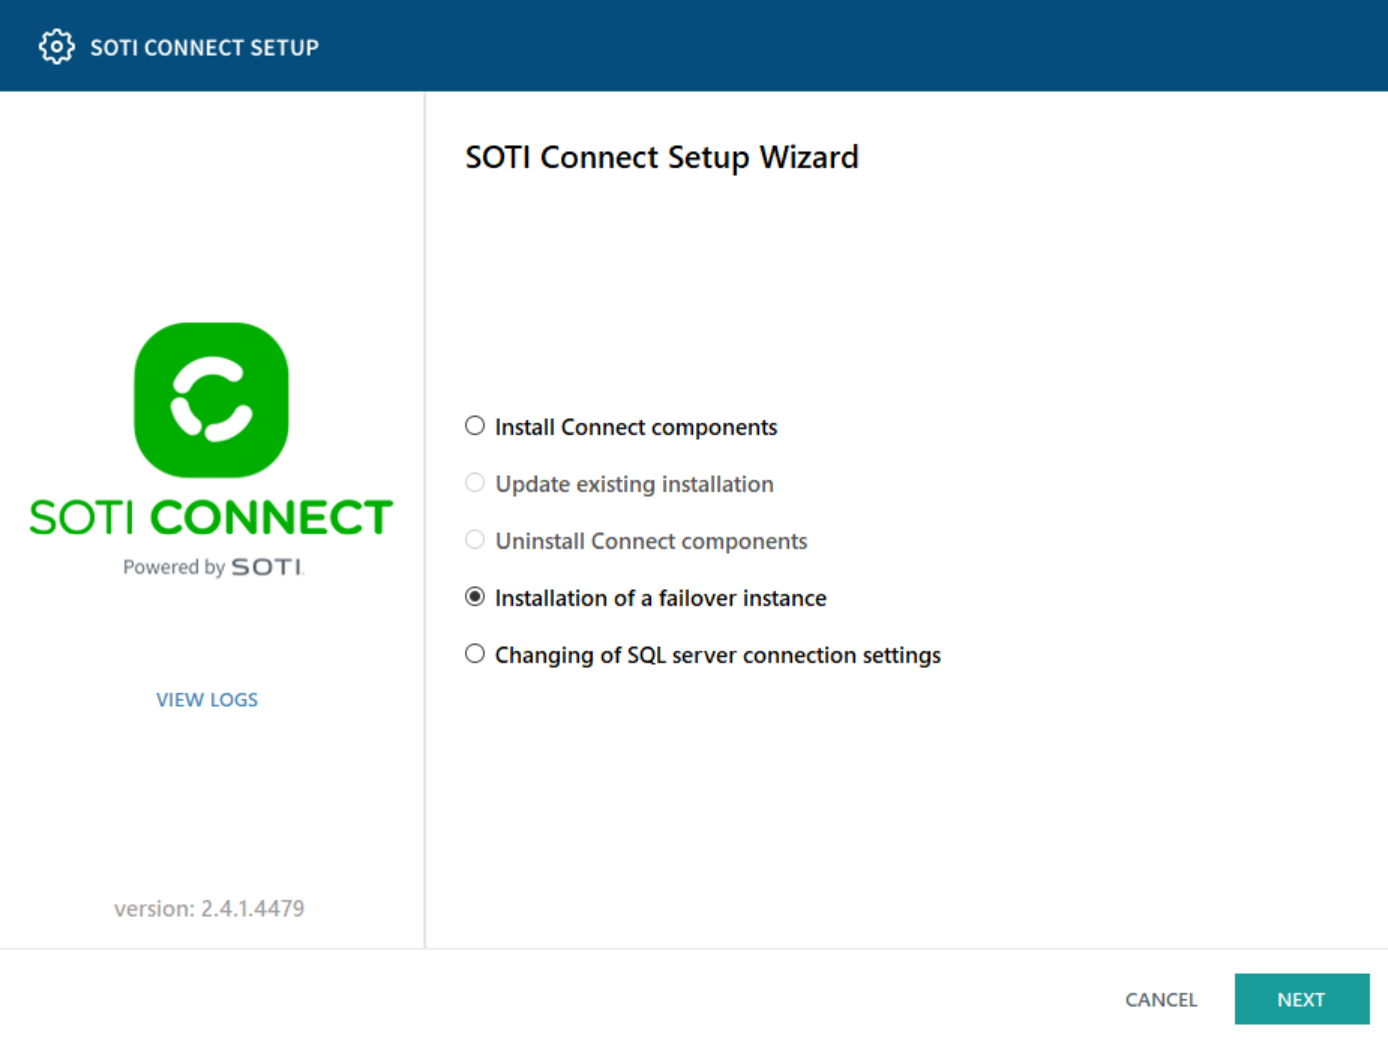
On the SOTI Connect Setup Wizard, select
Installation of a failover instance and select
Next.
-
Select Management Service and additional components as
needed. This includes the Logging Service (this cannot be installed as a
separate component). You can install the File Store Service as a separate
component, see Installing FS with MS. Select
Next.
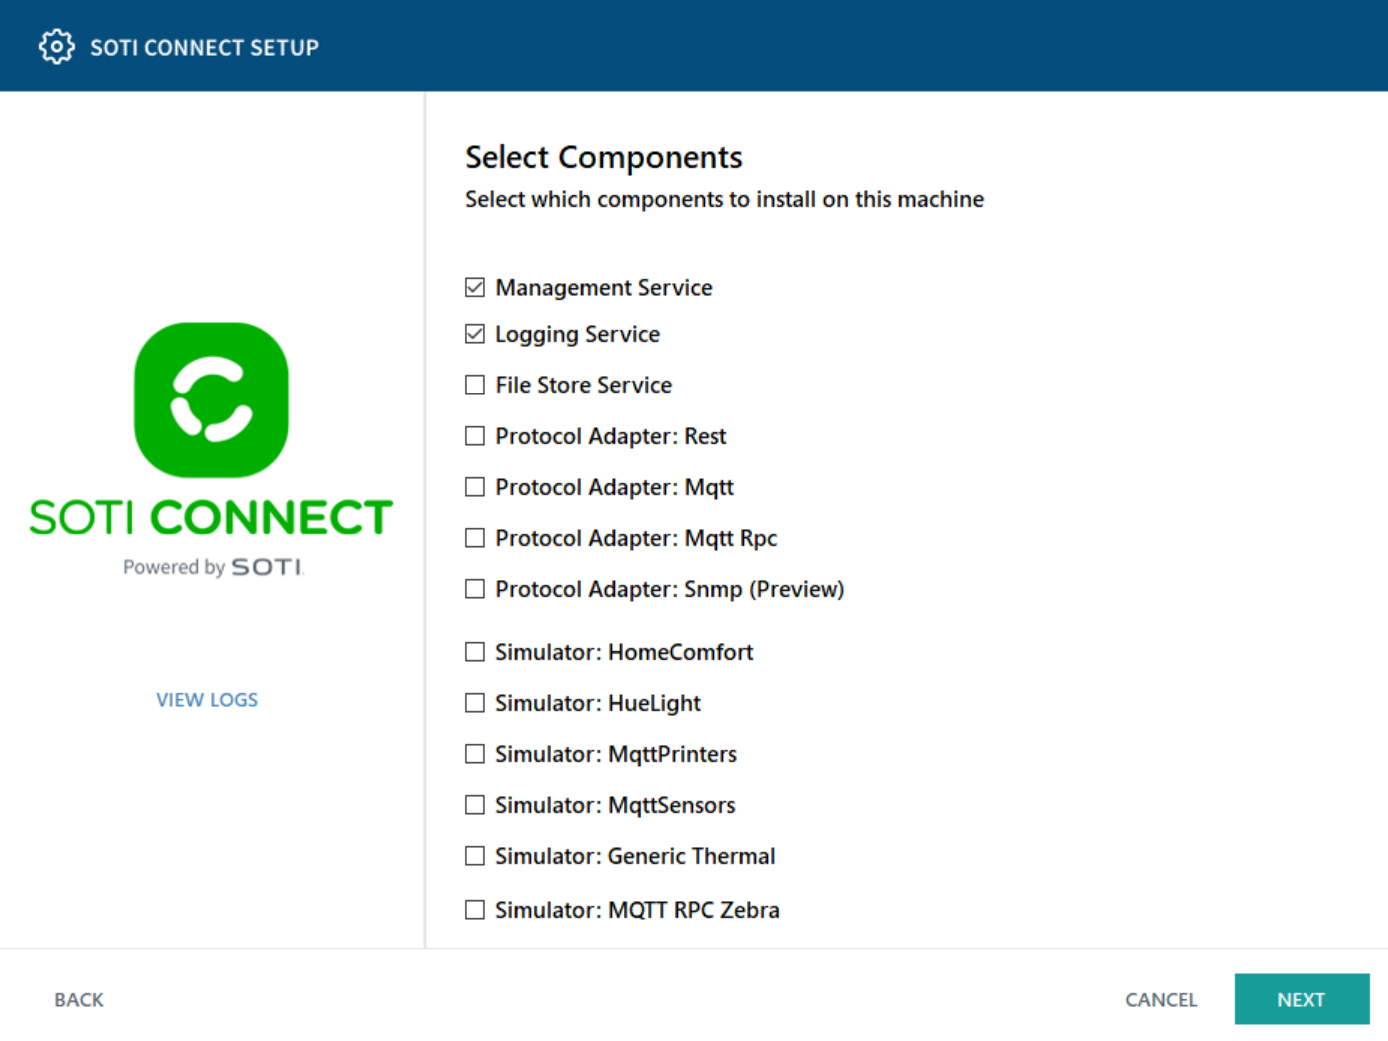 Note: With SOTI Connect v2.4.1, you can add a PA during the failover instance installation. To add a PA, you must first update to SOTI Connect v2.4.1 or later.
 -
On the Locate active Management Service instance screen,
enter the Network Address or FQDN of the active MS
instance.
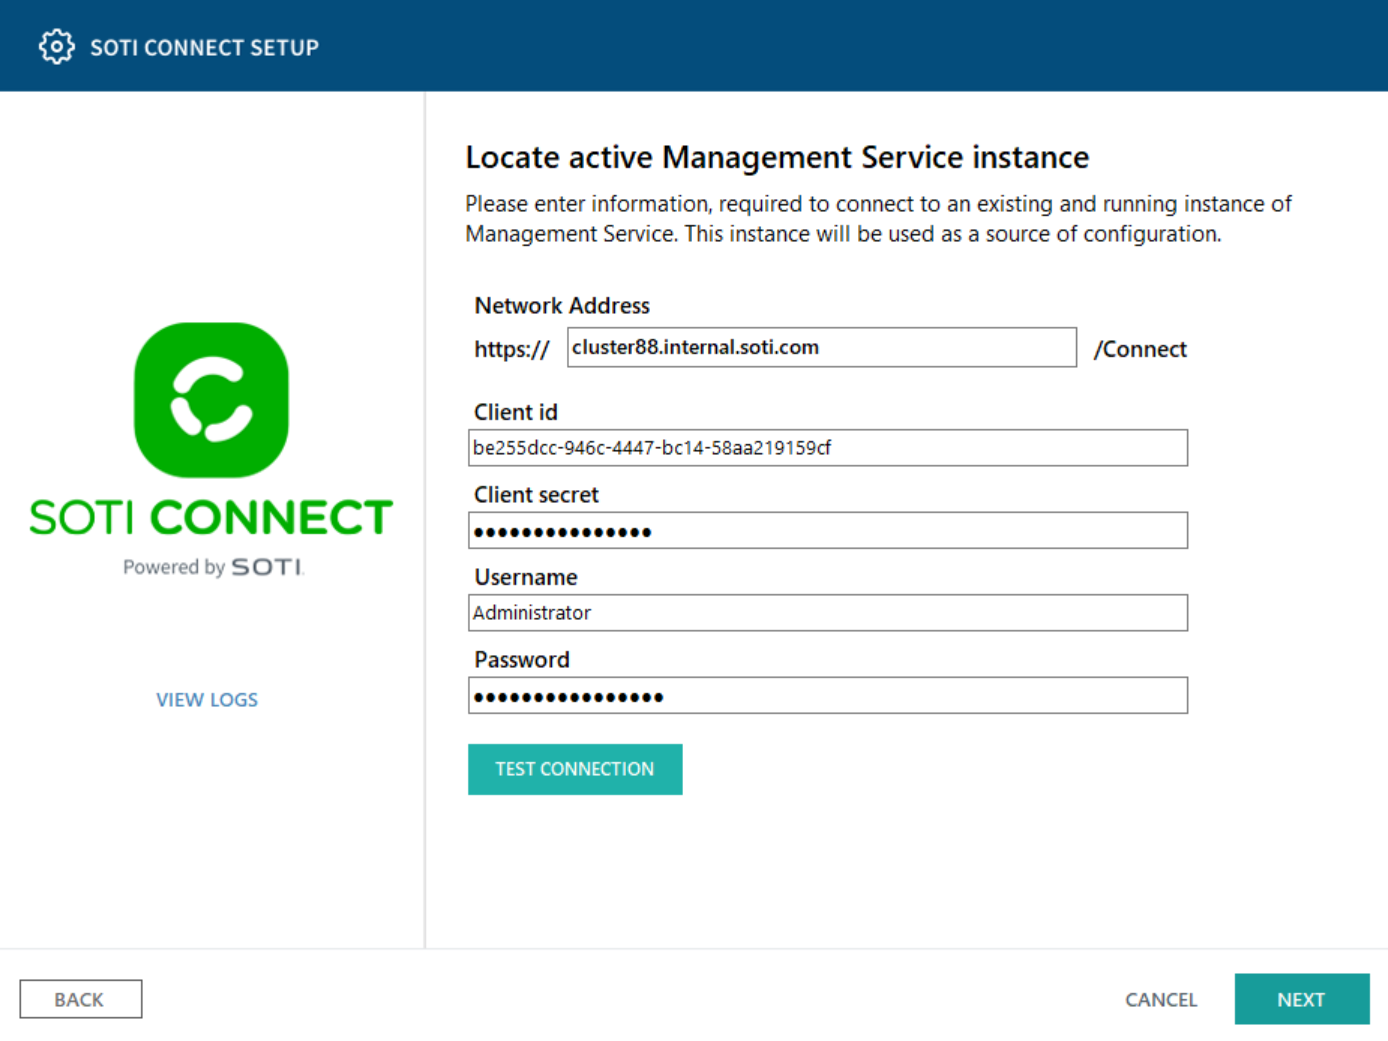
- Enter the Client id, Client secret (configured on the Security Access area of the active MS), Username and Password of an Administrator user. Select Test Connection and select Next.
-
On the Management Service configuration screen, enter
the FQDN of the active MS instance. Select Next.

- Choose the root folder for the failover MS installation.
-
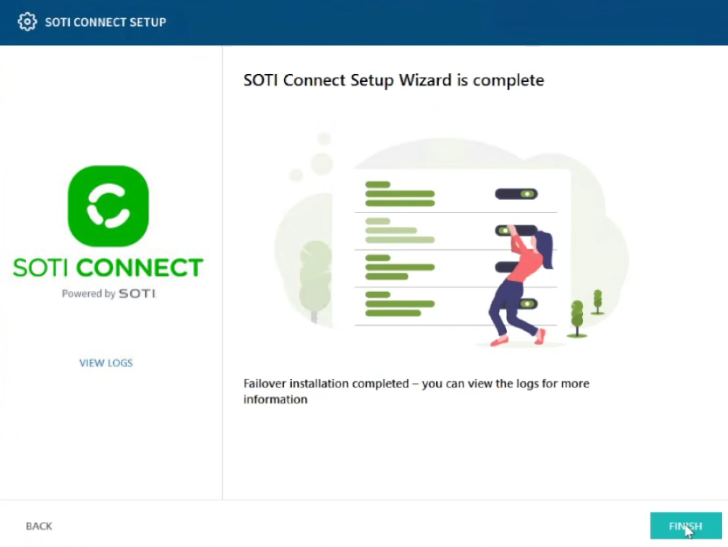
Select Install. The failover instance is installed.
Select Finished when complete.
Note: Only one MS can be connected to the SQL database at a time.