Creating a New Inventory Search
About this task
Procedure
- On the menu bar, click the main menu button and select Network Inventory.
- Click New Network Search.
- Enter a Network Search Name. This name is displayed in the left-hand menu of the Network Inventory.
-
Click Save.
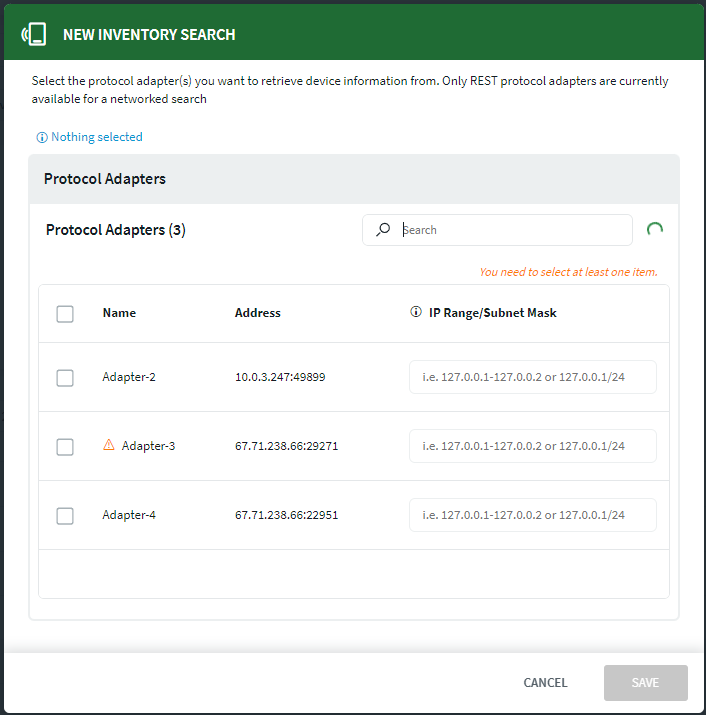
The New Inventory Search screen appears, which allows you to define your search parameters:

-
Select the checkboxes beside the protocol adapters that you want to include in
your search. You can only search REST PAs. You can further refine the adapter
search by entering an IP range/Subnet Mask separated by
commas, in the following format:
127.0.0.1-127.0.0.2,127.0.0.1/24Note: If you do not enter specific IP Ranges or Subnet Masks, the search will pull from the/24mask of the adapter's subnet. -
Click Save.
Your new network search appears in the left-hand menu and SOTI Connect runs the search automatically. Depending on the scope of the protocol adapters you selected, the search can take several minutes:

You can rerun your search at any time by clicking the SEARCH NETWORK button.
Editing or Deleting an Existing Network Search
Procedure
- On the menu bar, click the main menu button and select Network Inventory.
-
In the left-hand menu, click the saved network search you want to update,
then perform one of the following actions:
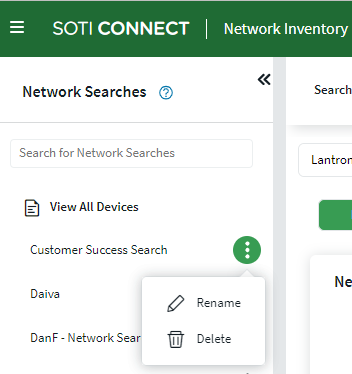
- Click the
 More button beside the name of a network search
to Rename or Delete your
search:
- In the Search Criteria field, click the
Filter button. Make any changes to the
protocol adapter selection, then click Save. A
red indicator appears beside the Search Network
button to remind you that the search has changed and you should run it
again.

- Click the
- To run the search again with the new parameters and dismiss the red indicator, click the Search Network button. Click the Save As button if you would like to save your revised search under a new name.