Setting Up a WebDAV Server
Use the following steps to set up your IIS WebDAV server for use with SOTI Hub. SOTI Hub requires the use of a Microsoft Internet Information Services (IIS) WebDAV server to access files residing on an NTFS file server. If needed, detailed instructions on how to perform each of the steps listed below can be found here.
You can also use a SharePoint server to host your content repository. Go to Using SharePoint with SOTI Hub for more information.
Prerequisites
The machine that hosts the IIS WebDAV server must have the following software installed:
- Microsoft Windows Server 2008 or later
- Microsoft Internet Information Services version 7 or later
Setup Steps
Use the following steps to set up the WebDAV server.
-
Install IIS 7 or later.
-
In the Actions panel, select Enable WebDAV
-
Enable the WebDAV Publishing role.
-
In Internet Information Services (IIS) Manager, in the Connections pane, right-click on Default Site and select Add Virtual Directory to open the Add Virtual Directory dialog box as shown below.

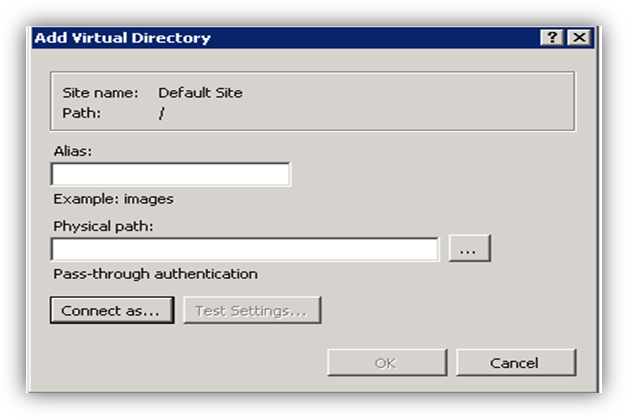
In the Add Virtual Directory dialog box, enter an alias. In the Physical path field, enter the UNC path for the file share.
The application pool for the WebDAV server must have Read, Write, and List Folder Contents permissions to the file share. If this is not the case, click the Connect as button and select a user who has the required permissions.
When you are done, click OK to close the Add Virtual Directory dialog box.
-
In IIS Manager, in the Connections pane, click on Default Site to select it. In the center pane, double-click on WebDAV Authoring Rules.
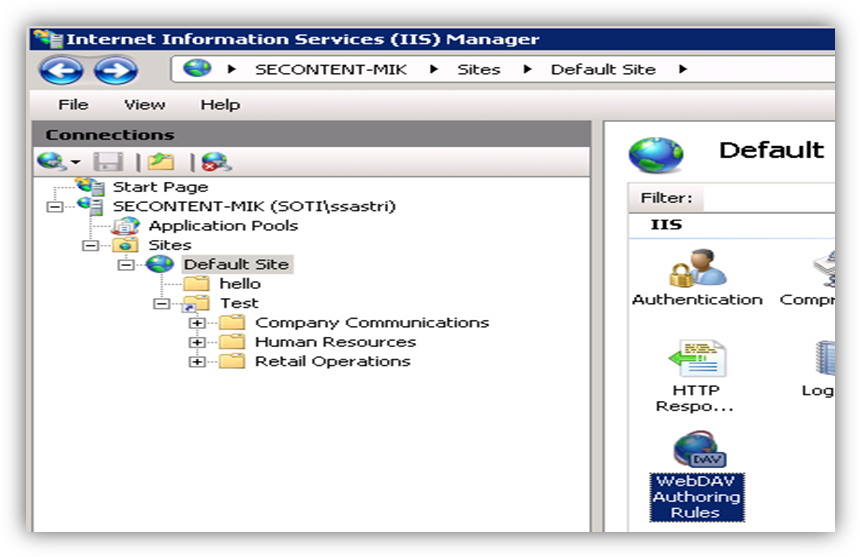
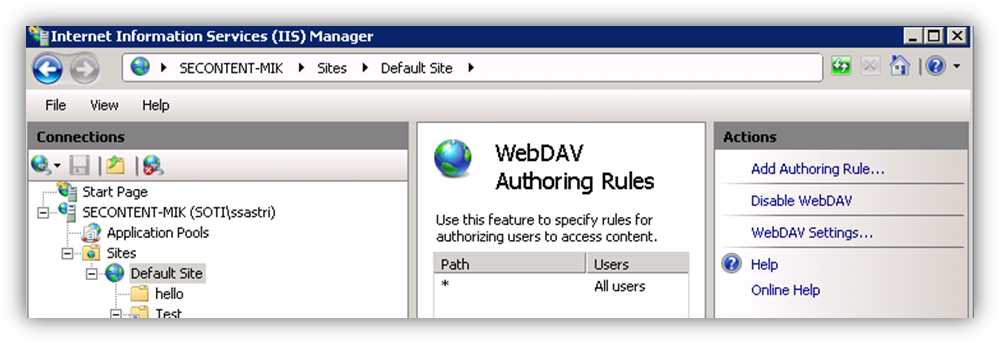
In the Actions pane, select Add Authoring Rule.
In the Add Authoring Rule dialog box, select the following settings:
Option Value Allow access to All content Allow access to this content to All users Permissions Read Source Write An example is shown here:
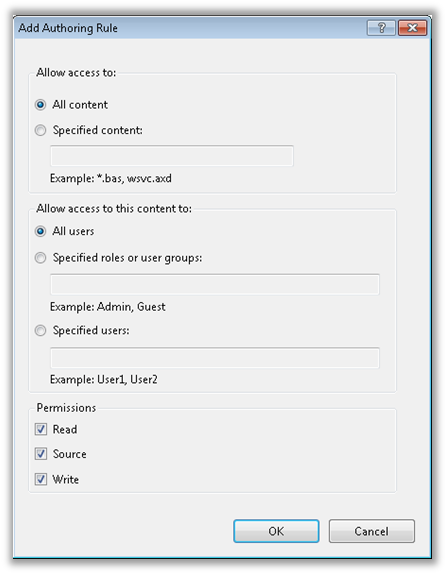
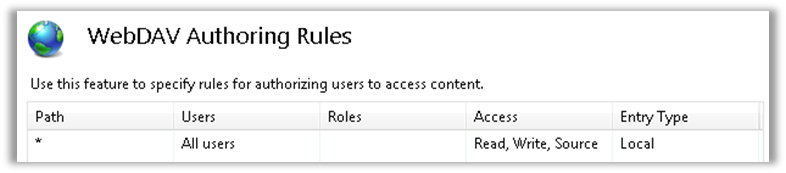
When you are done, click OK to close the Add Authoring Rule dialog box and save the rule. The new rule is listed in the WebDAV Authoring Rules pane, as shown here:
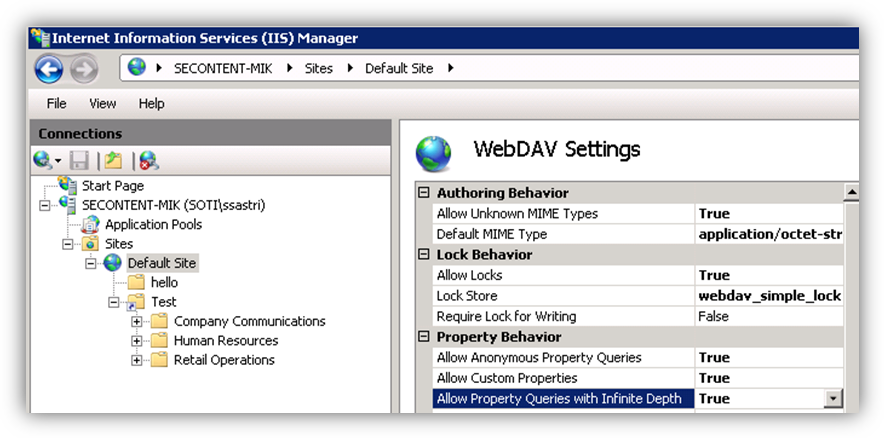
In the Actions pane, select WebDAV Settings.
In the WebDAV settings, under the Property Behavior section, set Allow Property Queries with Infinite Depth to True.
-
(Optional: This step is required only if you want to use HTTPS to communicate with the WebDAV server.)
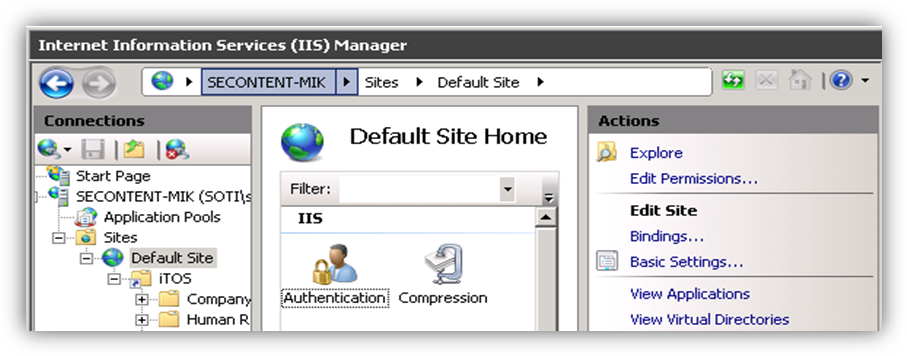
In IIS Manager, in the Connections pane, click on Default Site to select it. In the Actions pane, select Bindings to to open the Site Bindings dialog box as shown below.
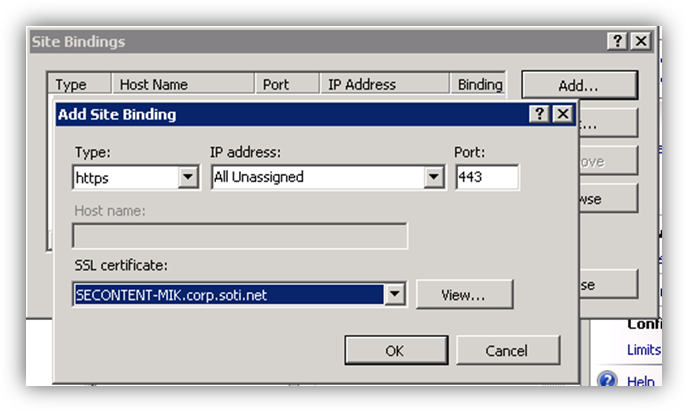
In the Site Bindings dialog box, highlight the port 80 entry and click the Remove button. Next, click the Add button to open the Add Site Binding dialog box. In the Add Site Binding dialog box, in the Type list, select https and select the SSL certificate that corresponds to the DNS name of the default site.
If you are using HTTPS to communicate between your content repository and your devices, your SSL certificate must be issued by public issuing authority and installed on all devices that access SOTI Hub. Use a Certificate profile configuration to push the certificate to your devices. For best results, push the certificate configuration to the devices either prior to or at the same time as pushing the SOTI Hub app configuration.
When you are done, click OK to close the Add Site Binding dialog box and return to the Site Bindings dialog box. Click Close to close the Site Bindings dialog box.
Note:
If you are using an Enterprise Resource Gateway, and a self-signed or enterprise certificate was used for the WebDAV server, ensure that the Root CA certificate is installed on the server that is hosting the Enterprise Resource Gateway.
-
(Optional: This step is required only if you set Login Option to either LDAP Credentials or Fixed Credentials in the SOTI Hub Content Repository dialog box in the MobiControl Web Console.)
In IIS Manager, in the Connections pane under Default Site, click on the virtual directory you created earlier to select it. Double-click on Authentication in the right pane.
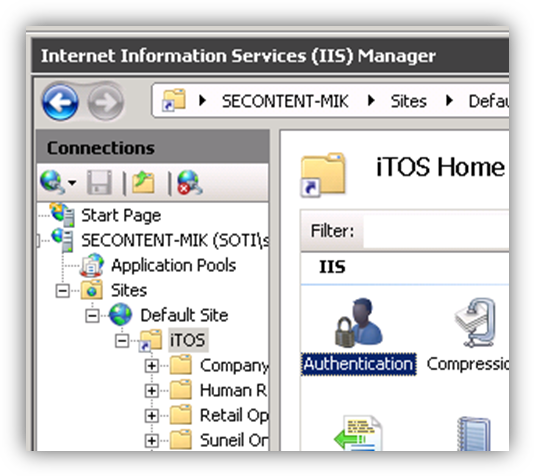
Right-click on the Windows Authentication method and select Enable. Ensure that you disable all other authentication methods.

Right-click on the Windows Authentication method again and select Providers to open the Providers dialog box. In the Providers dialog box, ensure that the correct authentication provider is moved to the top of the Enabled Providers list. When you are done, click OK.
You have now finished setting up your IIS WebDAV server for use with SOTI Hub.
Note:
Directory browsing does not need to be enabled in IIS to have IIS act as a WebDAV server.
If you want to control access to specific folders within your content repository, go to Managing Access on a WebDAV Server.
SOTI apps Server Extension for hub
The SOTI Apps Server wizard installs extensions on your WebDAV machine to provide additional functionality to the SOTI Hub app such as download resumption and intermittent search.
Go to SOTI Apps Server Extension for SOTI Hub for more information.