Adding a New Group Mapping
About this task
Add a new automatic group mapping:
Procedure
- From the main menu, select Administration.
- In the left pane, select Automatic Group Mappings.
-
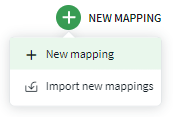
Select the
New Mapping icon. Select the New
mapping option.

-
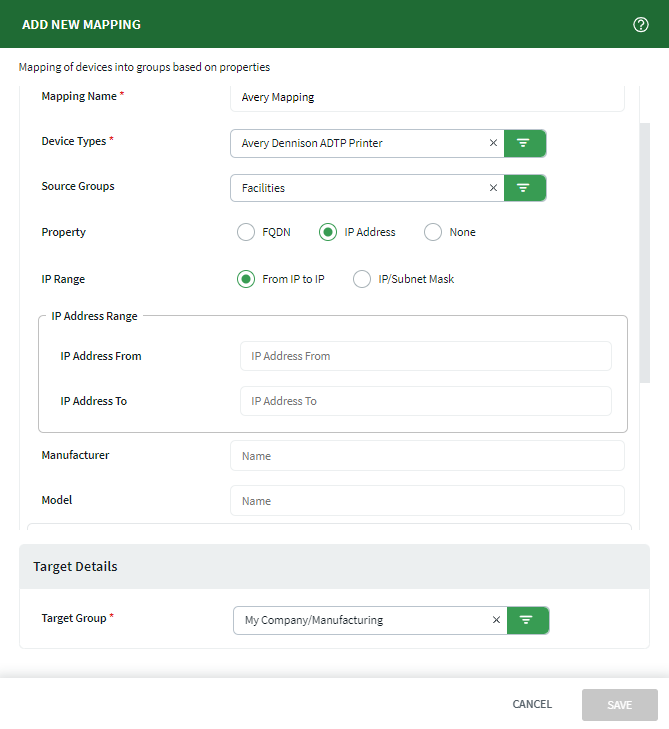
Select the Device Types for automatic group mapping.
Note: If the selected devices do not support Fully Qualified Domain Name (FQDN), a notification displays at the selection step, and the FQDN option is not in the Property section.
- Select Source Groups to narrow your mapping criteria to only devices within this group. Only devices from the selected source groups can move.
-
In the Property section, you can create automatic group mappings based on an
FQDN, an IP Address, or
neither (None).
 To define the mapping using IP addresses, select IP Address. For IP Range, choose:
- From IP to IP to enter an IP range.
- IP/Subnet Mask to enter an IP address and subnet mask.
Note: When using a wildcard (*) character for FQDN Match, make sure to end the string with .com. For example, ab*.com is valid, but ab* is not.Note: Using addresses in automatic group mappings is optional. If you do not wish to use FQDN or IP addresses, select None. -
You can optionally enter Manufacturer and
Model information as further criteria for the
mapping.
Note: Manufacturer and Model use string-based comparisons and are case-sensitive.
-
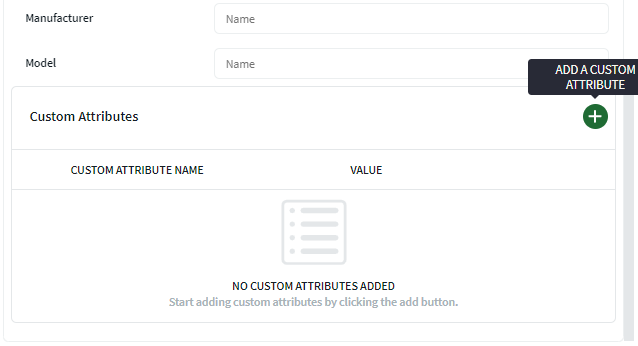
Select up to eight custom attributes in the Custom
Attributes section.
 Note: You must first create custom attributes for a device. Once created, applicable custom attributes are selectable in the Custom Attributes panel. To create custom attributes from the main menu, select . See Adding a Custom Attribute.Note: Geolocation Custom Attributes are not available within automatic group mappings.Note: Custom Attributes are case-sensitive.
 -
In the Target Details section, select the Target Group
where the devices matching your mappings move to.
Note: Optionally, you can isolate the scope of the mappings by selecting Source Groups. Only devices from the selected Source Groups move.
- Select Save.
Results
Note: Auto Group Mappings might not always prioritize
recently modified mappings. To maintain mapping accuracy, manually review and adjust
your mappings as necessary.