Adding a User Role and Granting Permissions
About this task
To add a new user role to SOTI Connect:
Procedure
-
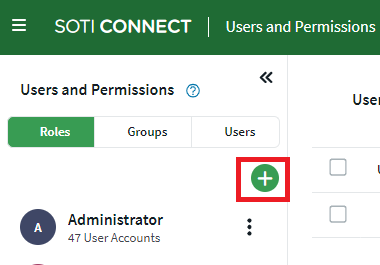
On the menu bar, click the main menu button and select Users and
Permissions.
The Users and Permissions view opens, with the Roles tab selected.
-
In the left pane, click the Add Role button:
-
In the Create New Role dialog box, enter a unique name for
the new role and click Save.
The new role appears in the left pane.
Results
The new user role has now been added to SOTI Connect.
Adding General Permissions to a Role
About this task
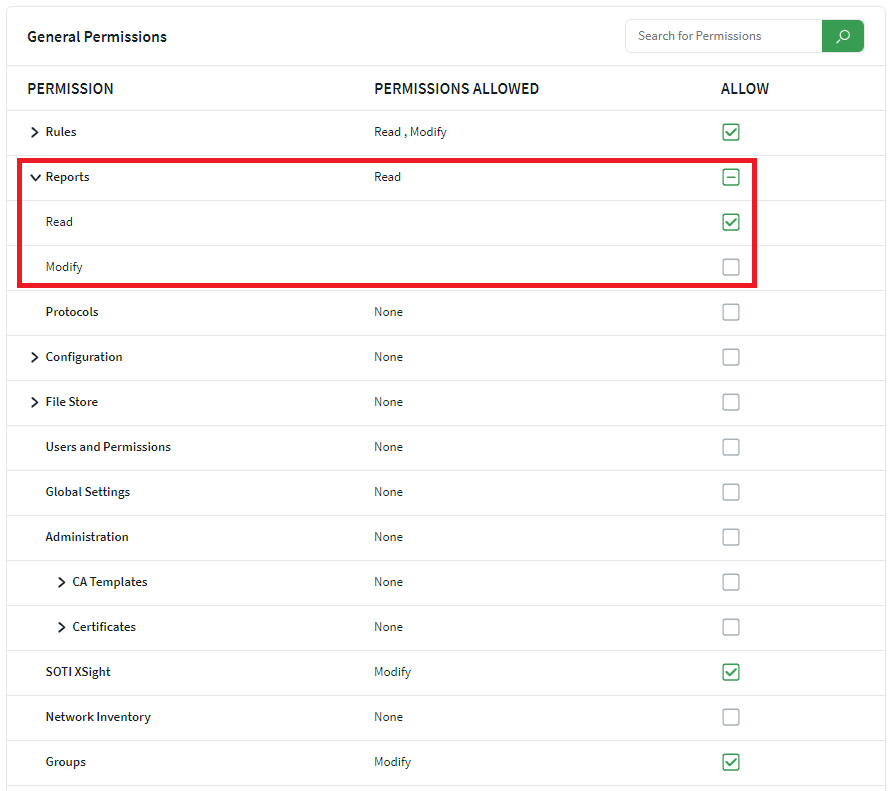
Note: A line ( - ) inside a Permissions parent node check box (like
Reports highlighted in the image above) indicates
that you selected some, but not all, child permissions. In the example,
Read permission is allowed, but
Modify is not.
Procedure
- In the left pane, select the new role you just created.
-
Click General Permissions.
The General Permissions view opens on the right-hand side of the screen.
- Select the Allow check boxes beside the permissions you want this role to have. Some permissions include both Read and Modify permissions. Click Save.
Adding Device Group Permissions to a Role
About this task
You can also control access to the device groups you have set up in SOTI Connect by role. Users will have particular capabilities depending on which group they belong (for example, they might have read-only access in the Western group, or write capabilities in the Eastern group).
Note: By default, all new roles are assigned to All Device
Groups, with basic Read and
Enroll/Unenroll
permissions.
Procedure
- In the left pane, select the new role you just created.
-
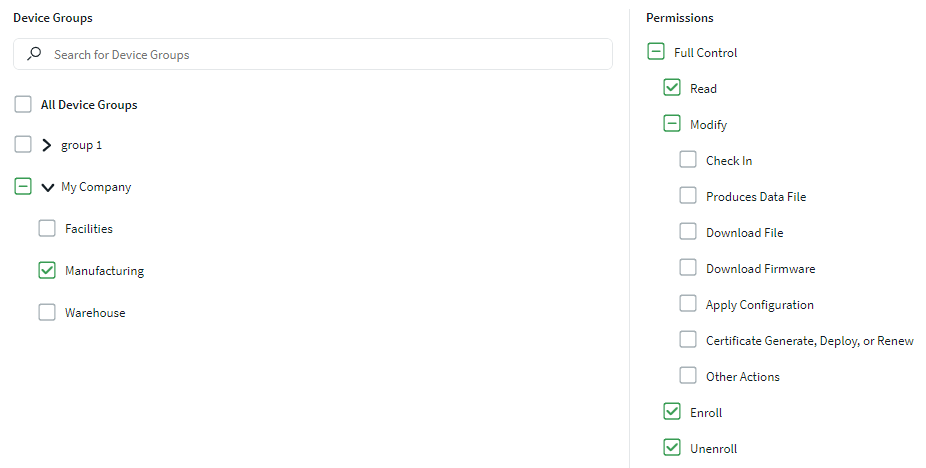
Click Device Group Permissions.
The Device Group Permissions view opens on the right-hand side of the screen.
- In the Device Groups area, select the check boxes beside the device groups and sub-groups you want this role to be associated with. For example, in the image above, the role is associated with the Manufacturing sub-group within the larger My Company grouping of devices.
- In the Permissions area, select the check boxes beside the capabilities of the role within the device group. For example, in the image above, the role can Read device information within the Manufacturing group of devices, as well as Enroll or Unenroll devices in that group.
- Click Save.