Setup Outbound SOTI Cloud Link Agent for SOTI Connect
About this task
Important: Outbound SOTI Cloud Link Agent is only supported for SOTI Connect 2024.1.0 or later. If
you are running an earlier version of SOTI Connect, you must
upgrade your SOTI Connect instance
Note: If you are using SOTI Identity for
user management in SOTI Connect, perform the steps in Set up Inbound SOTI Cloud Link Agent for SOTI Identity.
Configuring the SOTI Cloud Link Agent for SOTI Connect
Procedure
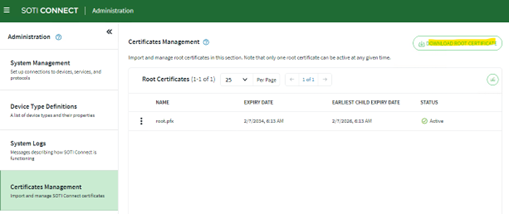
- Install the SOTI Connect Root Certificate on the SOTI Cloud Link Agent box under Trusted Roots CAs
-
Launch and login to the SOTI Connect Console. Then
from the main menu, select .

-
Unzip the downloaded .ZIP file and install the root
certificate under the unzipped folder.
Note: Use the generated password when downloading the root certificate.
- Download the installer for outbound SOTI Cloud Link Agent from SOTI downloads page.
-
Run the installer.
The wizard successfully installs the SOTI Cloud Link Agent.
Configuring the SOTI Cloud Link Agent
Procedure
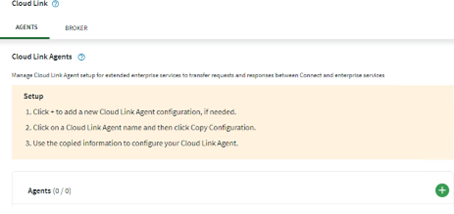
- In the SOTI Connect console, open the main menu and select
-
Under the Agents tab, select

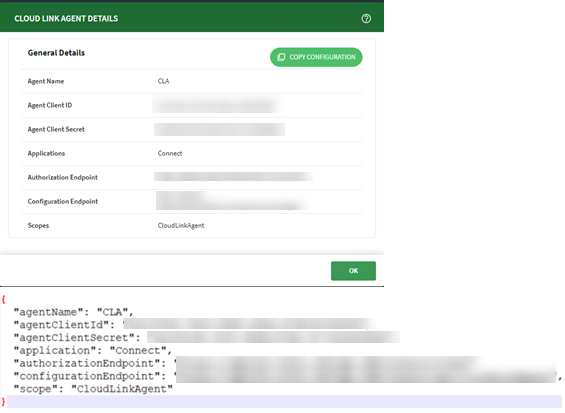
- Enter a unique Agent Name for the SOTI Cloud Link Agent and select Save. The SOTI Cloud Link Agent details open
-
Select Copy Configuration for the configuration
detail (
JSON) and paste it onto a text editor and select OK
-
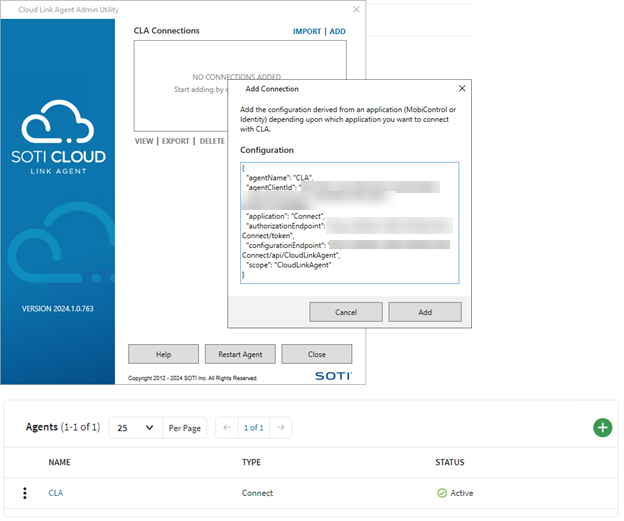
Open the SOTI Cloud Link Agent Administration Utility (see
Outbound SOTI Cloud Link Agent Administration Utility).
Note: The default location of the SOTI Cloud Link Agent is
C:\Program Files\SOTI\CloudLink\CloudLinkAdminUtility.exe - Select Add to open the Add Connection dialog box.
- Paste the configuration strings you copied from the console into the Configuration field. Then select Add.
-
On the SOTI Connect Console, refresh the page and
observe if the SOTI Cloud Link Agent is active.
