|
|
Device Lockdown |
Device lockdown replaces the standard device home screen and Windows Start button with a customizable home screen. Users have access only to authorized applications and websites, and are prevented from accessing all other applications and device controls.
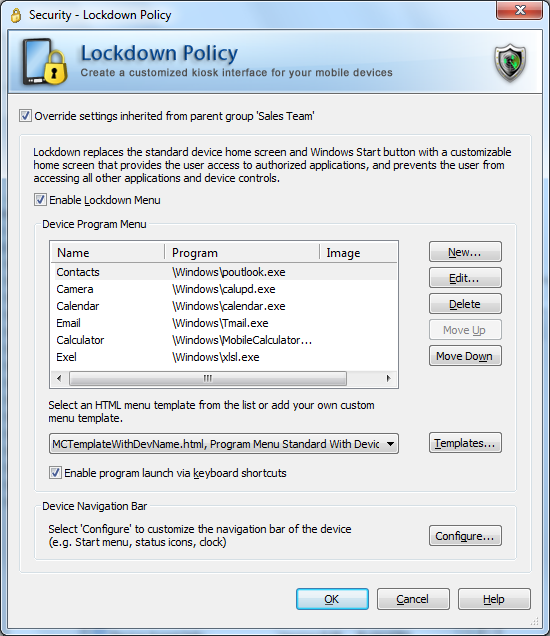
Lockdown Policy dialog box
For assistance with Override Settings Click Here.
By locking down devices, organizations can minimize the risk of unauthorized persons accessing information on their mobile devices. Administrators can control exactly which programs users are allowed to run, and which websites they are allowed to visit. This decreases the amount of down-time caused by users changing settings that may adversely affect the operation of the device or application software, and also decreases support costs. MobiControl allows running the mobile devices in a kiosk mode with a read-only access to provide critical information to the end users, without giving them access to change the settings.
The lockdown menu can only be dismissed by an administrator. Specification of a user password is optional. If not configured the device user can access the lockdown menu directly after turning on the device. If a user password is defined, then the password must be entered in order to access the lockdown menu.
To configure lockdown settings for a device or group of devices, select the target device or group in the device tree view in the main console window and select Security from the Configure Device(s) submenu.
| Field Name | Description |
|---|---|
| Enable lockdown menu | Use this checkbox to enable or disable the device lockdown menu. |
| Device Program Menu |
The device program menu is a list of programs and websites to which the user has access. There are pre-configured HTML menu templates that can be edited or applied to the menu, and an option to enable or disable the launching of a menu item with keyboard shortcuts. Please see the Device Program Menu section below for details. |
| HTML menu template |
Select a menu template from the drop-down list. Please see the Templates section below or the Customizing Lockdown Program Menu Templates page for more information. |
| Enable program launch via keyboard shortcuts |
Keyboard shortcuts such as numeric keys can be used to launch lockdown menu items. See the Shortcuts section below. |
| Device Navigation Bar |
This applies to only Pocket PC and CE devices; it does not apply to Smartphone devices. The device navigation bar, commonly referred to as the task bar, contains the Start button and small icons for quick access to device status and settings such as the time, date, wireless status, or volume control. By default, when lockdown is enabled, the standard operating system navigation bar is replaced with a customizable navigation bar. Select the Configure button to specify which icons in the custom navigation bar are to be made available to the device user. Please see the Navigation Bar Configuration section below for details. |
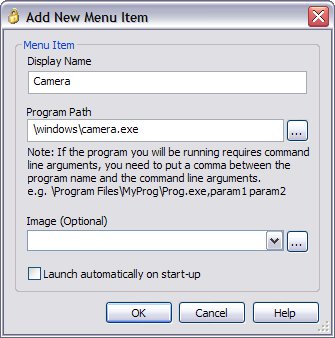
Add New Menu Item dialog box
![]() Tip:
Tip:
- To provide the device users with access to specific websites and prevent access to other websites, provide the URL in the Program Path of the Add New Menu Item line.
- If you link to a search engine the end user will gain full access to the Internet.
Device Program Menu
Use the New button to add menu
items. Each entry consists of a user-friendly name and a complete
file path to the executable, .lnk shortcut file, .cmd script file, or website address (URL). To adjust the position of the menu items,
use the Move Up and Move Down buttons.
| Field Name | Description |
|---|---|
| Display Name | This is the displayed name of the menu item which will appear on the device. |
| Program Path |
This is the path for the web address, or executable file on the device.
You can either type in the path or you can browse the file
using the browse button |
| Image (optional) |
If you wish to replace an image that had been previously imported, upload the new graphic file, maintaining the same file name as the old one. You will be asked to confirm the overwrite of the old file. Click Yes, and the new image will be in effect. This is the name of the image file that you want to display
in the lockdown menu with this menu entry. By selecting the image in this dialog box, it will be automatically
delivered to the device along with the lockdown configuration. Select an image
from the drop-down list, or click the browse button In order to display this image in the lockdown menu, it is necessary for the HTML
template to have a special 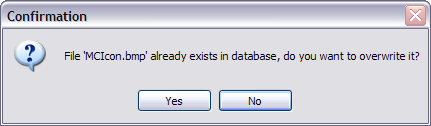
Lockdown Menu Image Overwrite Confirmation dialog box |
| Launch automatically on startup | When this option is checked, the selected program will be automatically executed on startup (i.e. after a soft reset, or restart of the lockdown process). |
 . You can only browse the files if the device
is connected to the desktop via ActiveSync. For instance, the program path for Pocket Word is
. You can only browse the files if the device
is connected to the desktop via ActiveSync. For instance, the program path for Pocket Word is
![]() Tip:
Tip:
On devices that feature a numeric keypad, an alternative to tapping
the screen to launch the menu entries is entering the number that corresponds to the menu item.
For example, press 2 to launch the second menu item.
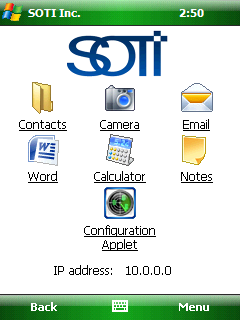
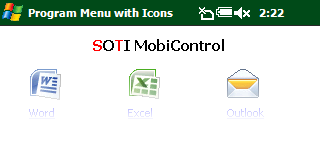
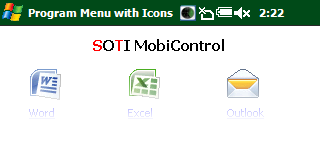
Device lockdown page
Templates
The lockdown program menu is displayed as an HTML web page to the user. The Template drop-down box allows you to select an HTML template from a list of built in templates and your own customized templates.
You can easily create a customized lockdown template by copying an existing template and directly modifying HTML code in the built-in Lockdown Menu Template Editor available in MobiControl. (Please see the Customizing Lockdown Program Menu Templates page.) You can also use your favorite HTML editor. When editing the HTML file, be sure to preserve the special MobiControl Menu tags. These special tags are automatically replaced with the appropriate Program Menu entries by MobiControl.
Once you have selected the desired template and clicked the OK button, MobiControl will merge the menu items that you have configured with the selected template and generate a custom HTML menu page.
Keyboard Shortcuts
If the checkbox next to Enable program launch via keyboard shortcuts is selected, program menu items may launch in a few additional ways: pressing a numeric key on the device or using a scanner will launch the program menu item corresponding to the value of the numeric key or barcode. To prevent this, clear the checkbox next to Enable program launch via keyboard shortcuts.
Navigating Device Lockdown
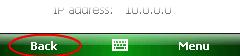
Back Button:
While you are navigating a web page within the lockdown, the back button will
allow you to return to the previous page.
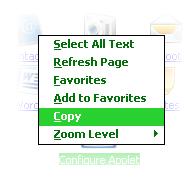
Click and hold on the device screen to bring up the "Right Click" menu. This allows you to copy and paste contents from within the lockdown.
![]() Note:
Note:
This feature is only supported on Windows Mobile 5.0 or later devices.
Navigation Bar Configuration
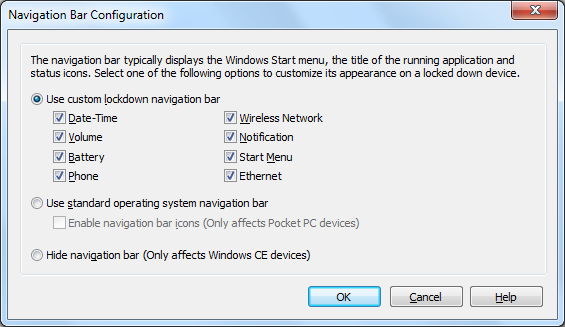
Navigation Bar Configuration dialog box
| Field Name | Description |
|---|---|
| Use custom lockdown navigator |  Enabled custom lockdown navigation This option will only allow the selected icons to show up in a custom navigation bar. The user will have the ability to click on the icons and have view-only access. The user will not be allowed to make any configuration changes using the icons on the navigation bar. Please see the descriptions of the six options following this table.
The icons of the lockdown custom navigation bar are non-responsive on Windows CE 6.0 devices due to a current limitation. This will be addressed in a later version. |
| Use standard operating system navigation bar |  Enabled Windows navigation bar This option will display the standard operating system's navigation bar. This option is recommended if there are specific icons that appear in the standard navigation bar that are not available in the custom navigation bar. In order to prevent the user from accessing Programs listed in the Start menu and links to Settings from popup balloons accessed through the navigation bar icons, the navigation bar is disabled by default. For only Pocket PC devices, it is possible to enable the navigation bar icons. This option will allow the user unrestricted access to the Windows navigation bar. |
| Hide navigation bar | For only Windows CE.NET devices, this option will hide the navigation bar completely. 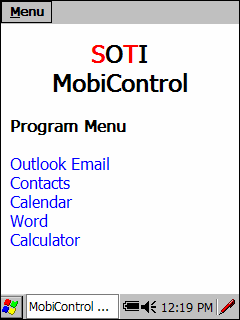 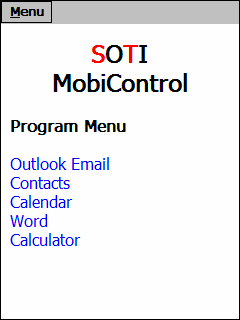 Disabled and enabled "Hide navigation bar" |
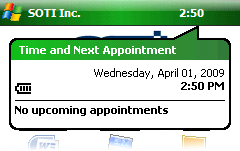
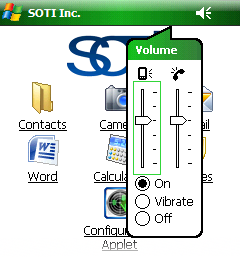
Enabled custom lockdown navigation bars with date-time and volume
The Date-Time option will display the time on the custom lockdown navigation bar. When the time is selected, a window will display the date, time and user's appointments.
The Volume option will cause the volume icon to be displayed on the custom lockdown navigation bar. When the volume icon is selected, the volume window will open and the user will be able to adjust the mobile device's sound and volume, change it to vibrate or turn off the sound completely.
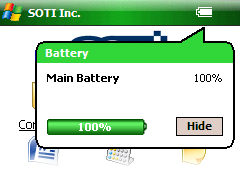
Enabled custom lockdown navigation bars with battery and wireless network
The Battery option will cause the battery icon to be displayed on the custom lockdown navigation bar. When the battery icon is selected, a window will display the percentage of the battery charge.
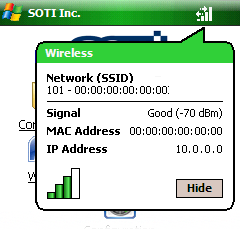
The Wireless Network option will cause the wireless bar icon to be displayed on the custom lockdown navigation bar. When the wireless bar icon is selected, a window will display the mobile device's wireless settings such as the signal strength, MAC address and IP address.

Enabled custom lockdown navigation bar notification and Start menu
The Notification option will cause the Notification icon to appear in the custom lockdown navigation bar when there is an unacknowledged notification on the device. When the notification icon is selected, a pop-up menu will display, from which the user can select the notification to be displayed. This option also controls the display of the Notification menu entry in the Lockdown window.
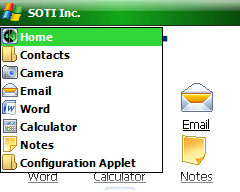
The Start Menu option allows the custom navigation bar to replace the standard Start menu with a listing of the programs specified in the Program Menu. This allows the Start menu to be used as an "application switcher" to move quickly from one application to another.
Customizing Lockdown
The lockdown program menu can be customized a number of different ways. You have the ability to change the lockdown password banner, as well as add your own notification icons. This section will explain how to edit your lockdown using MobiControl Package Studio.
Custom Password Prompt Banner
If you would like to add a custom
bitmap background image to your password prompt banner follow the steps
outlined below:
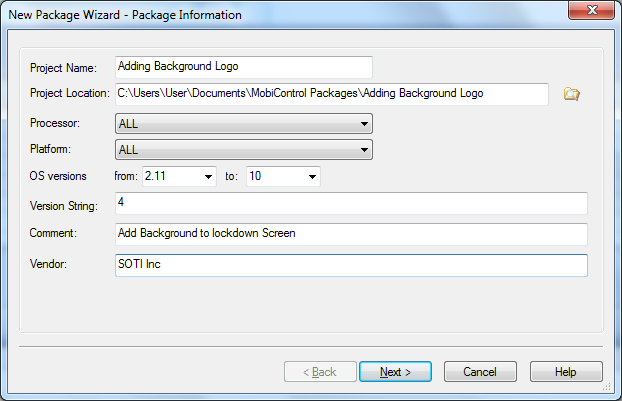
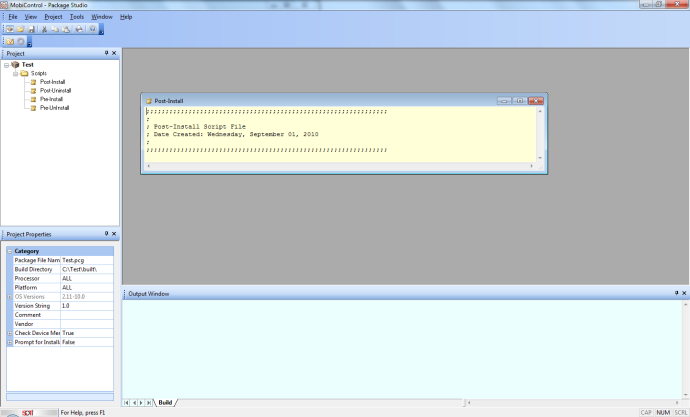
- Create a new package using Package Studio.
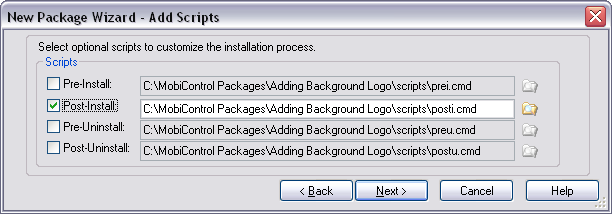
- Add a post-install script.
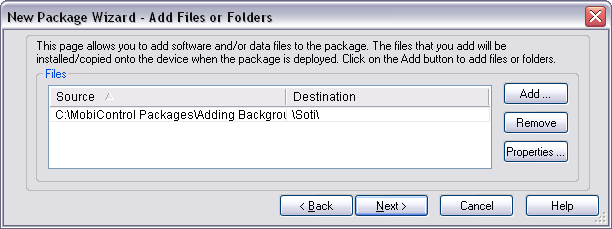
- Add files to the package.
Add a
.bmpfile that is 225 by 32 pixels, and tell the package editor where on the device the.bmpimage will be stored. In this example, it will be stored on the device in the\SOTI\folder.
- Edit the post-install script.
Add one line:
writeprivateprofstring Kiosk LoginBanner "\FOLDERNAME\FILENAME.bmp"
Replace "FOLDERNAME" and "FILENAME" with the correct folder and file names.
- Build the project.
Once you have completed editing the post-install script, you should be able to build the project and deploy it to devices.

Custom Notification Icons
If you would like to add a custom notification icons to your lockdown follow the steps outlined below:
- Create a new package using Package Studio.

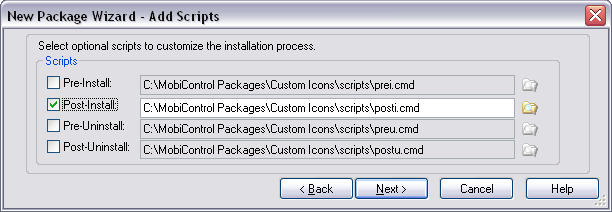
- Add a post-install script.
- Add files to the package.
The image file must be 16 pixels in height and the width must be an integer multiple of 16. Each multiple of 16 pixels will determine how many icons are available for use. Now, decide where on the device the image is going to be stored. For example, I have chosen to store it on the device in the
\SOTI\ICONS\folder. The example image is 48 pixels wide by 16 pixels high, which will make 3 icons available for display. Note:
Note: The first pixel in the top left corner of the image will set which color is transparent when the icons are displayed.
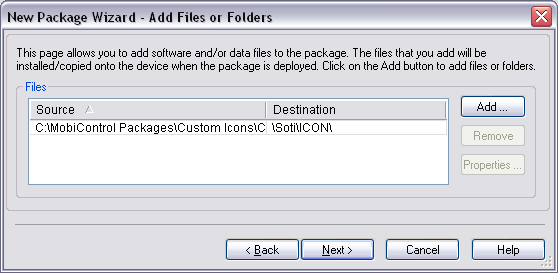
Once you have selected the location to store the file, finish the New Package Wizard.
- Edit the Post-Install script.
This script will contain different registry settings and commands to install the icon and display it.
First, prepare the registry for the new settings.
regset HKLM\Software\Apps\SOTI\MobiControl LockdownNotificationsregset HKLM\Software\Apps\SOTI\MobiControl\LockdownNotifications 001_IMAGE \SOTI\ICON\CustIconExample.bmpregset HKLM\Software\Apps\SOTI\MobiControl\LockdownNotifications 001_STATE dword:0The first line in the script creates a new folder, "
LockdownNotifications." The second line creates an entry in theLockdownNotificationsfolder calledXXX_IMAGEwith a value of\SOTI\ICON\CustIconExample.bmp. This is the location of the image file on the device. The third line creates adwordvalue, and this will tell the kiosk which icon in the image to display. Going to the example image above, when we give adwordvalue of0, nothing will be displayed. However, if we give adwordvalue of2the MobiControl icon will be displayed.The very first time you create these entries in the registry, or if the image location gets changed, you must restart MCKiosk. This can be done with the script below. It will cause MCKiosk to reload with a delay of half a second:
Start /wait MCKiosk -Quit
Sleepex 500
Start MCKiosk
- Switch to the correct icon.
Now that you have successfully edited the registry, only one registry change is required to switch between the different icons. This is done by using the following command:
regset HKLM\Software\Apps\SOTI\MobiControl\LockdownNotifications 001_STATE dword:#where "
#" is the index of icon you would like. If the number being entered is not valid, no icon will be displayed. When changing thedwordvalue, the icon will change instantly. This line can be placed anywhere, in any script, to display or change the icon.
- Deploy the package.
Once you finish editing the script, and you are ready to deploy the package to the devices.

Navigation bars with no icon, "Mobi" text custom notification icon, and world custom notification icon
For further assistance, please contact us.