
|
Secure Content Library |
The MobiControl Secure Content Library allows users to upload files through the web console so that it can be distributed to devices.
With the Secure Content Library we are able to specify file properties when it is uploaded. These properties can range from delivery methods to expiry dates.
note:
The Secure Content Library is only available for iOS and Android devices.
Note:
If the file sync rule is enabled for iOS devices, all those files will appear in the same panel as Content Library files. Files sent by the file sync rule cannot be configured by Content Library settings.
To go to the Secure Content Library, click the Content Library tab at the bottom of the device tab.
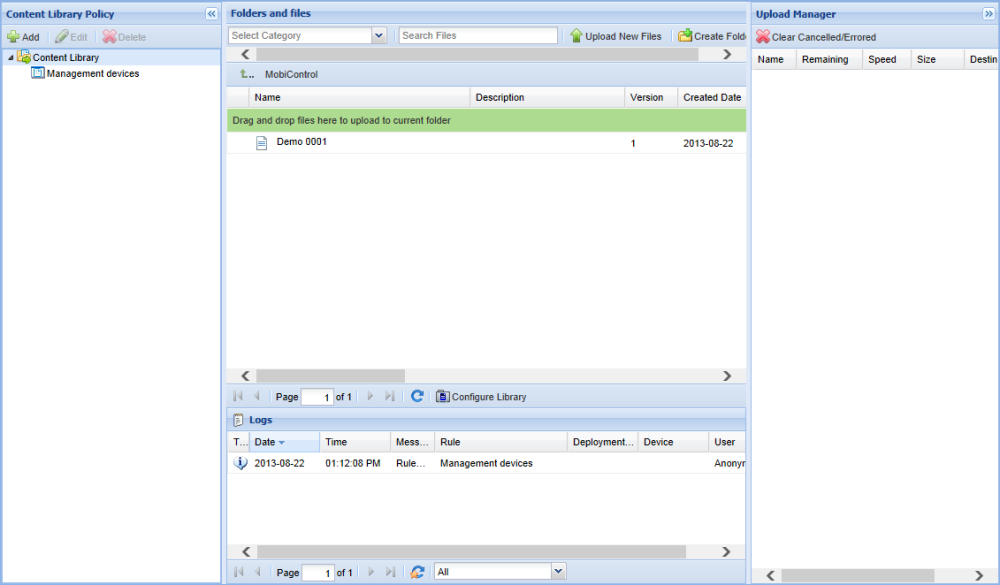
Secure Content Library
There are 4 main panels in the Secure Content Library. Starting clockwise, there is the Content Library Policy, Folders and Files, Deployment status, and logs. The Content Library Policy allows us to select which devices get files. Folders and files panel allows us to upload new files and create new folders. The deployment status shows us how many devices downloaded files, and the logs panel shows the logs related to the Secure Content Library.
Library Path
When we first open the Secure Content Library tab, we will be prompted with a dialog asking us to name the Content Library and where to store the files.
The Storage Path could be anywhere the deployment has access to. Be it a shared folder on the network, or a folder on the hard drive. All files uploaded will be placed here.
Note:
The recommended Storage Path should be a network drive where both the Deployment Service and Management Service have access to.
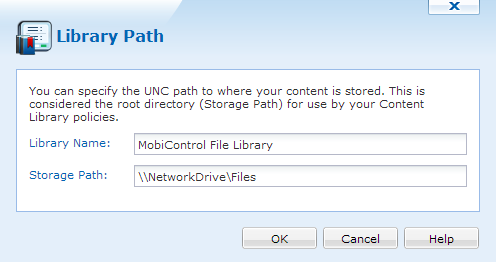
Library Path
Note:
We can change the Library Path at any time. To do this, click the  icon at the bottom of the Folders and files panel.
Folders and Files
After choosing the Library name and the Storage Path we are ready to create our folders and upload our first files.
Creating Folders offers a way to organize files. If a folder is wanted to be created, click  . When the Create Folder dialog appears, enter a name and click
  .
.
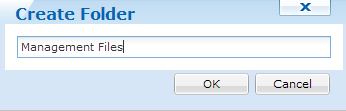
Create Folder dialog
File Upload
To upload a file, you can simply drag it from your local system to selected content library folder.
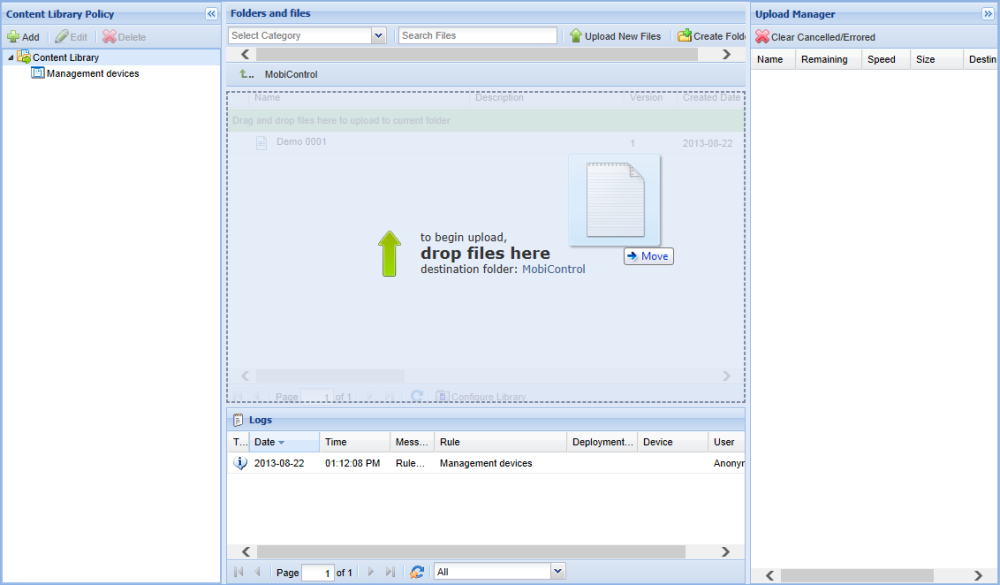
Drag and Drop File Upload
You can also upload a file from option.
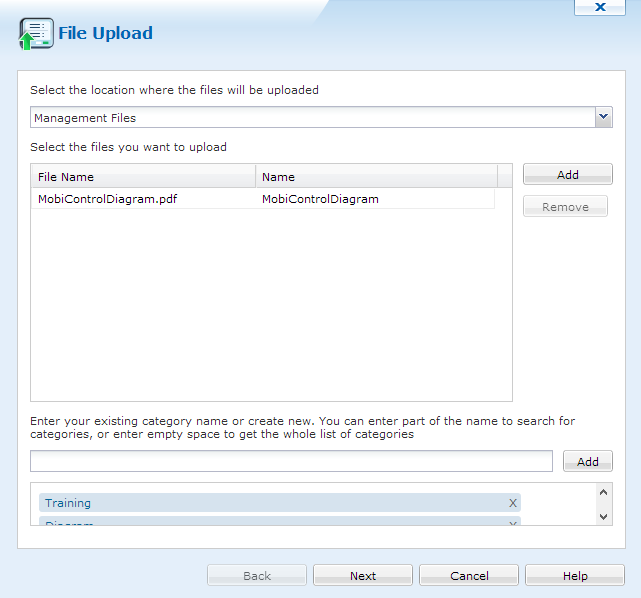
File Upload
Click the  button to select a file and upload it. We can upload multiple files from here. If a file isn't needed, select it and then click
  .
.
After uploading the files, we can select where these files will be placed in the Secure Content Library. File Repository is the root directory, then listing all folders that were created.
When a folder is chosen, we can add categories to these files. Categories are special tags that label each of the files. If we categorize these files for training, we can filter them based on these tags.
To add a category, just type it into the text field. If categories were created before, MobiControl will find them and we will be able to select them. If a category wasn't created, click Add to create this category.
When everything is configured and set, we can click  to go to the next page.
File Upload Properties
This panel will allow us to modify the properties of the uploaded files.
We can select the dates the files are effective for, the delivery method, security and description.
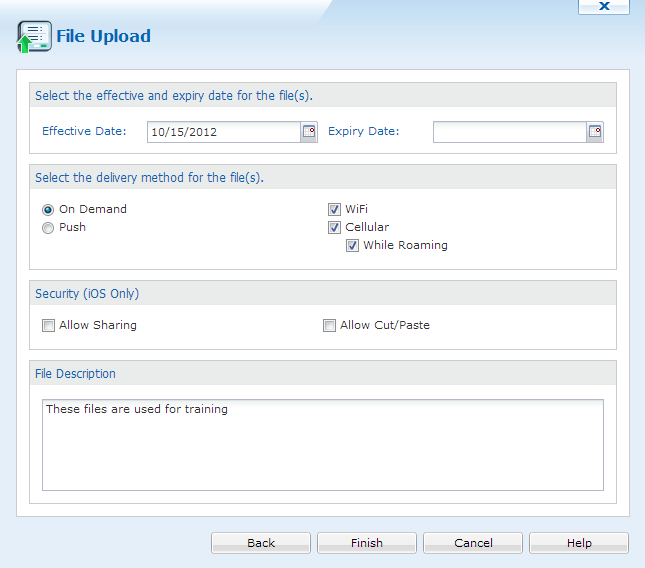
File Upload Properties
Note:
If the Expiry Date is not needed, please do not click the field. This will ensure that the files will never expire.
If we select On Demand as the delivery method, then files will not be automatically pushed to the devices. Selecting Push will allow the files to be automatically downloaded to the devices.
We can also restrict the way the files are downloaded.
iOS devices offer additional security where these files cannot be shared or cut and pasted.
After all properties have been set, click  . The files are now uploaded to the MobiControlDeployment Server.
Content Library Policy
The Content Library Policy provides a secure file distribution profile, from the file library to mobile devices.. We can create as many policies as needed. To create a new Content Library Policy, click  .
.
Create Content Library Policy
When we clicked , the Create Content Library Policy dialog appeared. In the first panel, enter a name, then click .
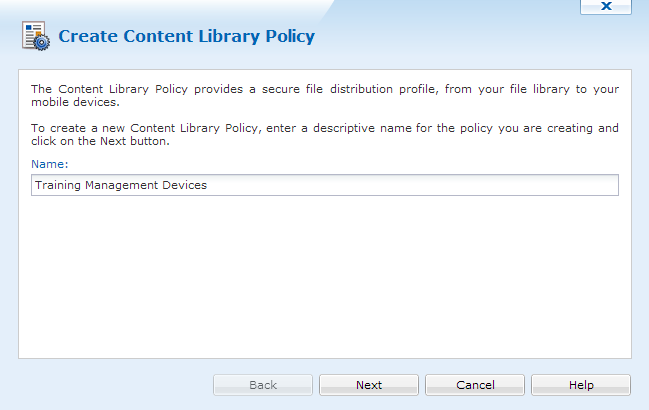
Create Content Library Policy
On the next panel, we can select which devices or groups will receive these files.
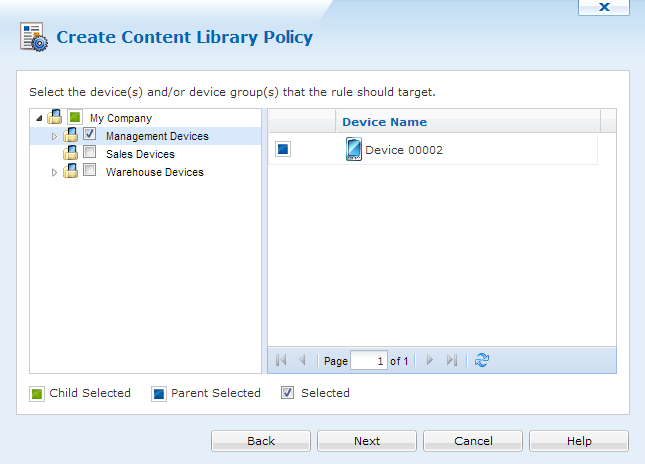
Select devices and groups
Click to advanced to the next panel.
On this panel we are able to select which files are going to be accessible on the devices. If categories were made before, we can just type a category and all files with that tag will be selected.
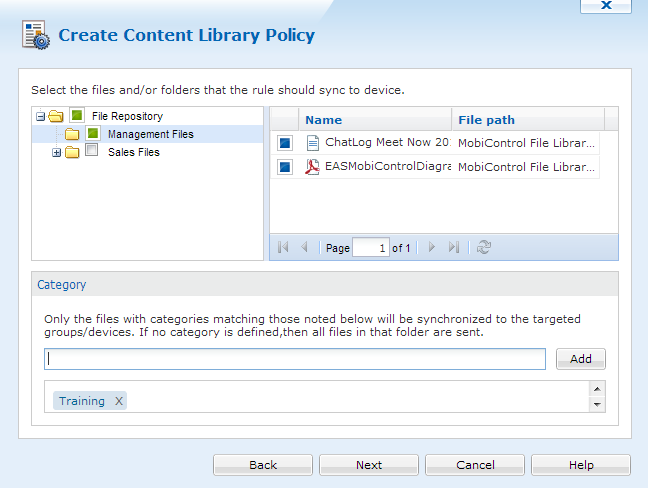
Source Files
After the files are selected, click .
The next panel will allow us to override the file settings. If these settings need to be set, click the Override file settings checkbox.
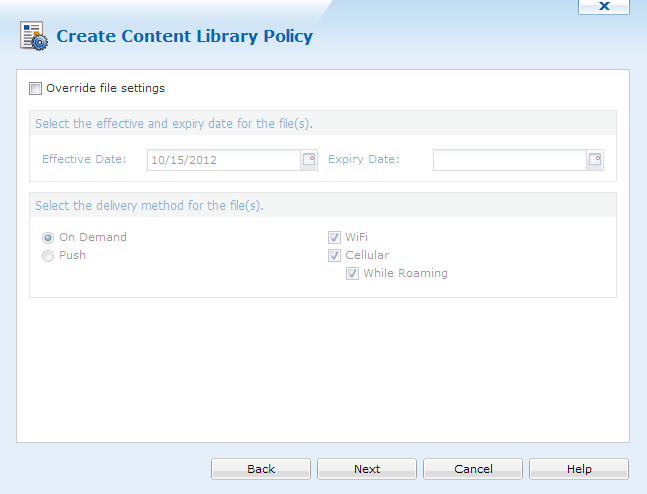
Override File settings
Once the settings have been set, click .
The final panel will show us a summary, click to save and create this policy.
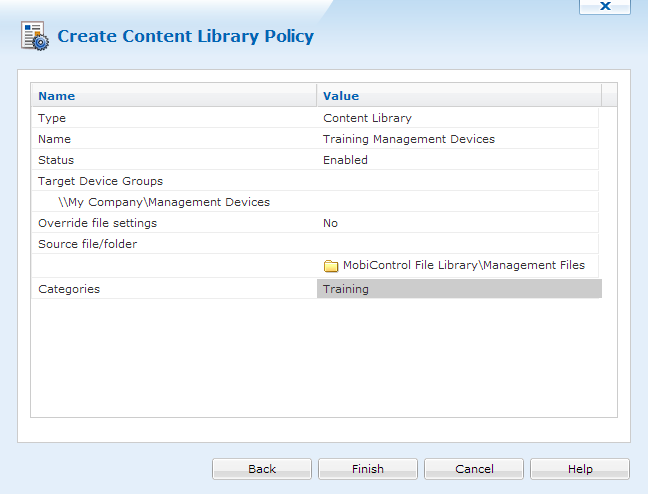
Content Library Policy summary
Categories Manager
To gain access to the category manager, click the drop box and select Categories Manager. This drop down list is located in the Folders and Files panel.
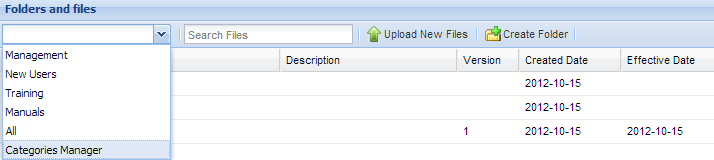
Categories Manager selection
Once selected, the Categories Manager dialog will open. Here we can delete previously created categories, and create new ones. We can also see how many files a category was tagged in.
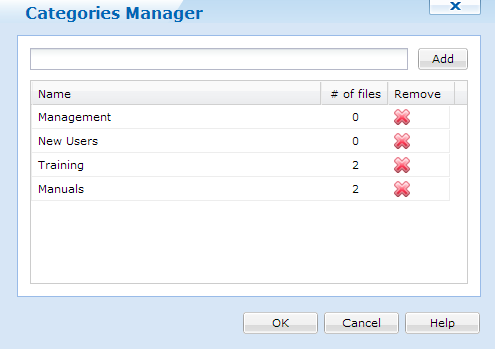
Categories Manager
Policy Management
When you right click a policy that is created, you are presented with a menu to edit, delete, enable or disable it. You also have an option to see the properties of the policy.
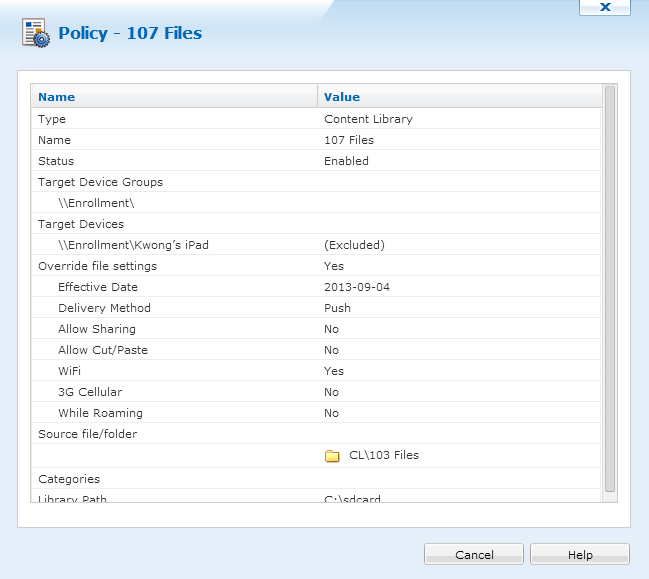
Policy Properties
Here you can see every detail about the particular policy.
File Context Menu
When files have been uploaded to the Secure Content Library we are given additional options when we right click a file. Please see the Secure Content Library - File Context page for more information.