
|
APNS Certificate |
What is an APNS Certificate?
iOS Devices support Mobile Device Management (MobiControl), providing the ability to manage deployments of iOS Devices across organizations. These Mobile Device Management capabilities are built upon existing iOS Devices technologies like Configuration Profiles, Over-the-Air Enrolment, and the Apple Push Notification Service (APNS). This gives IT departments the ability to securely enrol iOS Devices in an enterprise environment, wirelessly configure and update settings, monitor compliance with corporate policies, and even remotely wipe or lock managed iOS Devices.
Management of iOS Devices takes place via a connection from the Deployment Server to the Apple Push Notification Service. When the Deployment Server wants to communicate with iOS Devices, a silent notification is sent to the device prompting it to check in with the Apple Push Notification Service. The device communicates with the server to see if there are tasks pending and responds with the appropriate actions. These tasks include updating policies, providing requested device or network information, or removing settings and data. The Communication between the Deployment Server and Apple Push Notification Service is secured requiring the use of a Certificate installed on the Deployment Server.
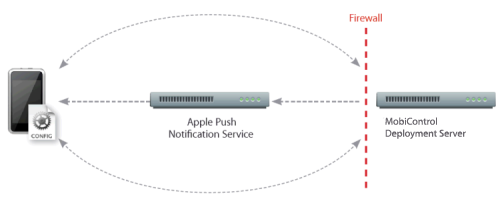
After completing the steps outlined below, a valid Apple Push Notification Service Certificate will exist in the Windows Certificate Store on the Deployment Server, enabling MobiControl to use the Apple Push Notification Service to communicate with iOS Devices devices.
How do I Create an APNS Certificate?
- Create the Certificate Request
Windows Vista, Server 2008 and 7
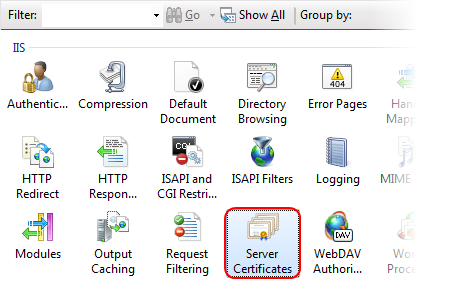
To create a new APNS Certificate Request, open the Internet Information Services Manager (IIS). Once inside the IIS Manager, open Server Certificates from the front page.
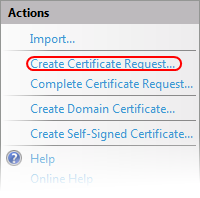
From the Actions pane in the Server Certificates window, select Create a Certificate Request.
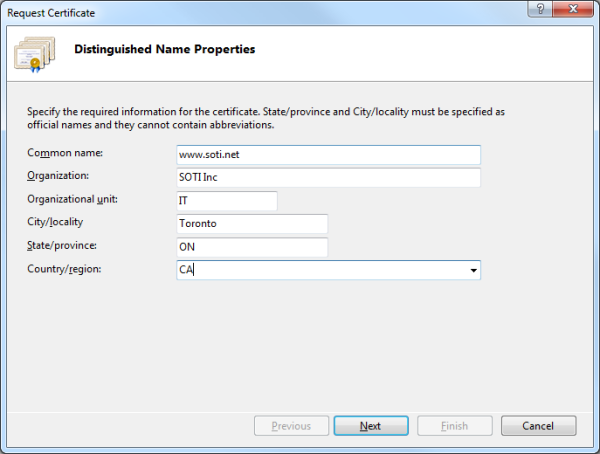
Once all the fields have been entered with valid information select Next.
In the Cryptographic Service Provider Properties page, ensure the Cryptographic Provider Service is set to Microsoft RSA SChannel Cryptographic Provider and Bit Length is set to 2048.
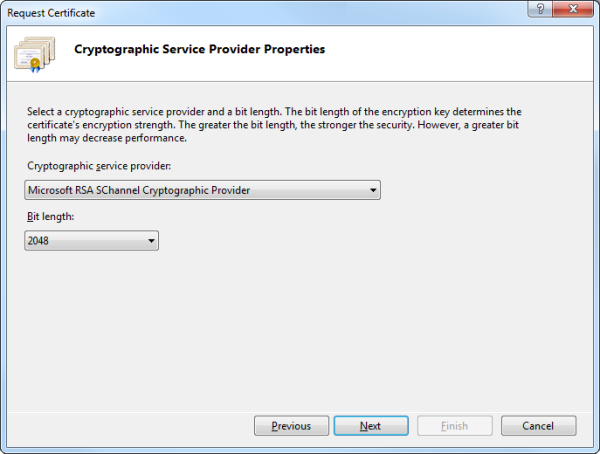
Once the information above has been verified, select Next.
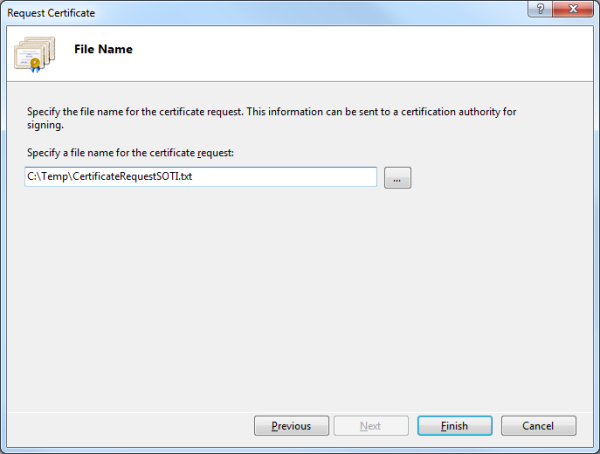
Select a Path where the request will be saved. This request will be saved as a .txt file. Then select Finish.
Windows Server 2003
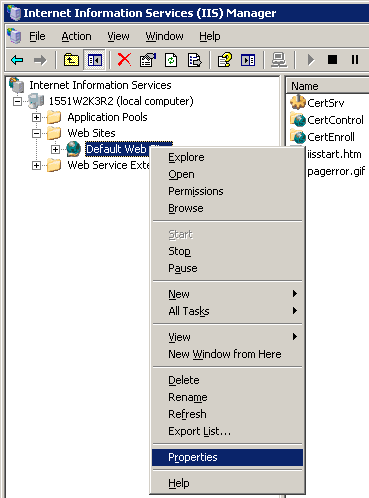
To create a new APNS Certificate Request, open the Internet Information Services Manager (IIS). Once inside the IIS Manager, right click on the Default Website and select Properties.
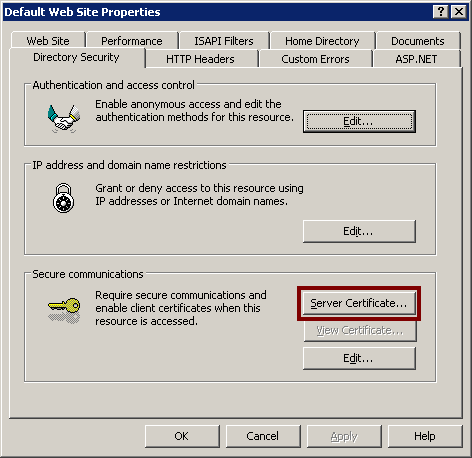
From the Properties window click on the Directory Security tab and click the Server Certificate button.
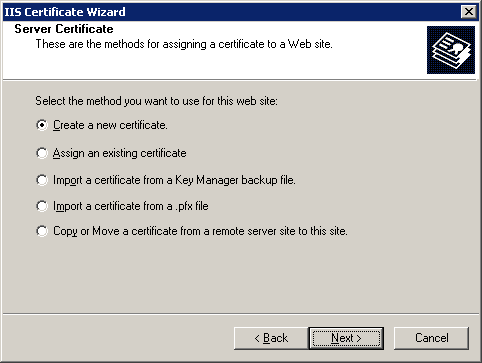
Once the wizard starts click Next, select Create a New Certificate and click Next.
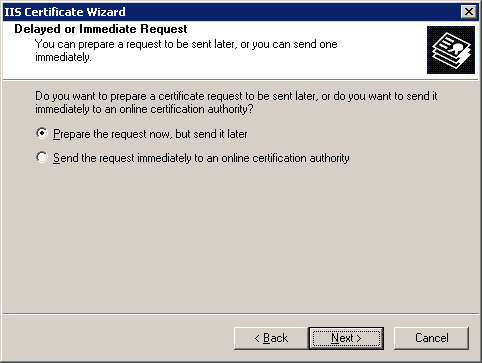
Select Prepare the request now, but send it later and click Next.
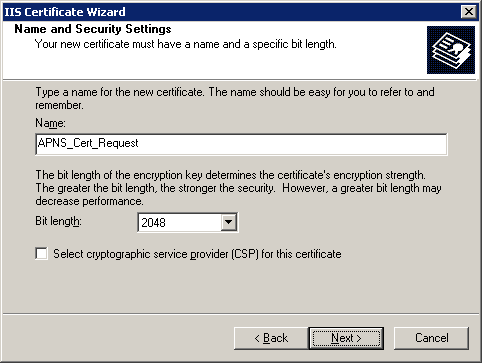
Provide a name for the request and set the Bit Length to 2048 and click Next.
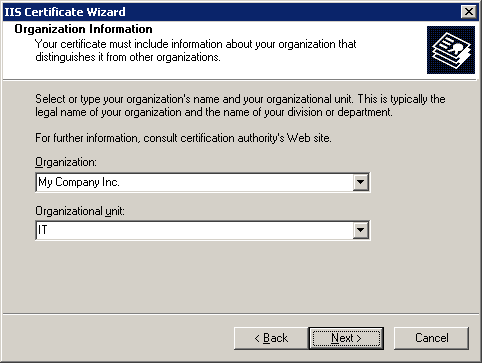
Specify an Organization and Organizational Unit and click Next.
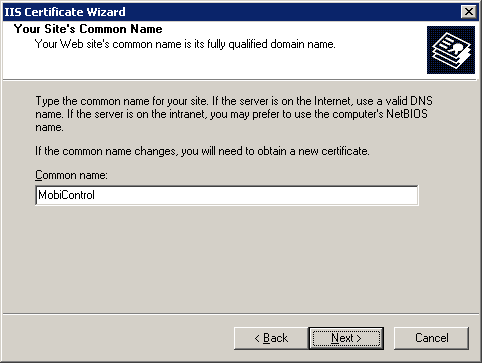
Specify a Common Name and click Next.
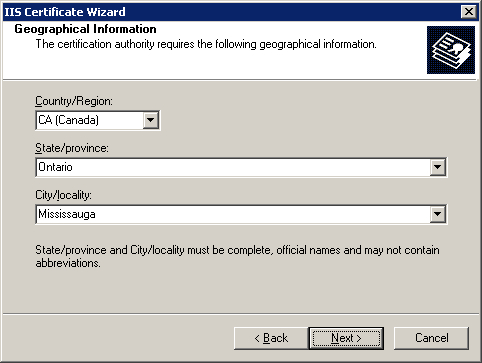
Specify a Country, State/Province and City and click Next.
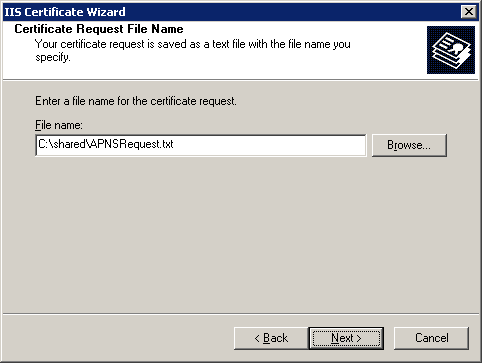
Specify a File Name and click Next.
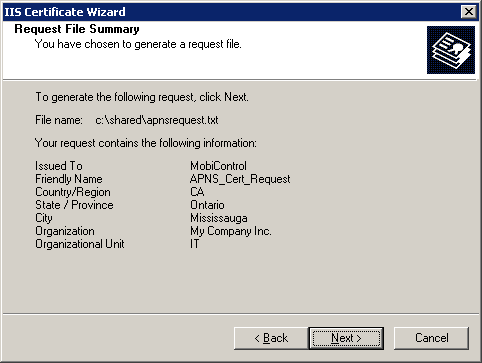
Verify the information entered on previous screens and click Next.
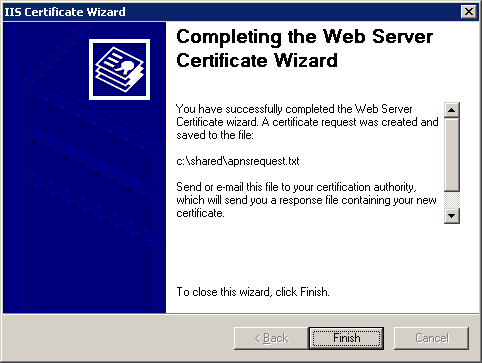
Click Finish to end the wizard.
Important:
Remember where this .txt has been saved as it will be used later to complete the Certificate Request.
- Generate the APNS Certificate
To complete the APNS Certificate Request, Click HERE to send us an email containing the Certificate Request generated in the first step. Please make sure to attach the Certificate Request to the email being sent.
When you receive the Certificate Request back, log into https://identity.apple.com/pushcert with any Apple ID and select Create a Certificate.
Important:
Apple requires the use of Safari for this process on either a MAC or a PC. Click here to download Safari.

Accept the Apple Agreement the browse to the Certificate Request file that you received from SOTI.

Once you have Uploaded the Signed Certificate Request and completed the process you can download the new Push Certificate.

Remember where this file has been saved as it will be used again in the next step.
- Complete the Certificate Request
Windows Vista, Server 2008 and 7
Open the Internet Information Services Manager (IIS). Once inside the IIS Manager, open Server Certificates from the front page.
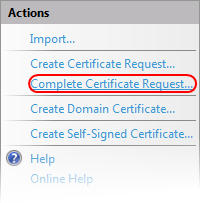
From the Actions pane in the Server Certificates window, select Create a Complete Certificate Request.
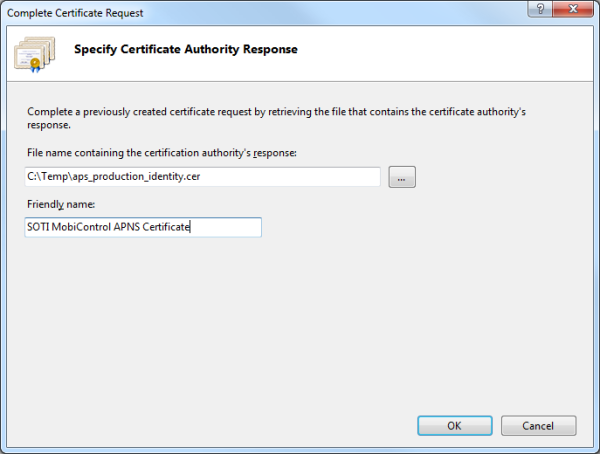
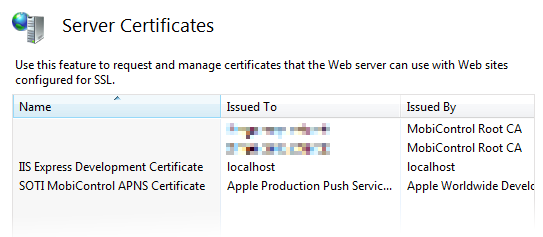
Locate the .cer or .pem file that was downloaded from the step above, and provide a friendly name, then select OK. The certificate request will be completed at this point and installed into your IIS environment.
Windows Server 2003
Open the Internet Information Services Manager (IIS). Once inside the IIS Manager, right click on the Default Website and select Properties. From the Properties window click on the Directory Security tab and click the Server Certificate button. Select Process the pending request and install the certificate and click Next.
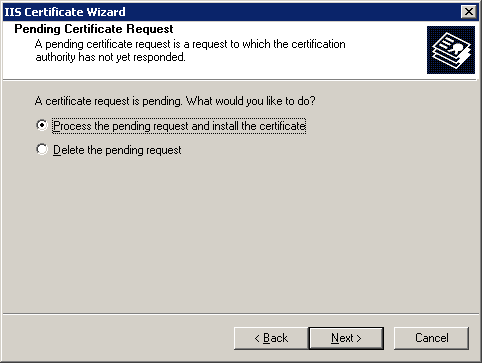
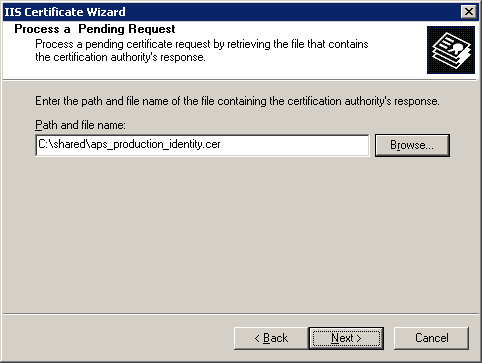
Specify the location of the file downloaded from Apple and click Next.
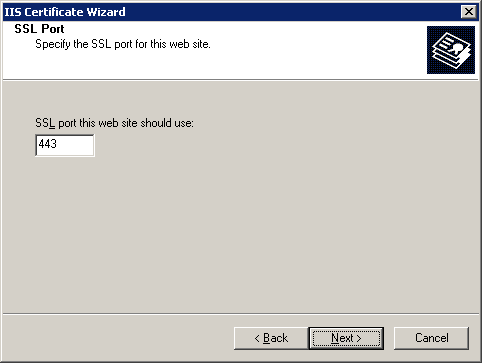
Specify the TCP port to be used for SSL communication and click Next.
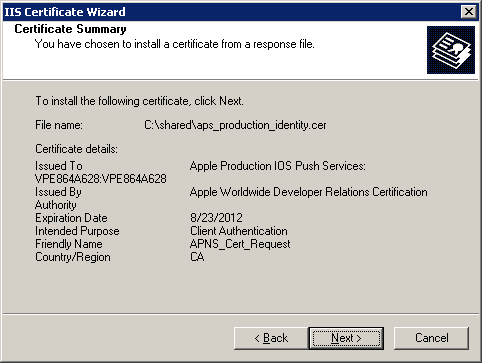
Verify the information on the screen and click Next.
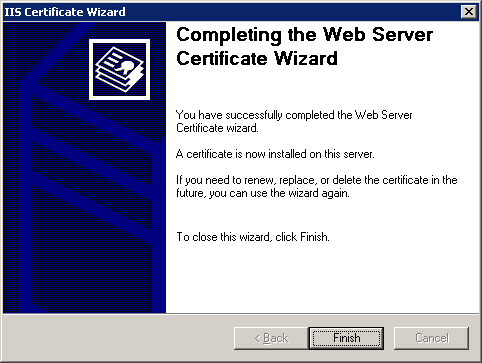
Click Finish to exit the wizard.
- Export the APNS Certificate
Windows Vista, Server 2008 and 7
Open the Internet Information Services Manager (IIS). Once inside the IIS Manager, open Server Certificates from the front page.
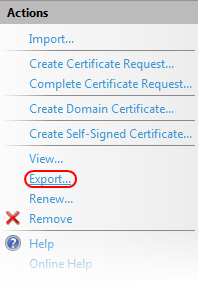
Highlight the APNS Certificate and select Export from the Actions Pane.
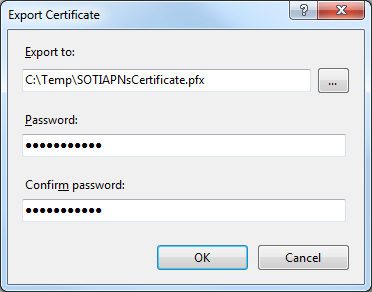
Select a path to export the APNS Certificate to, and enter a password of your choosing.
Windows 2003
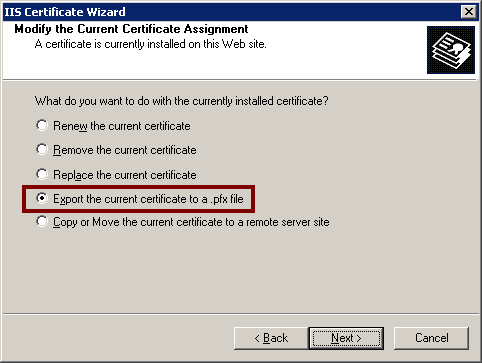
Open the Internet Information Services Manager (IIS). Once inside the IIS Manager, right click on the Default Website and select Properties. From the Properties window click on the Directory Security tab and click the Server Certificate button. Select Export the current certificate to a .pfx file and click Next.
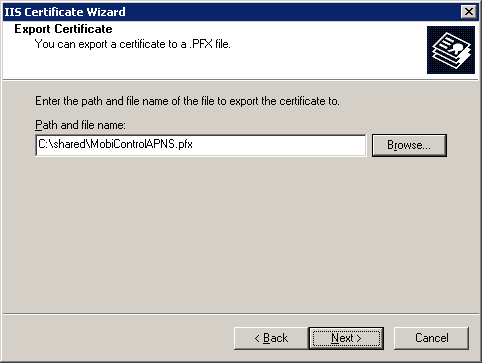
Specify the path of the .pfx file and click Next.
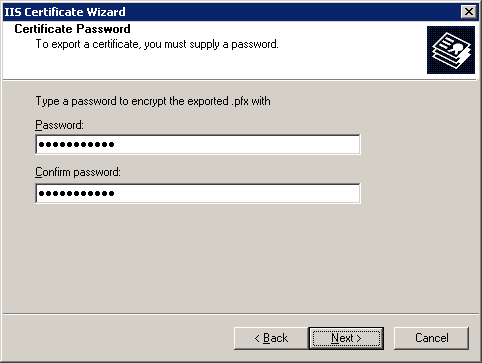
Specify a password for the certificate file to be exported and click Next.
Verify the details on the screen and click Next.
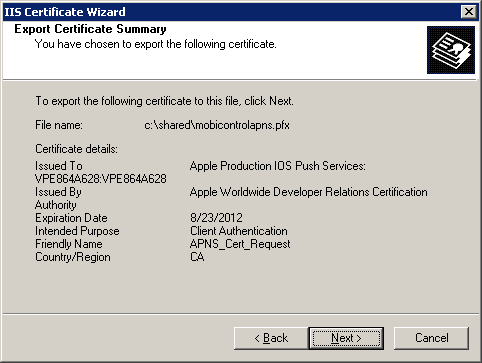
Click Finish to close the wizard.
Remember where the .pfx file has been saved to and what the password is as it will be required during the install of MobiControl.
Once you have successfully created an APNS Certificate, you will be able to manage your iOS Devices. Click here to finish the MobiControl Setup wizard.