
|
Customizing Android for Work Kiosk Mode Menu Templates |
You can build your own menu templates for use in Android for Work's Kiosk Mode. A menu template is an HTML file with special menu tags that get replaced by MobiControl when it generates the menu. Essentially, the menu tags get replaced by the menu item links that you configure for your program menu. The table below describes the special menu tags that get replaced in the HTML file.
The easiest way to create a custom program menu template is to make a copy of one of the default templates and customize it. You cannot edit the default templates directly.
- While editing the Lockdown or Kiosk Mode profile configuration, select the Templates button to open the Edit Menu Template List dialog box.
- Select an existing menu template and then select the Copy button.
- With the new template selected, select the Edit button to open the Lockdown Menu Template Editor. You can edit the template directly in the Lockdown Menu Template Editor dialog box or copy the HTML document into your favorite text editor to edit and paste it back into the Lockdown Menu Template Editor when you are finished.
- Customize the menu template to your satisfaction. Follow the guidelines below for best results.
- When you are satisfied with your changes, save your new template by selecting the OK button in the Lockdown Menu Template Editor dialog box.
Select the Rename button to enter a new name for your menu template in the New File Name field.
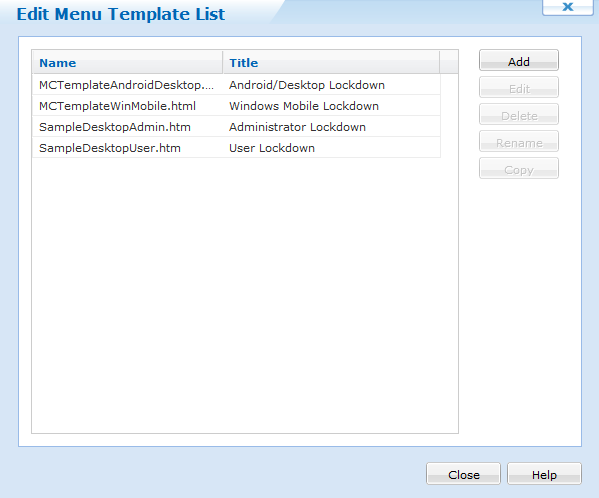
Edit Menu Template List dialog box
The following table describes menu tags:
| Tag Name | Description | ||||
|---|---|---|---|---|---|
<MCMenuFull>
|
This tag gets replaced with the full menu list that the user has configured. The menu items are separated by carriage returns. Sample Menu Entries: MobiControl Device Agent(launch://com.google.apps.maps) My Website (http://www.mywebsite.com)
|
||||
|
where " |
This tag allows you to place each complete menu item where you want it in the HTML. Sample Menu Entries: MobiControl Device Agent(launch://com.google.apps.maps) My Website (http://www.mywebsite.com)
|
||||
|
where " |
These tags let you further separate the menu item to be inserted into the "link" and the "display" text and control where in the HTML template they will be inserted. Sample Menu Entries: Android Calendar (launch://com.android.calendar) Browse mywesbite (browse://www.mywebsite.com) Report.pdf (file://mnt/sdcard/report.pdf)
|
||||
|
where " |
This tag lets you display the built-in icon for an application executable that is in the program menu. Sample Menu Entries: Android Calendar (launch://com.android.calendar) Browse mywesbite (browse://www.mywebsite.com) Report.pdf (file://mnt/sdcard/report.pdf)
|
||||
|
where " |
This tag lets you associate a picture with an entry in the kiosk screen. Sample Menu Entries: MobiControl Device Agent (launch://com.google.apps.maps) My Website (http://www.mywebsite.com)
|
Including Pictures in Menu Templates
You can insert images into your template by simply using the Insert Image feature in the built-in HTML Template Editor.
MobiControl will deliver the image to the device. Alternatively, if you do not want to use MobiControl to deliver the image,
you can simply specify in the HTML template the full path to the graphic for where it will be found on the mobile device (e.g. <img src="file:///SDCard/images/CompanyLogo.jpg">).
URI's
Uniform Resource Identifier (URI) is a string of characters used to identify a name or a resource on the Android Device. Such identification enables interaction with representations of the resource using specific protocols. Schemes specifying a concrete syntax and associated protocols define each URI. The MobiControl Kiosk Mode on Android for Work devices allows you to use custom URIs. Such URIs include Launch://, Http://, Https://, File:// and Browser://.
Linking to the MobiControl Device Configuration Applet
The MobiControl device applet that is normally accessed by tapping on the MobiControl icon on the Today screen or system tray of the device contains a bounty of useful status information. This information can be very useful when trying to troubleshoot a problem in the field, for example resolving connectivity issues between the device and the MobiControl Deployment Server.
To create a link to the applet from the kiosk program menu add a program entry
to the following path: net.soti.mobicontrol
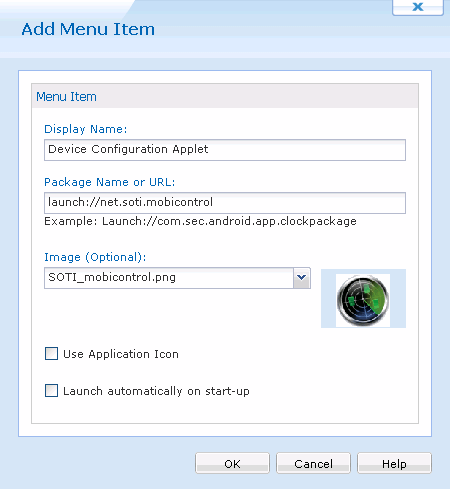
Program menu entry for MobiControl Configuration Applet
Edit Menu Template List
In the Edit Template Menu List dialog box, click Add and navigate to the location of your customized kiosk page and select it. You will see the customized menu template in this list now. You can chose to edit this template further by clicking on Edit and launching the kiosk menu template editor, or click on Close and then select the template from the Kiosk Menu.
Edit Menu Template List dialog box
You can edit the kiosk menu templates using the built-in HTML editor. After saving a modified template, be sure to select the template file in the combo selection box on the main Kiosk Mode Configuration page. Basic HTML, Java, and Flash are supported in kiosk mode.
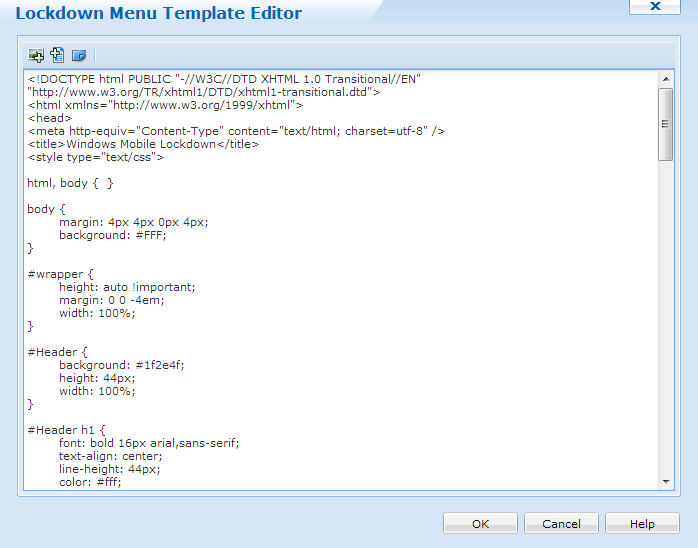
Kiosk menu HTML editor
 Tip:
Tip:
You can easily include a graphic in your HTML template by selecting the Insert Image menu option in the HTML Editor.