ERG Setup Step 1: Set Up Application Request Routing and URL Rewrite
Use the following steps to configure proxy settings for Application Request Routing (ARR) and URL Rewrite.
-
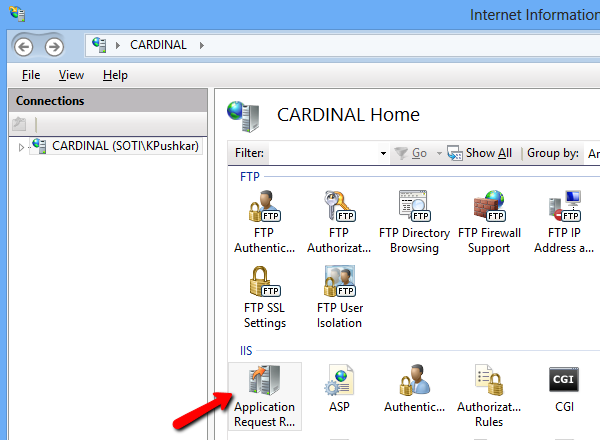
In Internet Information Services (IIS) Manager, in the Connections pane, click on a server to select it. In the right pane, click on Application Request Routing to select it.
-
In the Actions pane, under the Proxy section, double-click on Server Proxy Settings.

-
In the Application Request Routing pane, select the Enable Proxy option. Leave the other options and settings at their default values.
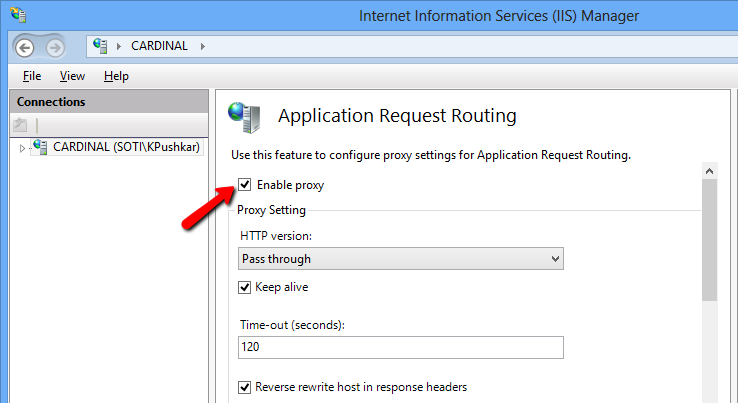
When you are done, click Apply in the Actions pane to save the change.
-
The next steps involve adding the
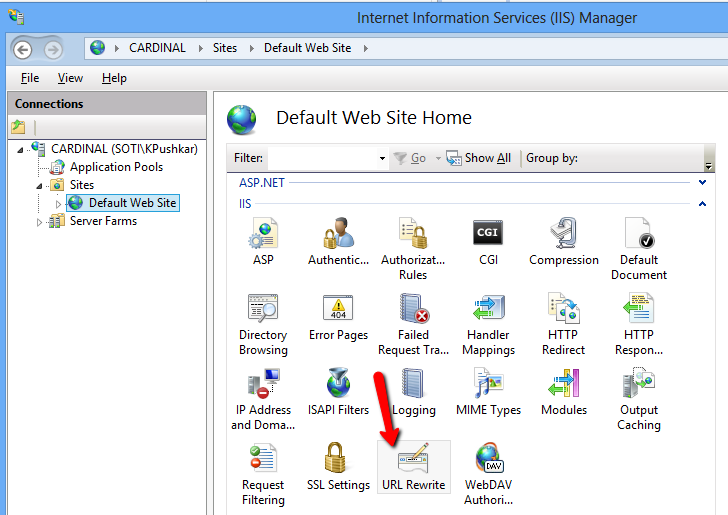
HTTP_ACCEPT_ENCODINGandHTTP_SERVERURLserver variables, and Inbound and Outbound rules.To do this, in the Connections pane under Sites, select the web site that is publishing the proxy server component. Then, in the right pane, double-click on URL Rewrite.
-
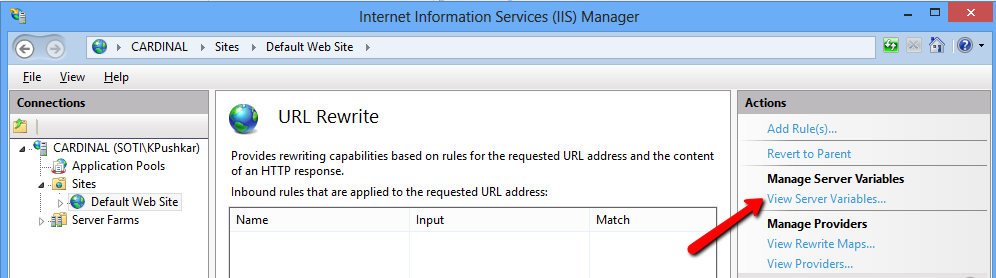
In the Actions pane, under Manage Server Variables, click on View Server Variables.
-
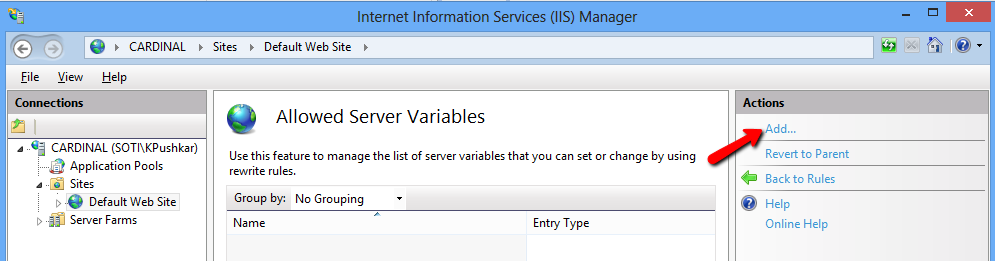
In the Actions pane, click on Add to open the Add Server Variable dialog box.
In the Add Server Variable dialog box, enter
HTTP_ACCEPT_ENCODINGand click OK.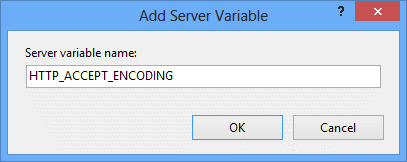
In the Actions pane, click on Add to open the Add Server Variable dialog box again.
In the Add Server Variable dialog box, enter
HTTP_SERVERURLand click OK.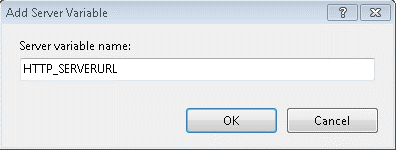
When you are done, click OK and then Back to Rules to return to the URL Rewrite pane.
-
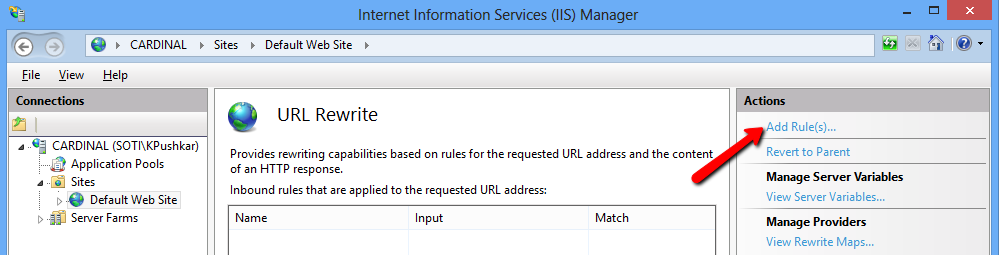
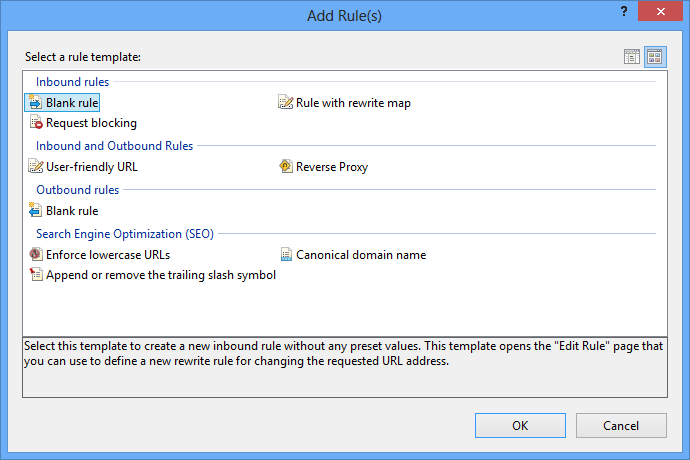
In the URL Rewrite pane, in the Actions pane, click on Add Rules to open the Add Rule(s) dialog box.
-
In the Add Rule(s) dialog box under Inbound Rules, click on Blank Rule to select it, then click OK.
-
In the Edit Inbound Rule pane, enter the following values:
Field Name Field Value Name ReverseProxyInboundRule1Pattern ^(.*)Rewrite URL {HTTP_SERVERURL}/{R:1}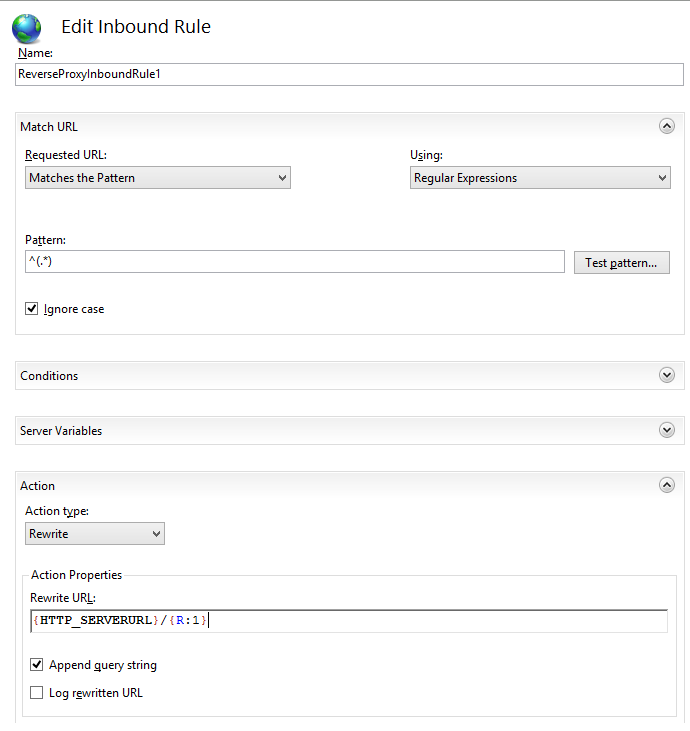
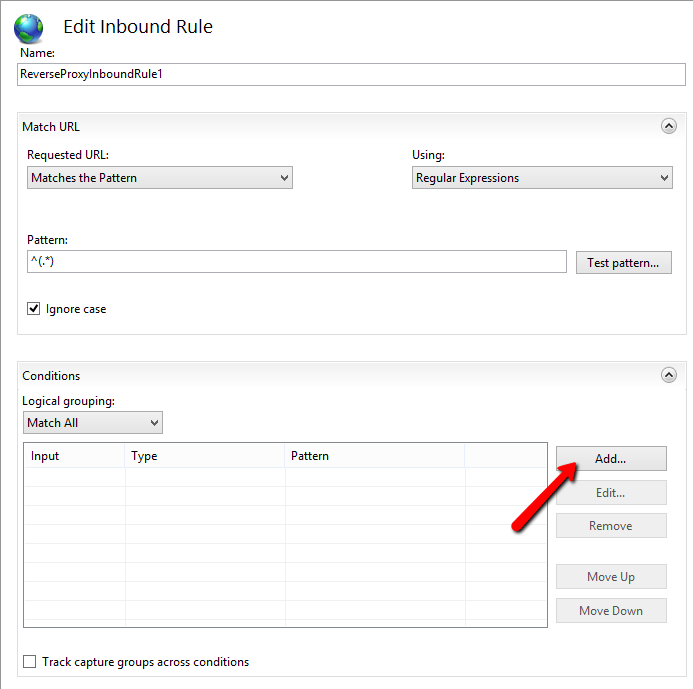
In the Edit Inbound Rule pane, expand the Conditions section and click the Add button to open the Add Condition dialog box.
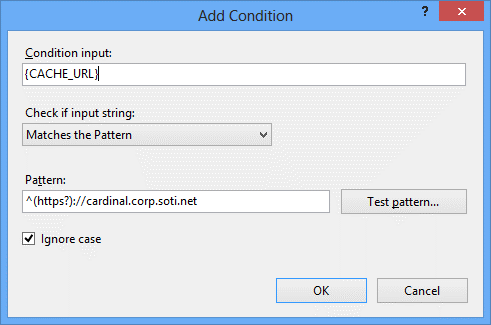
In the Add Condition dialog box, enter the following values:
Field Name Field Value Condition Input {CACHE_URL}Check If Input String Matches the PatternPattern ^(https?)://<serverdomainname>Note:
The value of <serverdomainname> must be the actual domain name of the web site. For example:
Note:
If you plan to use a load balancer to distribute traffic between multiple instances of the Enterprise Resource Gateway, enter the domain name of the load balancer.
When you have entered the values, click OK to save the new condition.
Now you need to create a condition that checks that the HTTP_SERVERURL server variable is not null. In the Edit Inbound Rule pane, click the Add button again to reopen the Add Condition dialog box.
In the Add Condition dialog box, enter the following values:
Field Name Field Value Condition Input {HTTP_SERVERURL}Check If Input String Does Not Match the PatternPattern ^/?$For example:
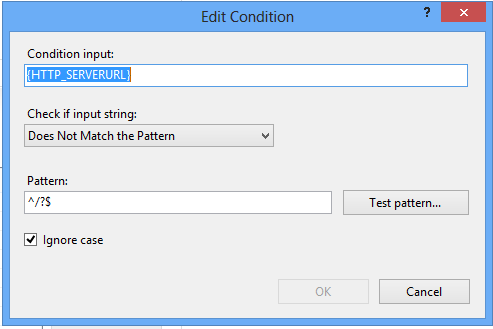
When you have entered the values, click OK to save the new condition.
Click Apply in the Actions pane to save the inbound rule settings.
(Optional) If you are using email exchange on the same proxy server, add an additional condition for the email exchange URL Rewrite rule. The condition checks whether the SERVERURL header is null.
In the Add Condition dialog box, enter the following values:
Field Name Field Value Condition Input {HTTP_SERVERURL}Check If Input String Matches the PatternPattern ^/?$For example:
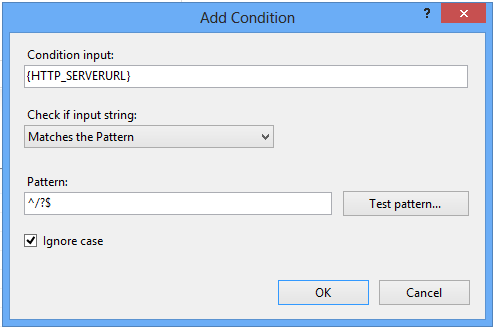
-
(Optional: This step is only required for the email exchange filter.)
Now you need to create the outbound rule. In the Add Rule(s) dialog box under Outbound Rules, click on Blank Rule to select it, then click OK.
In the Edit Outbound Rule pane, enter the following values:
Field Name Field Value Name ReverseProxyOutboundRule1Pattern ^http(s)?://<webdavserverdomainname>/(.*)
Note: This is the WebDAV server.Value http{R:1}://<proxyserverdomainname>/{R:2}
Note: This is the proxy server.Note:
The values of <webdavserverdomainname> and <proxyserverdomainname> must be the actual domain names. For example:
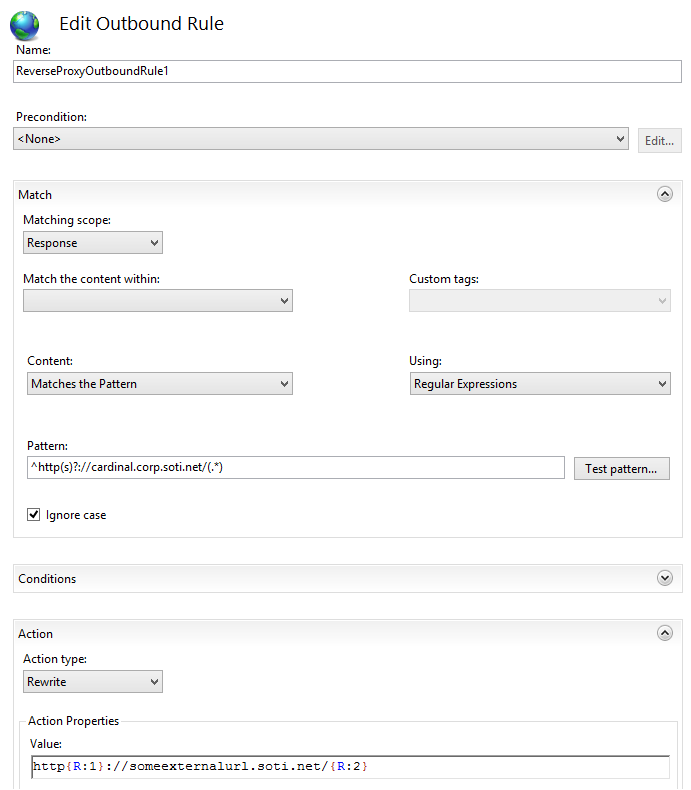
When you are done, click Apply in the Actions pane to save the change.
-
In the URL Rewrite pane, in the Actions pane under View Preconditions, click on Add to open the Add Precondition dialog box.
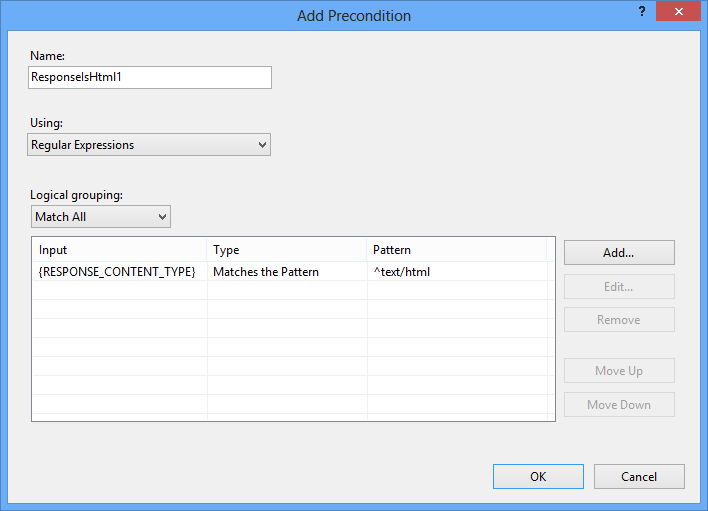
In the Add Precondition dialog box, enter the following values:
Field Name Field Value Name ResponseIsHtml1Using Regular ExpressionsLogical Grouping Match AllClick on the Add button to open the Add Condition dialog box. Enter the following values:
Field Name Field Value Condition Input {RESPONSE_CONTENT_TYPE}Check If Input String Matches the PatternPattern ^text/html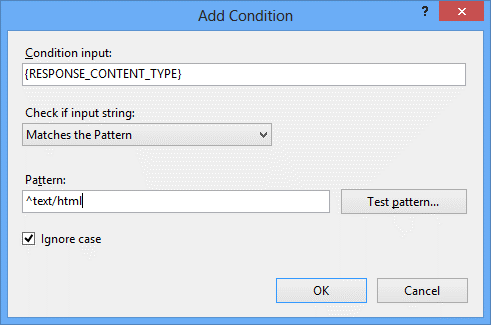
When you are done, click OK to add the condition to the new precondition, as shown here:
In the Add Precondition dialog box, click OK to save the precondition.
In the Actions pane, click Apply.
Once you have completed the above steps, restart the IIS server.